

Manual for assembling of full-plate armor or transformation from terminator to the beauty:)
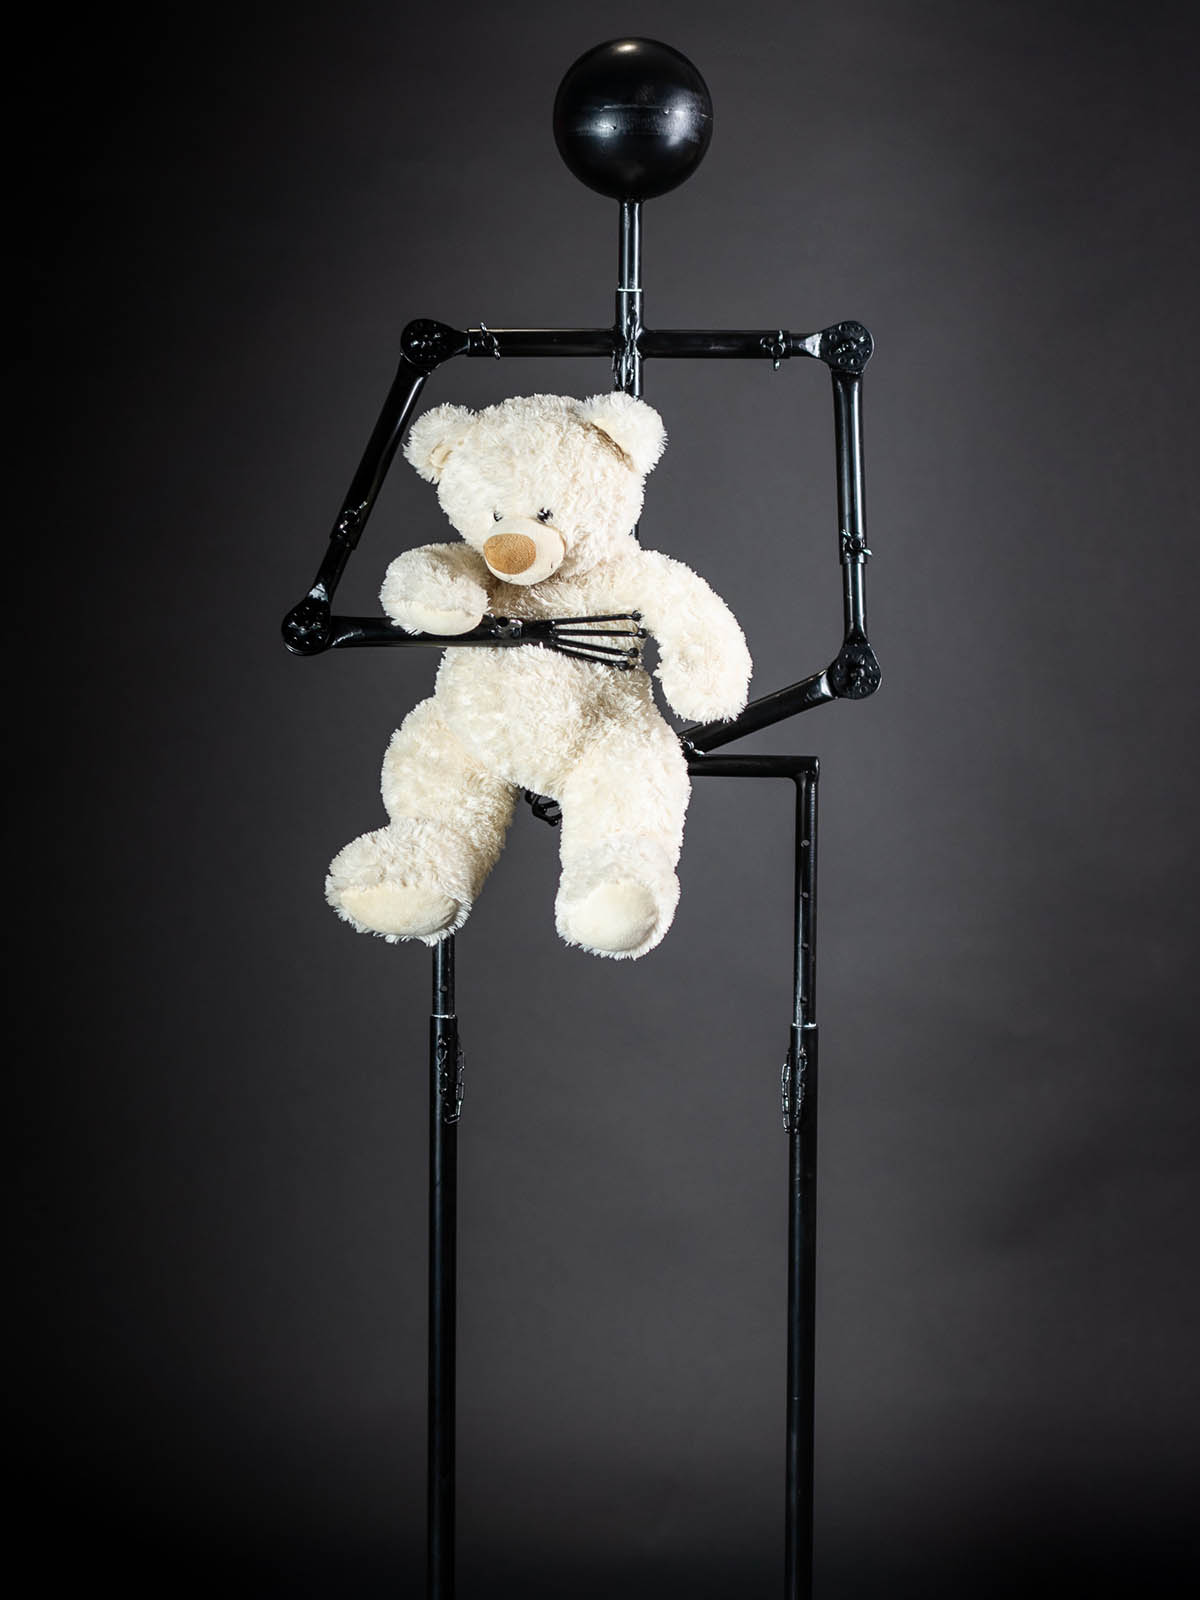
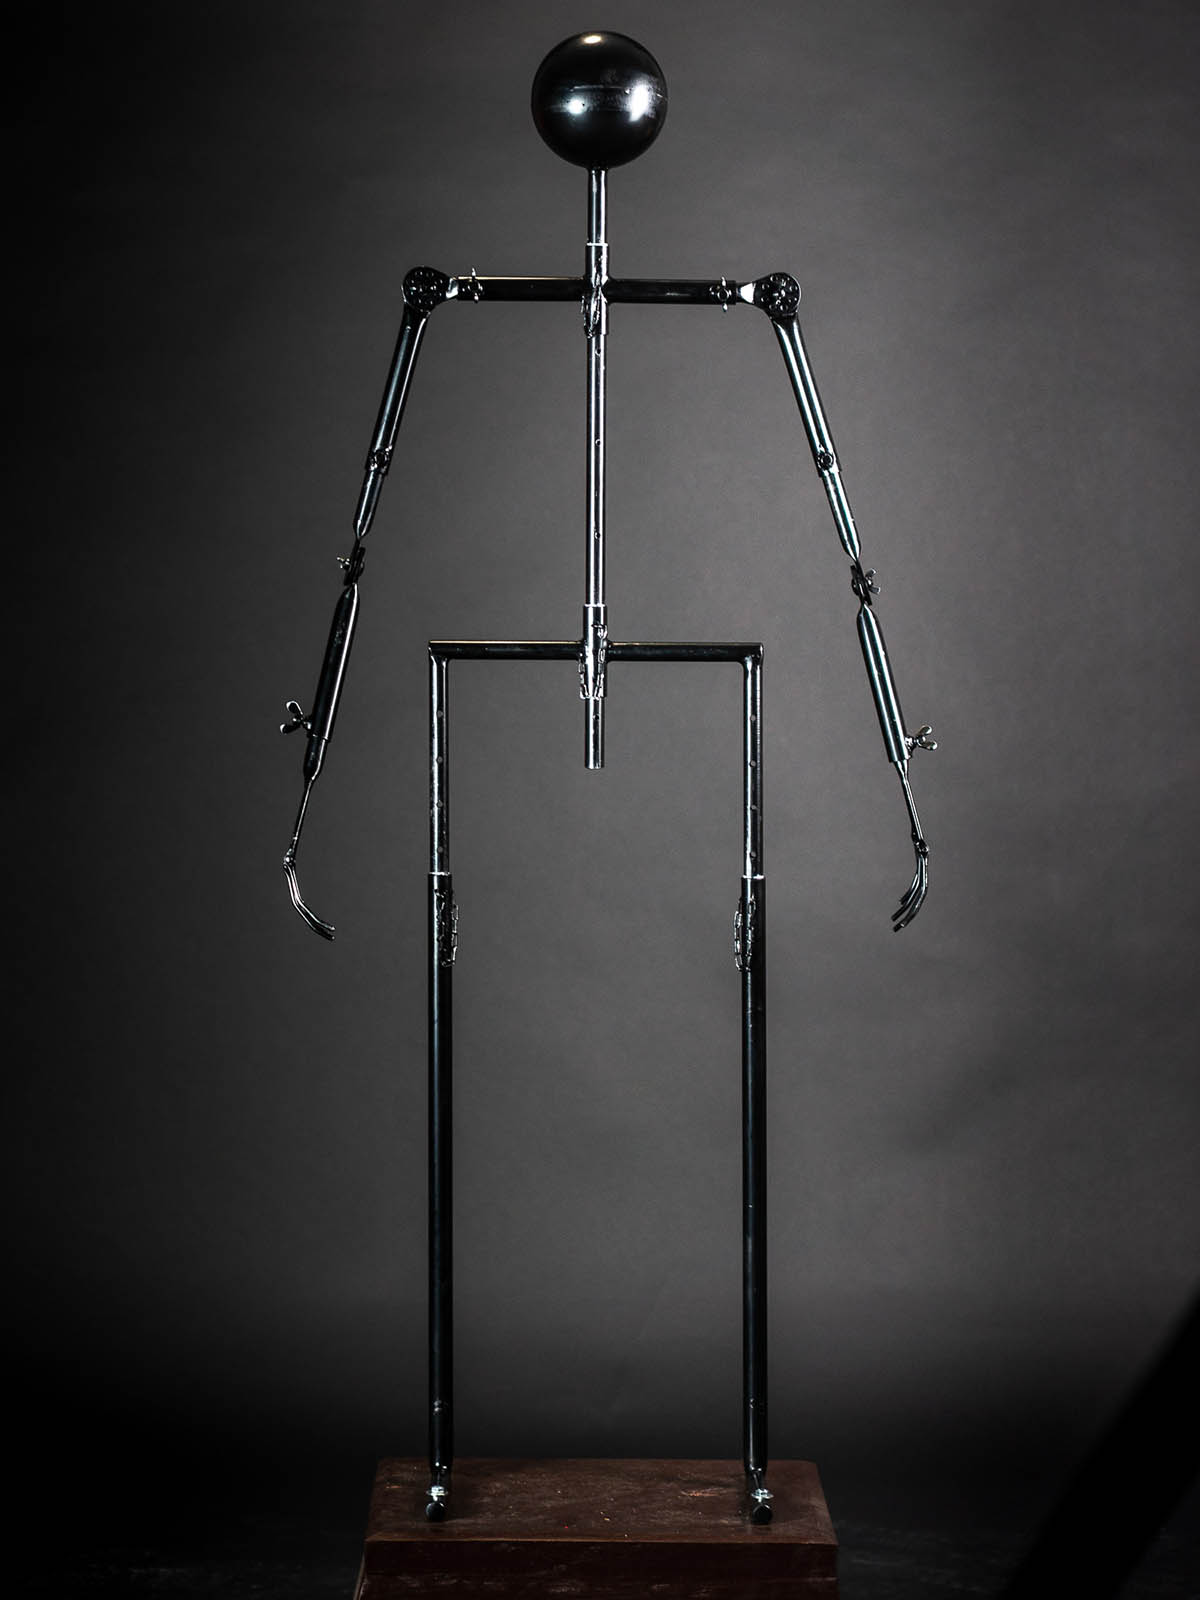
Photos 1 & 2. General view of metal frame for full-plate armor (hereafter “Frame”).
Photos 3-6. Shoulder joint. You may set up frame position, as you need. Pay attention that all movable hinge joints are fixed with wing bolts.
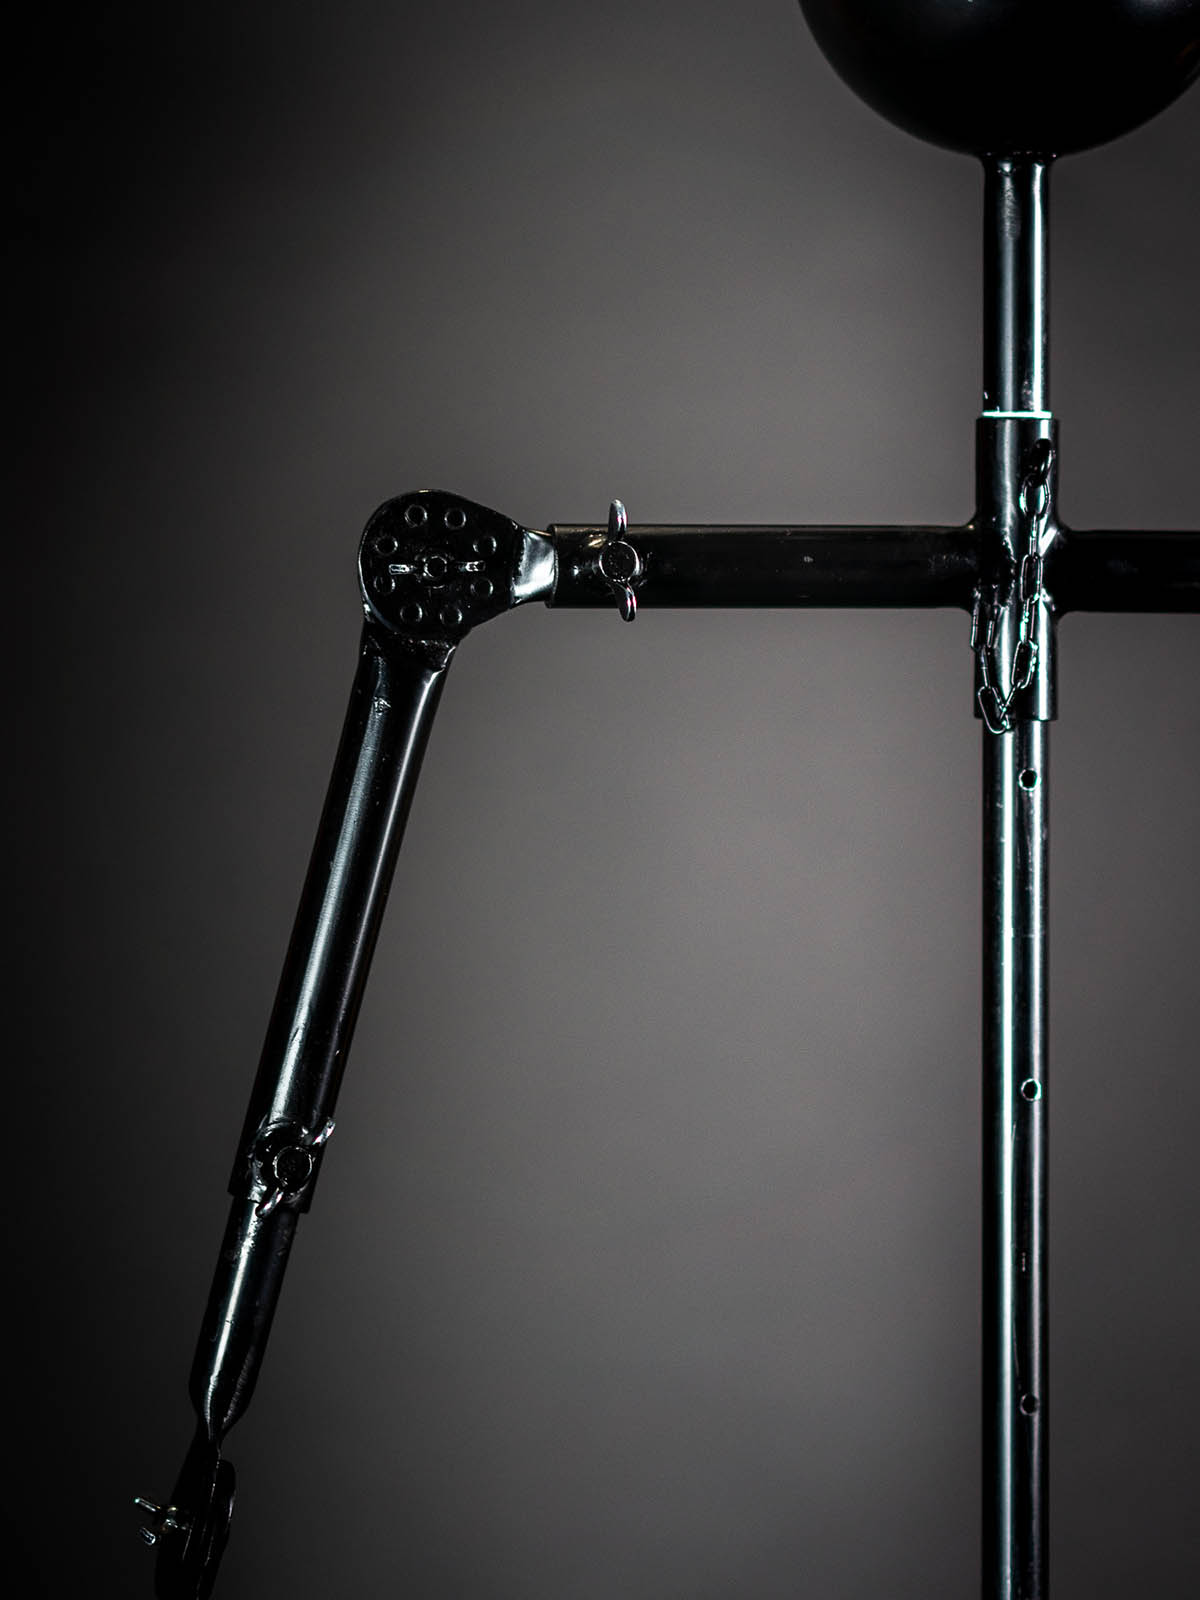
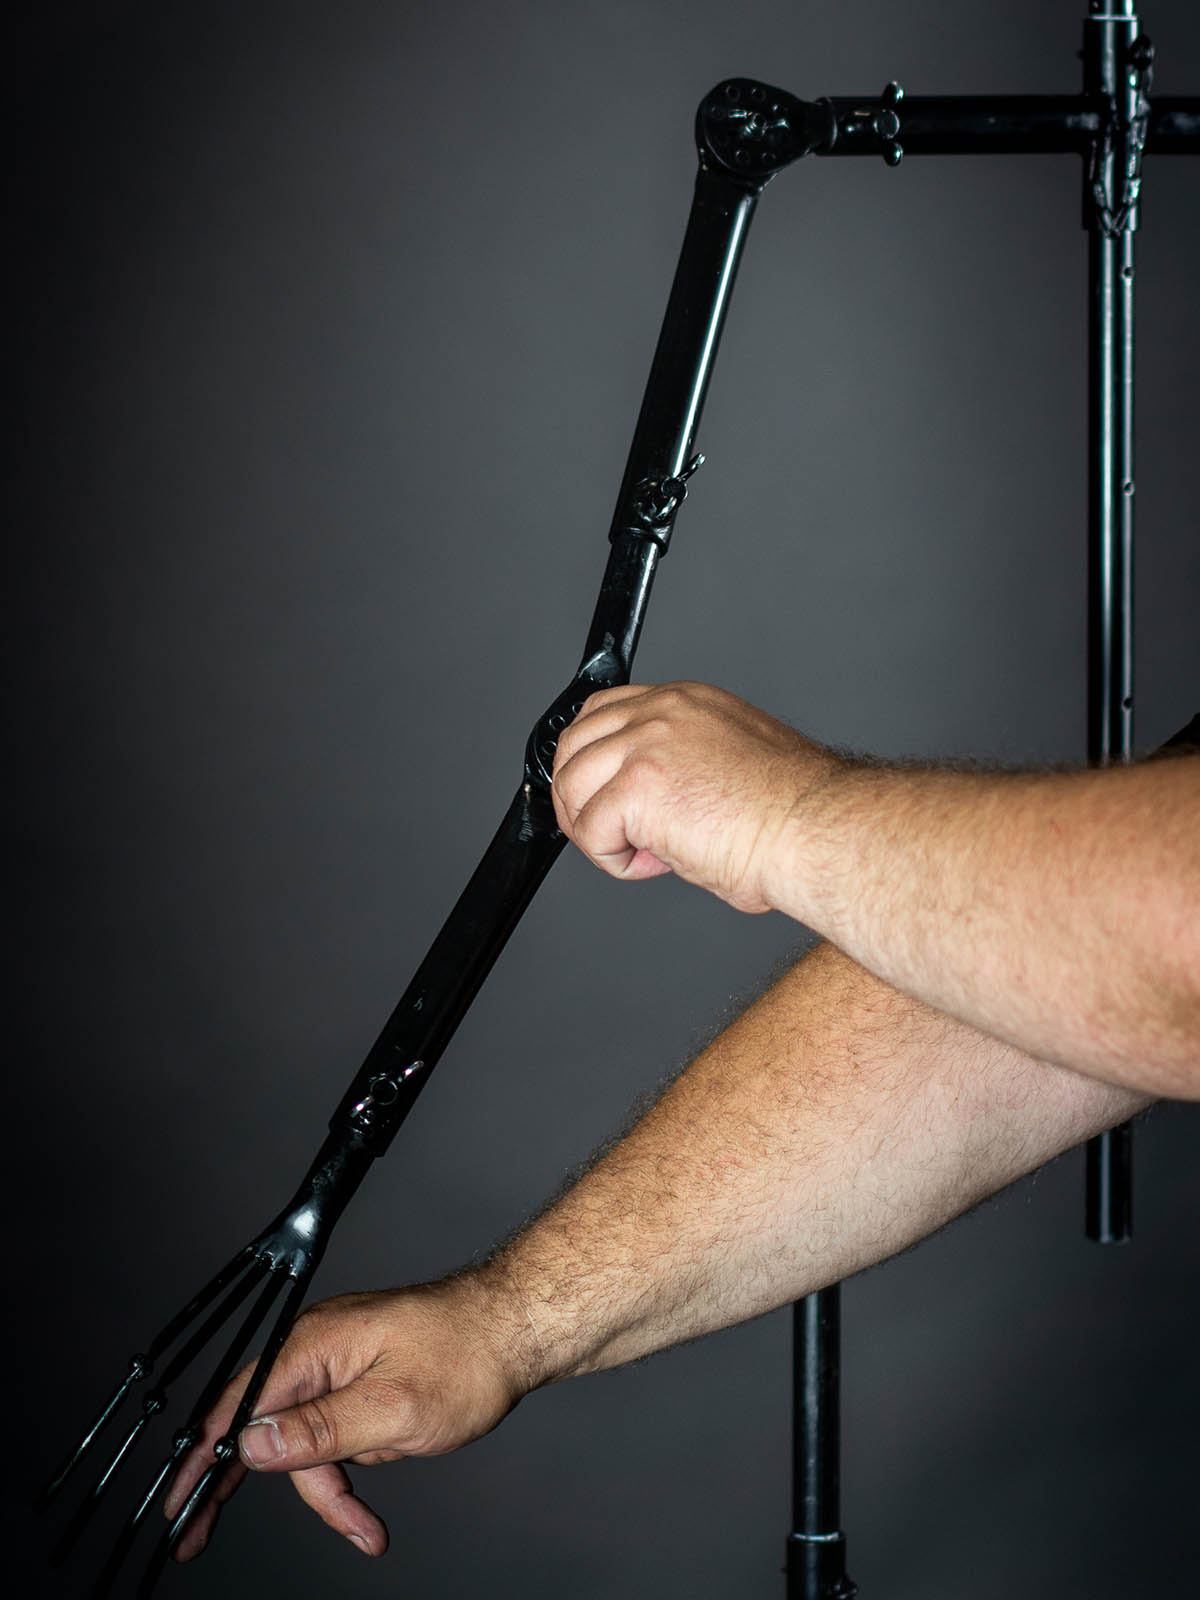
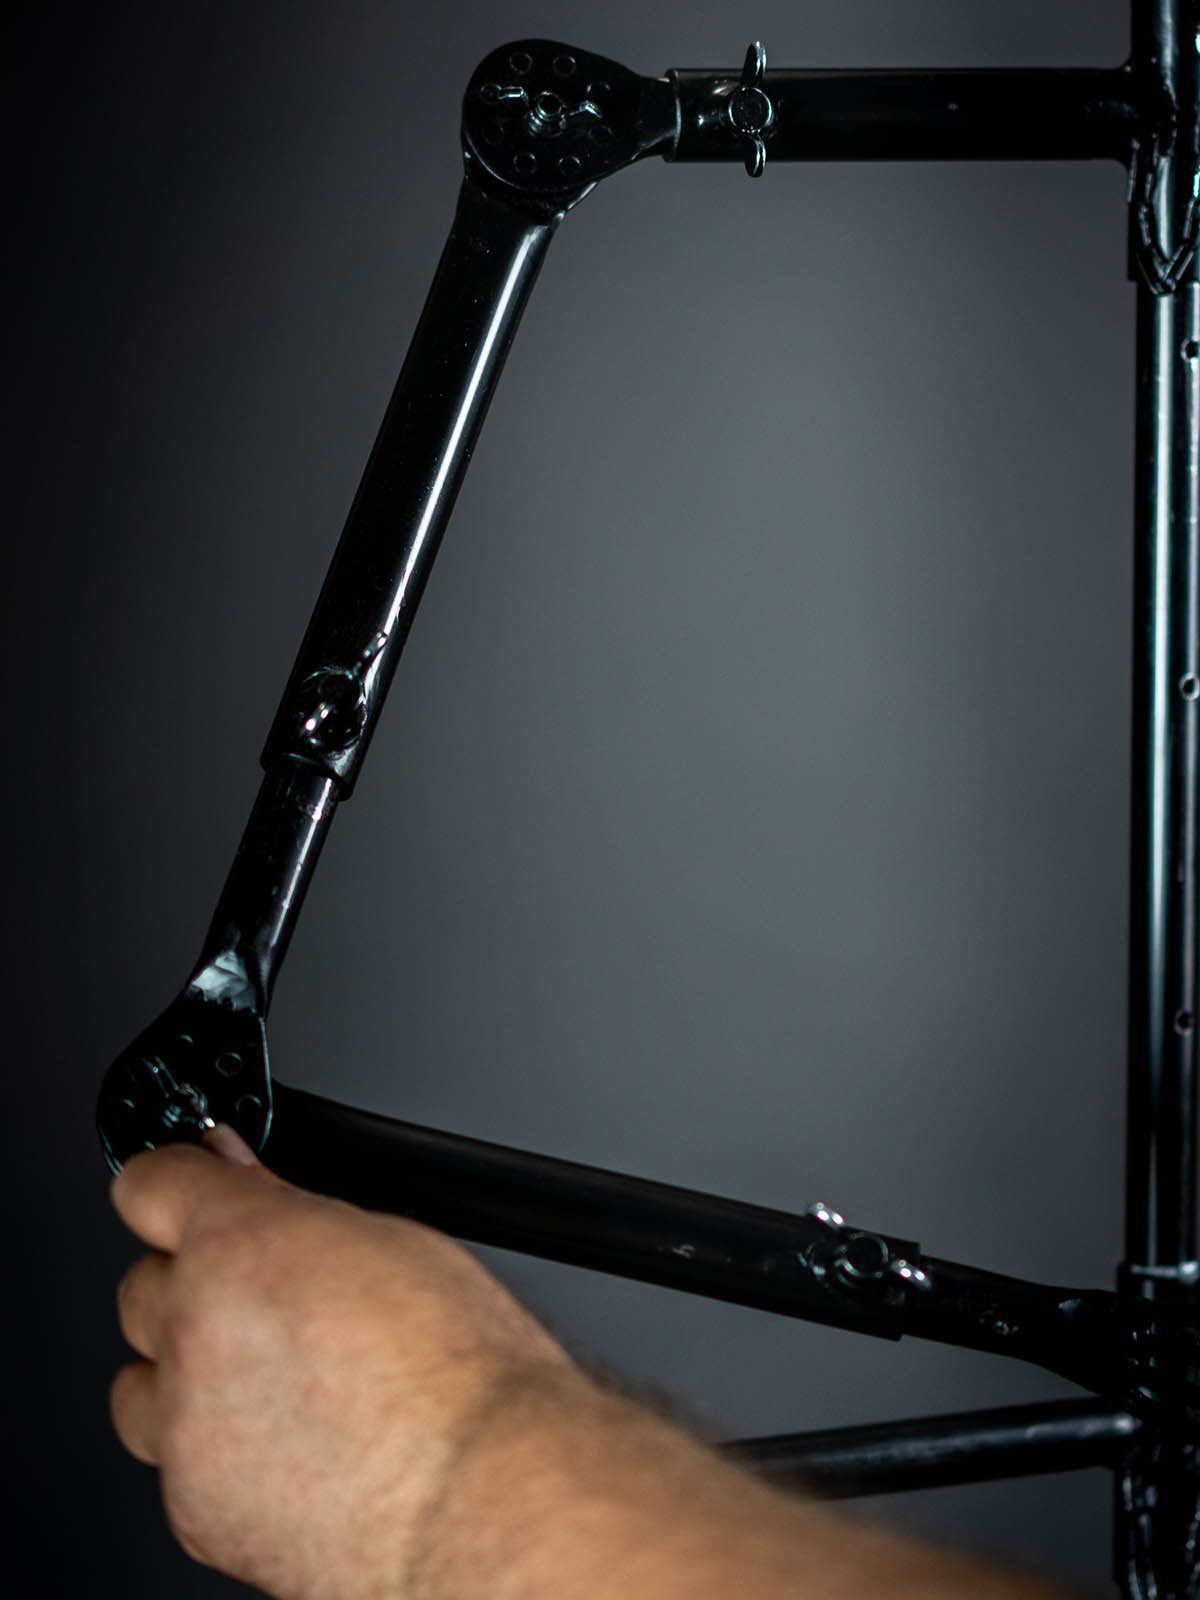
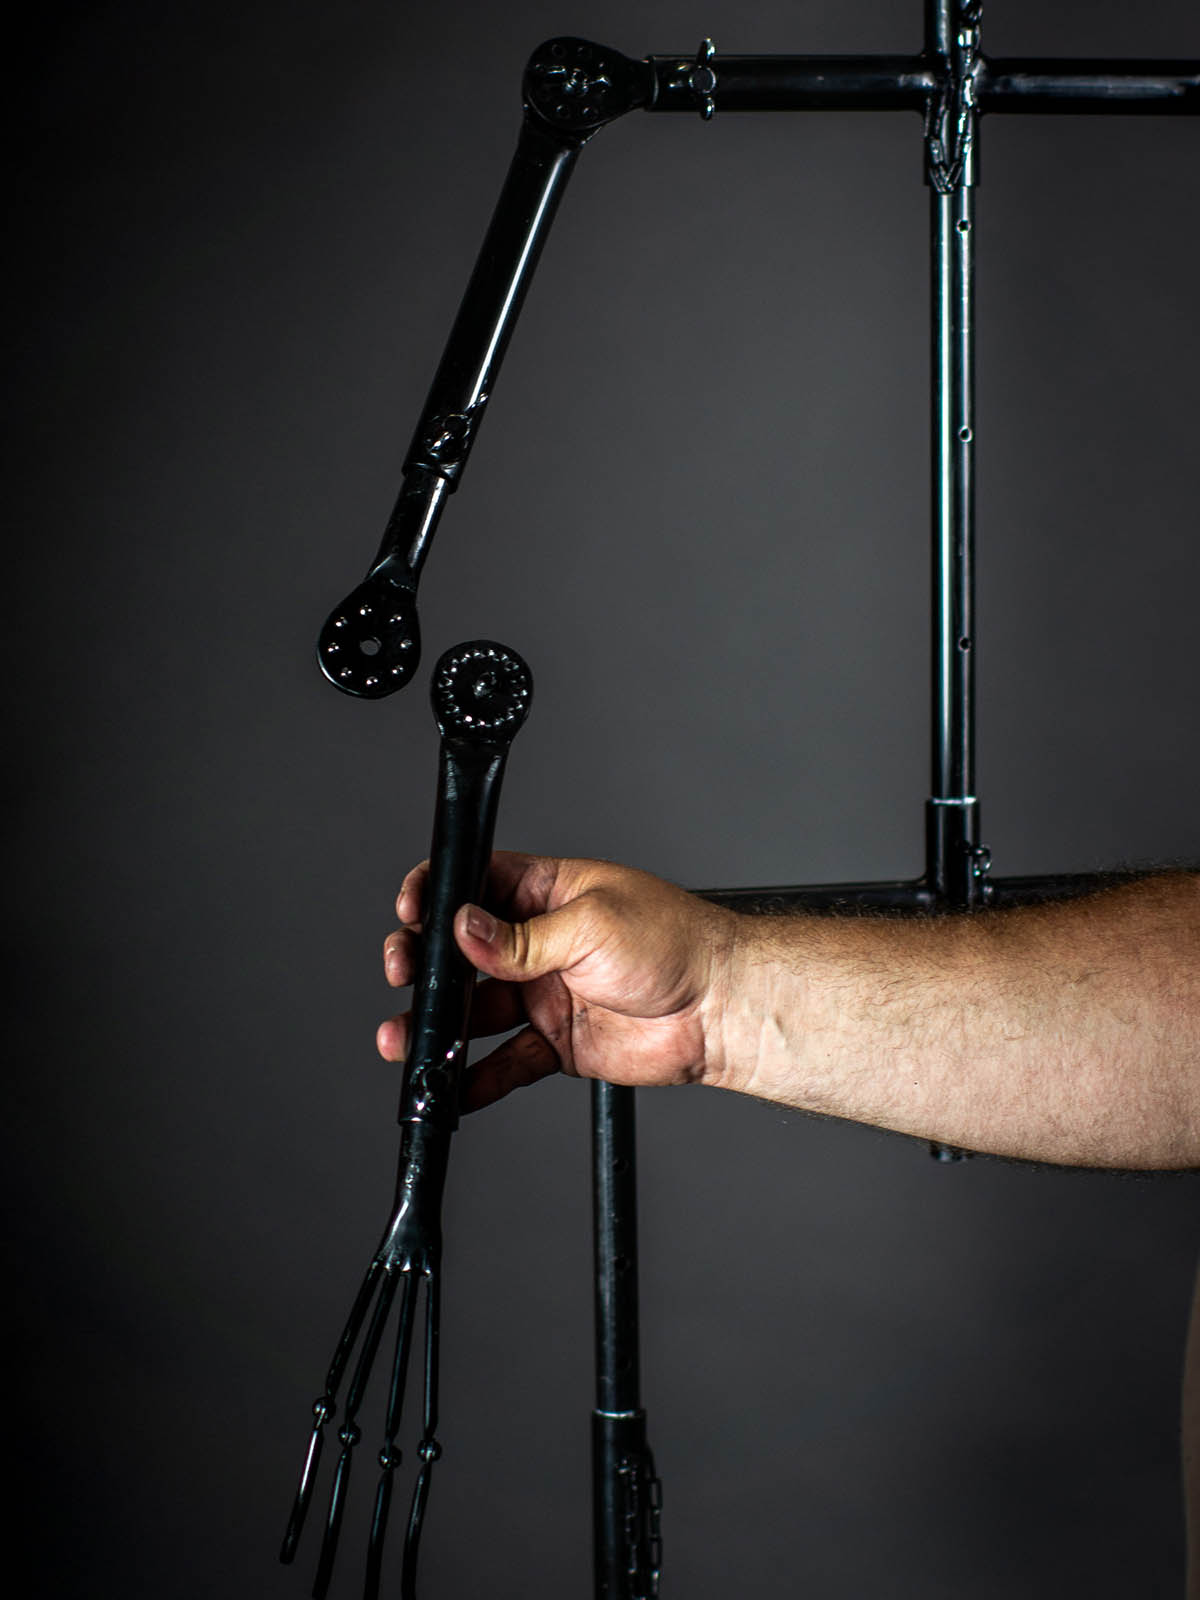
Photo 7. First of all, you need to attach legs of frame to pedestal with the longest bolts (4 pieces, 2 washers + wing nuts. It is quite easy: put the bolt into the hole in legs and fix it inside the pedestal with washer and wing nut).
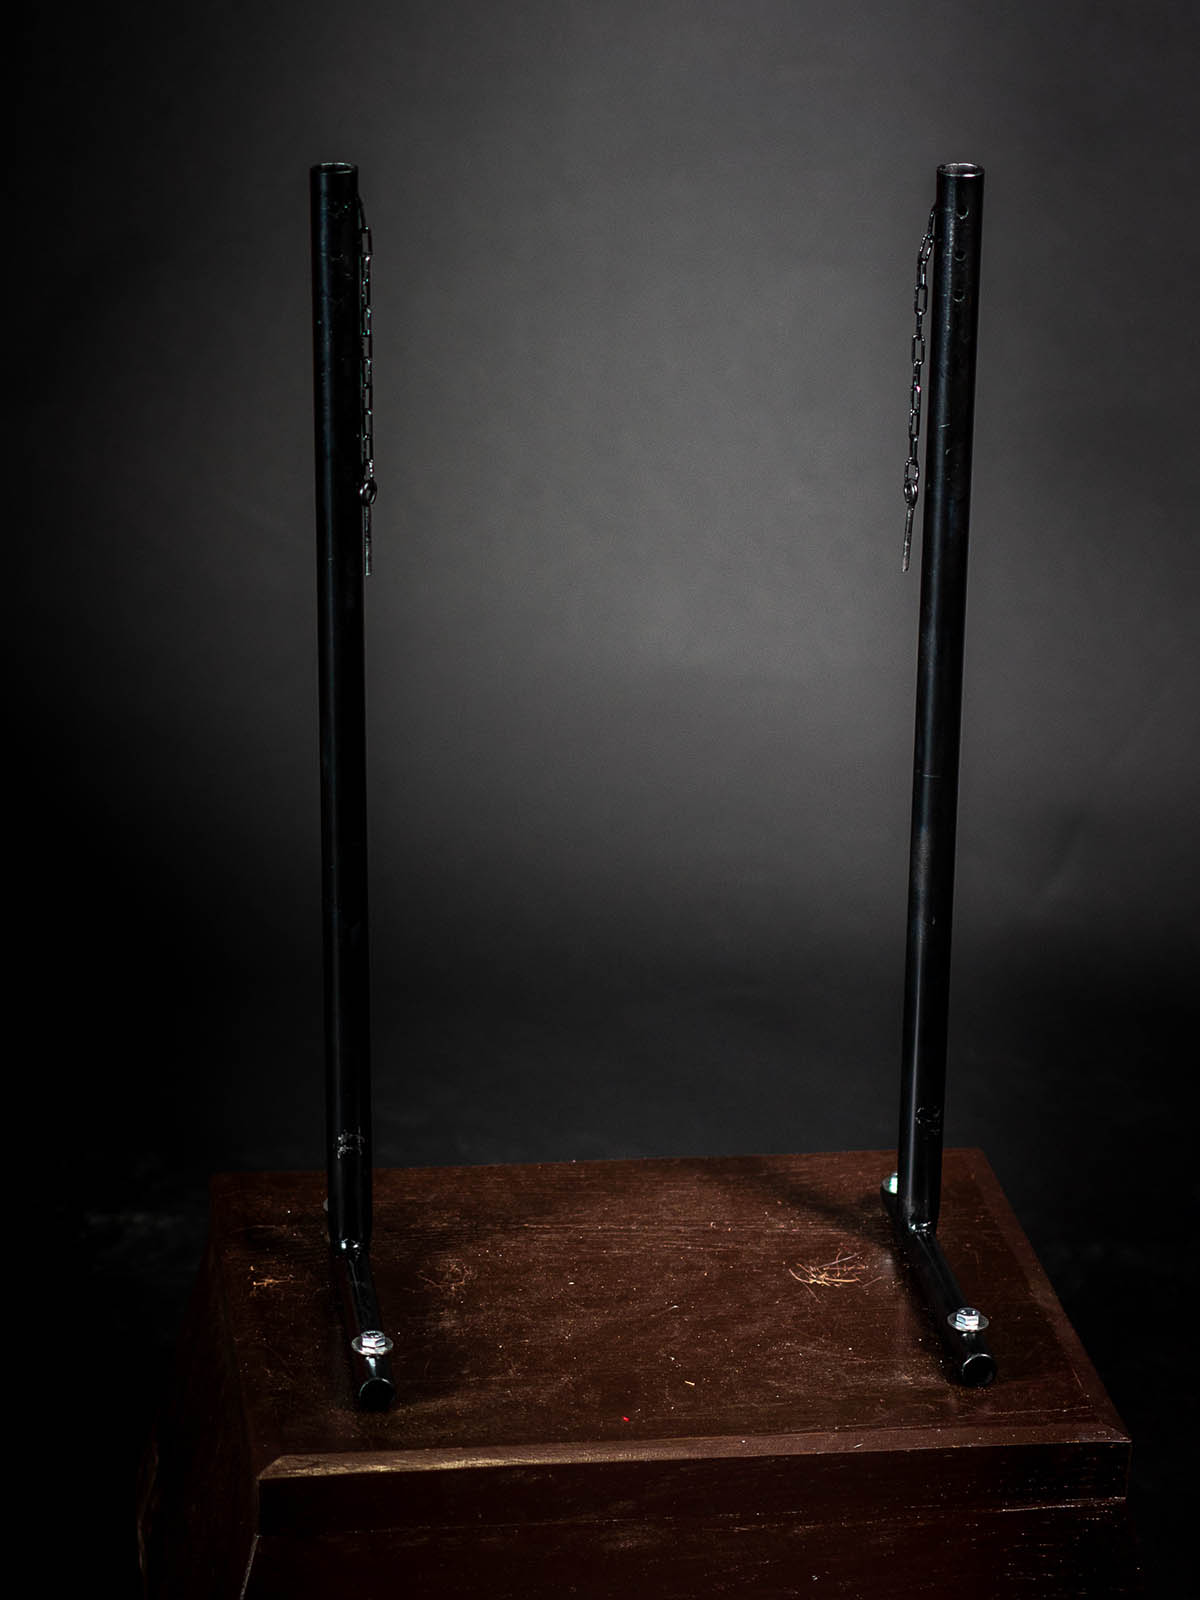
Photo 8. Put the pants on and put upper part of legs in the lower part. Fix it with a pin, which is chained to the body part. Pay attention: we marked the height at the photo. This will speed up assembling of the frame.
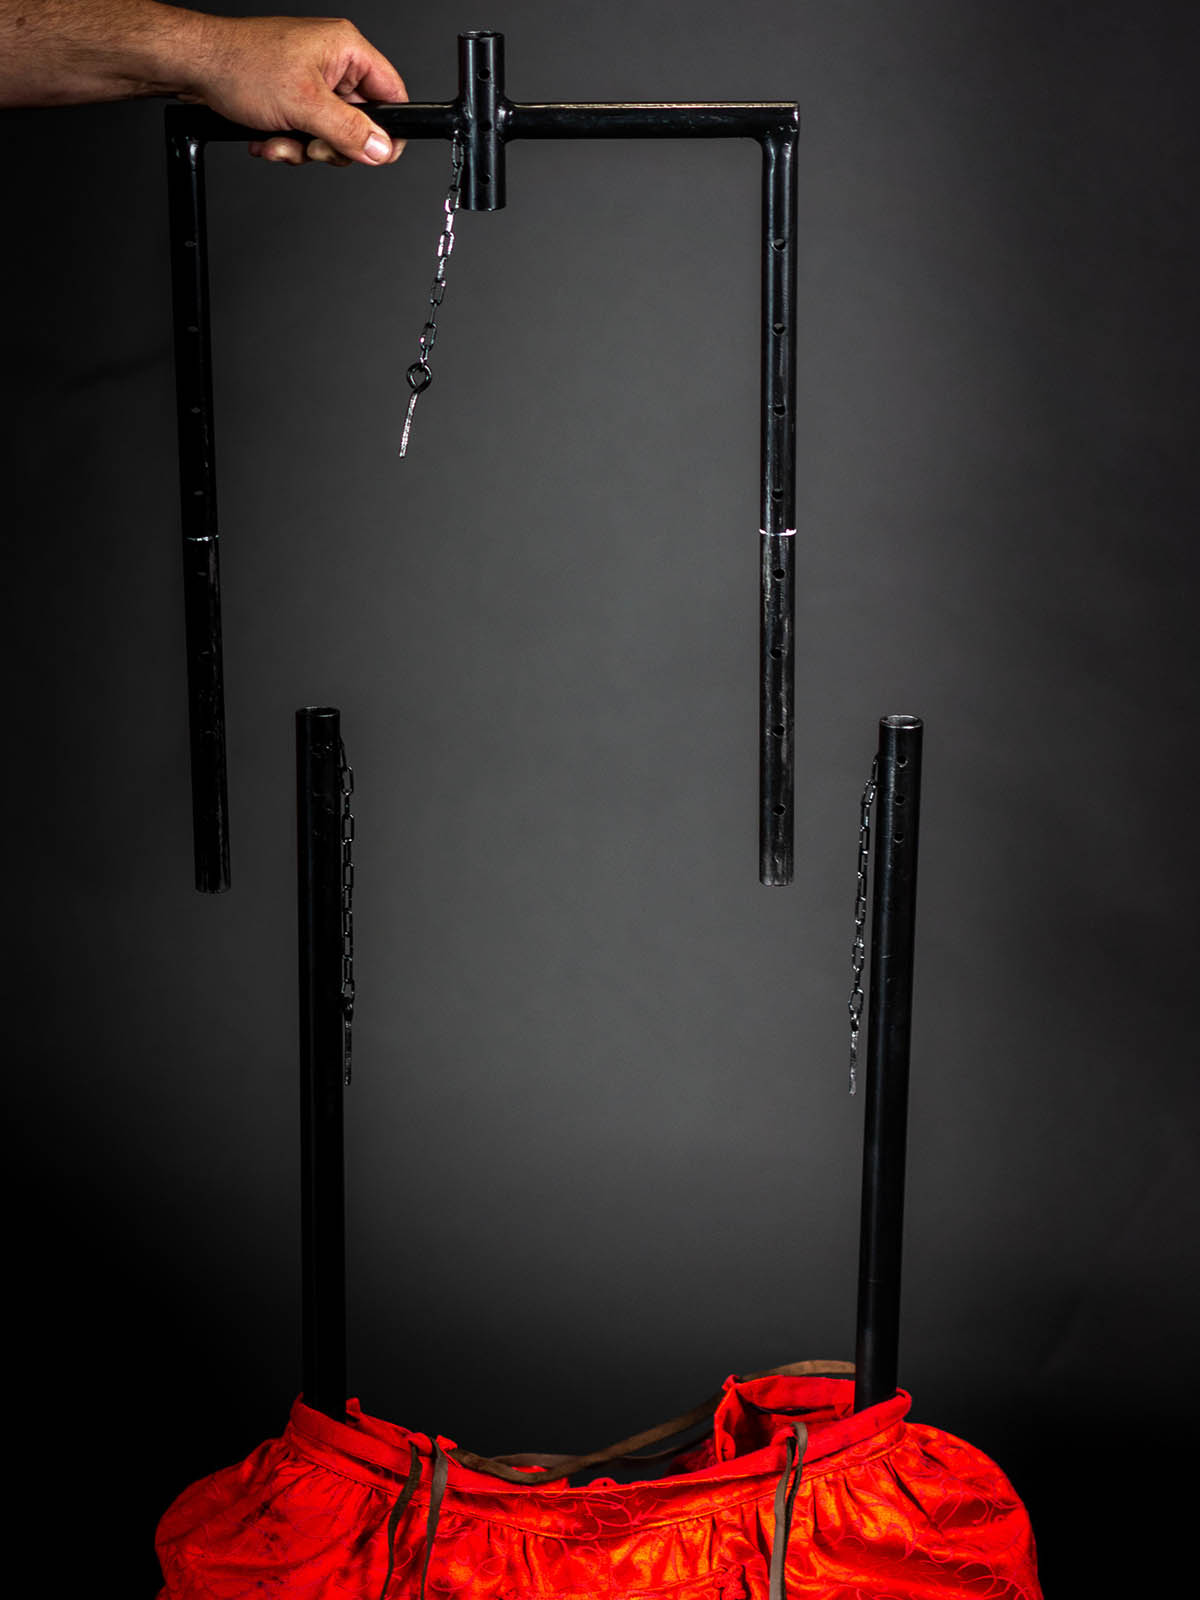
Photo 9. We marked level wherever you would need to set up frame by height.
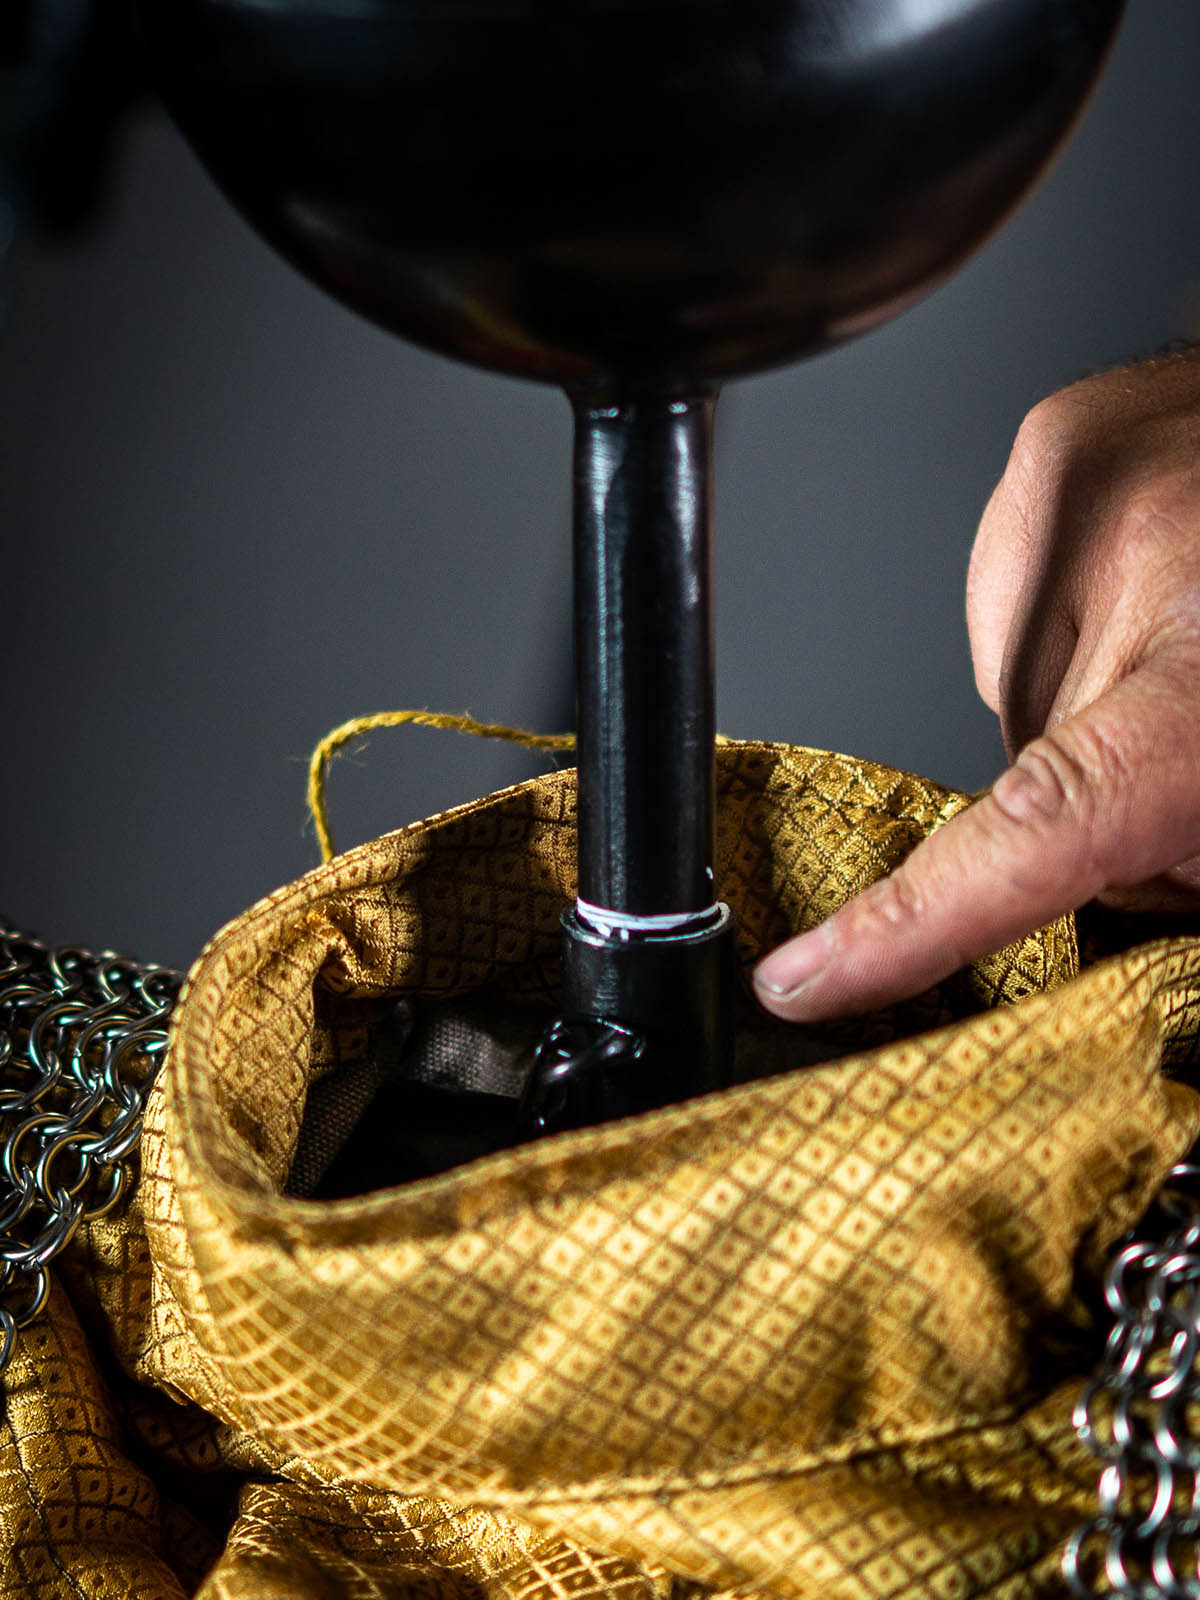
Photo 10. That is how assembled lower part of frame looks like.
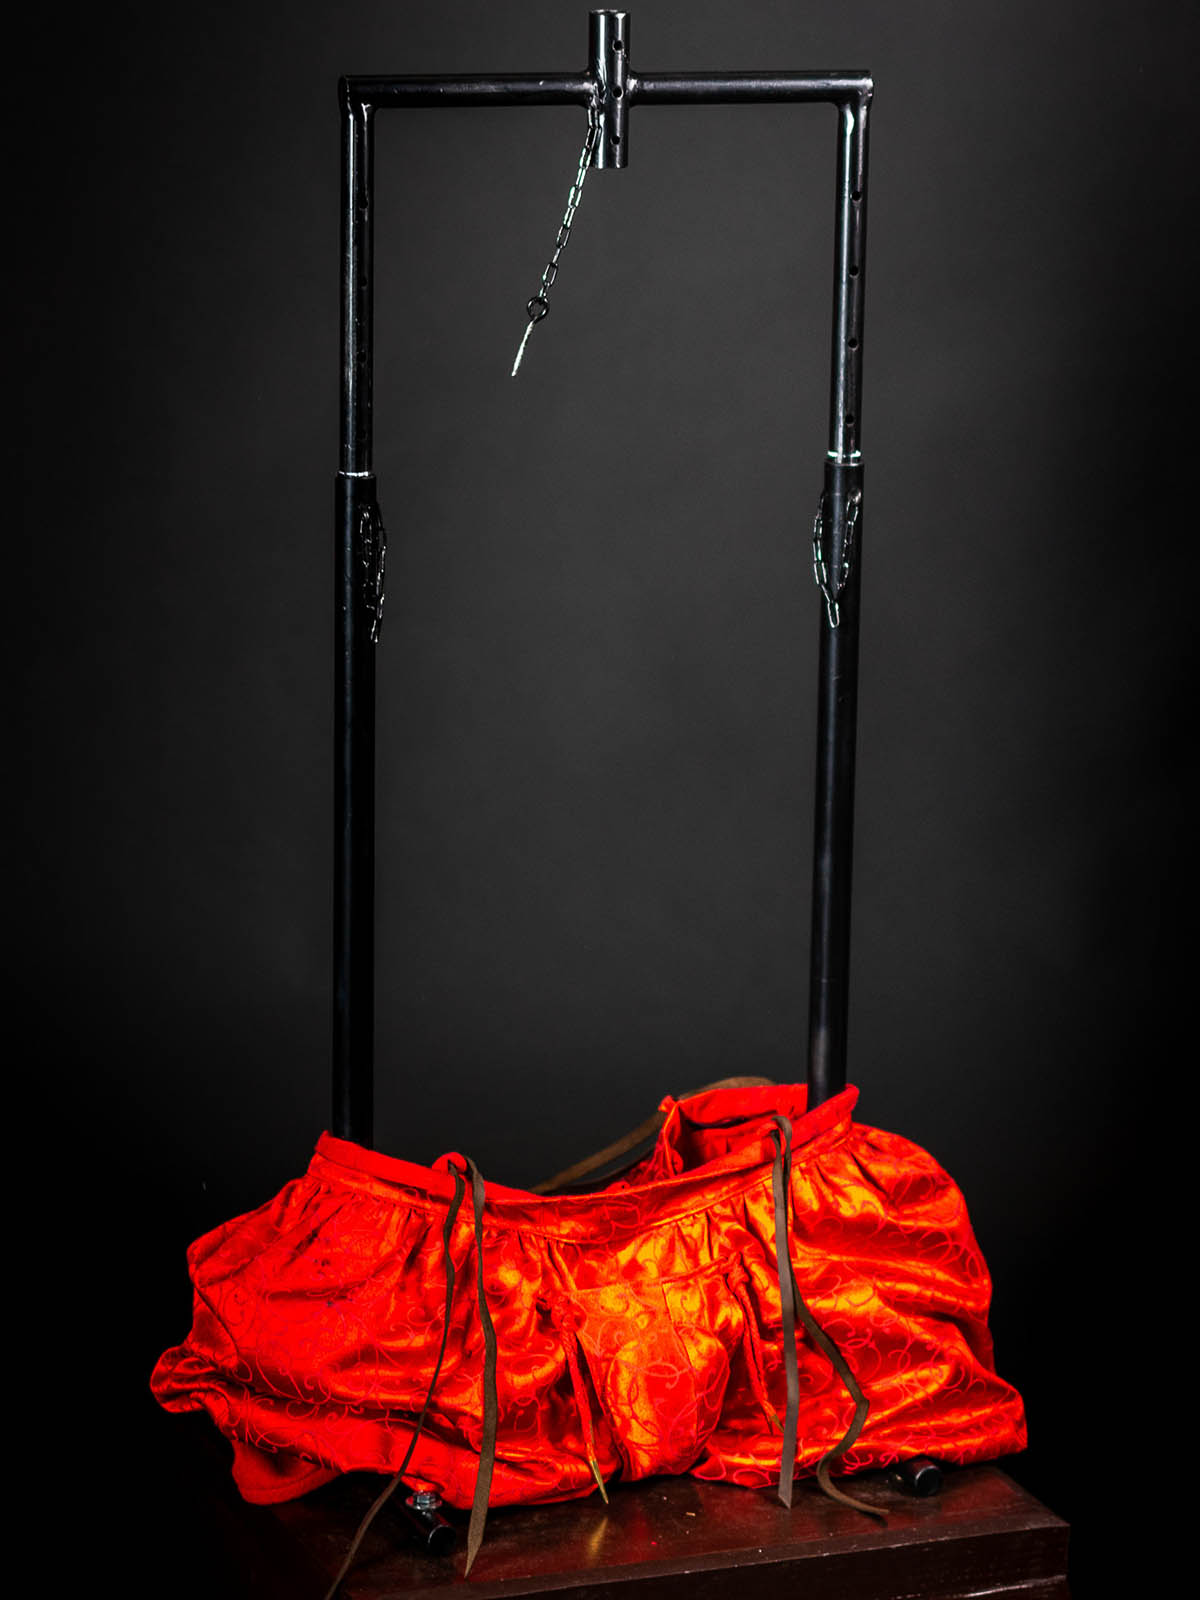
Photo 11. Let’s assemble upper part of frame. Firstly, we have put padded underarmour on the upper part of frame. This action is quite complicated, as we will have to tinker with fixing wing nuts. However, it is easy to reach sleeve and shoulder joint and fix everything. Then, put chainmail on the gambeson. Top is ready. Connect upper and bottom parts and fix them on the level of marked height.
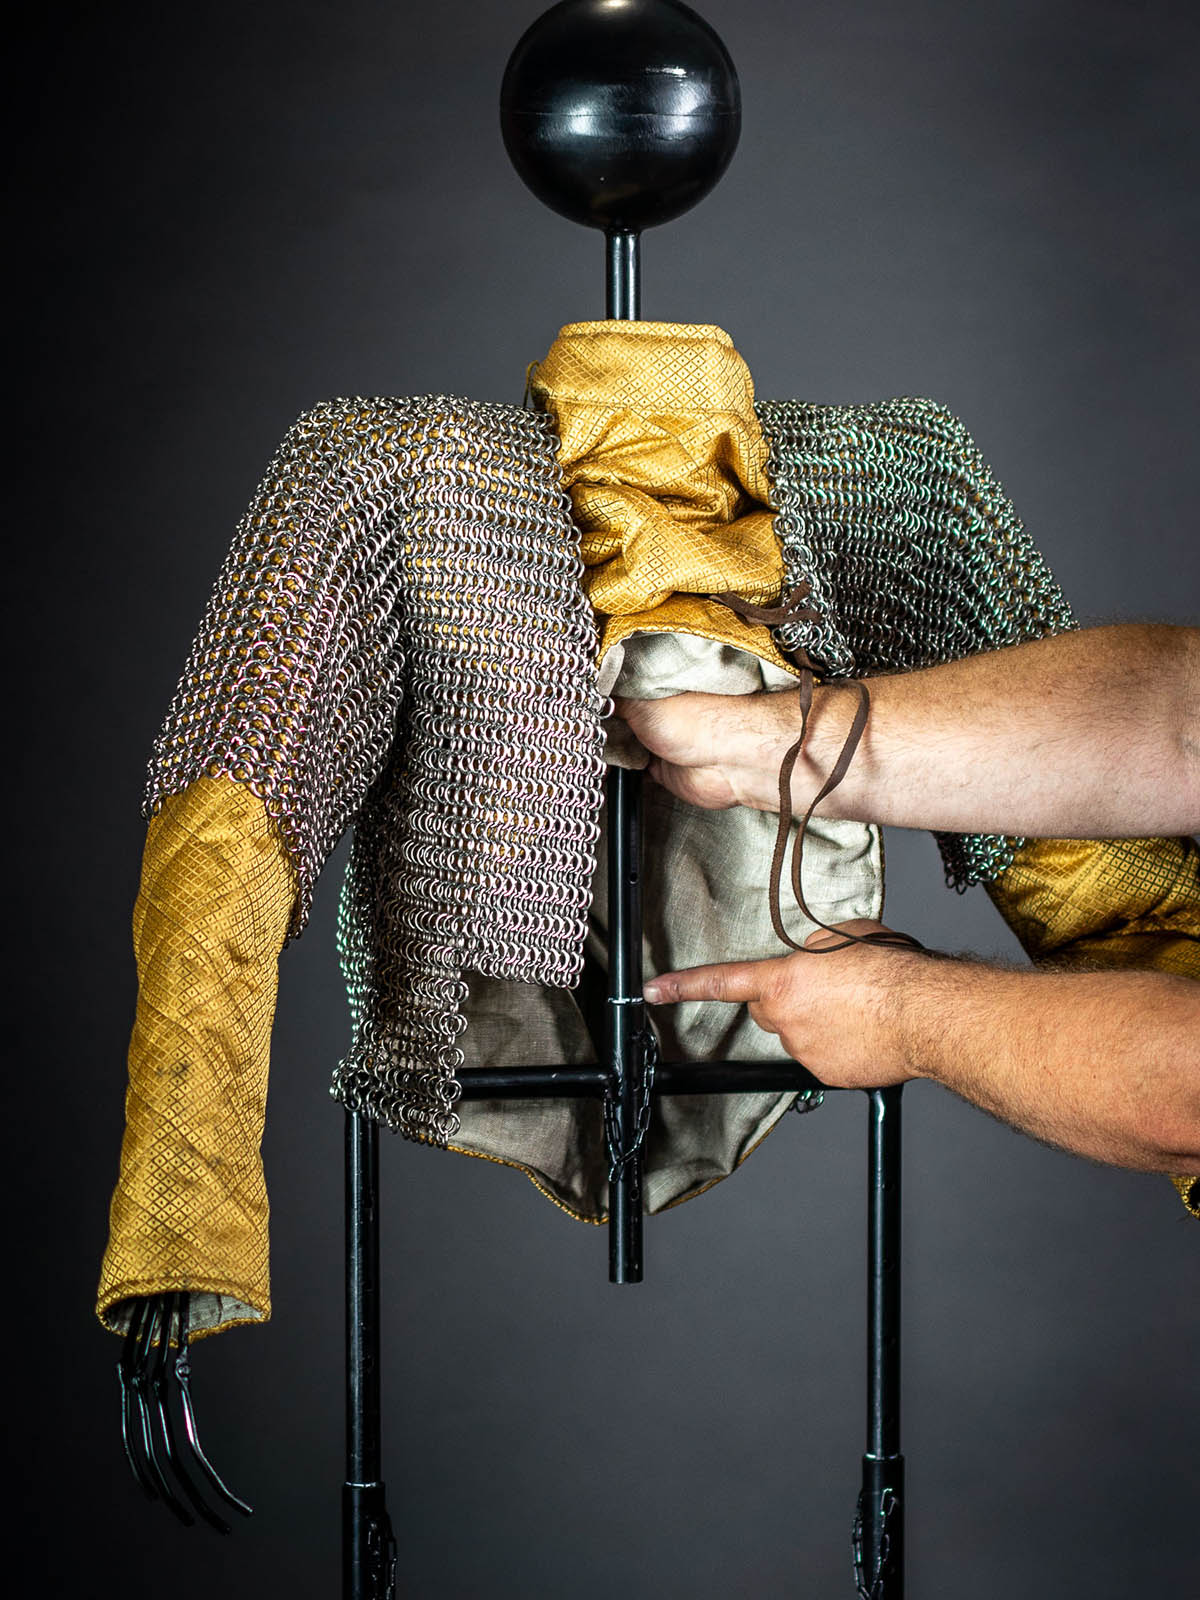
Photo 12. There is a cut with loops on the back part of pants. Lace it up from the bottom upwards with leather cord. Then attach pants to the chainmail behind.
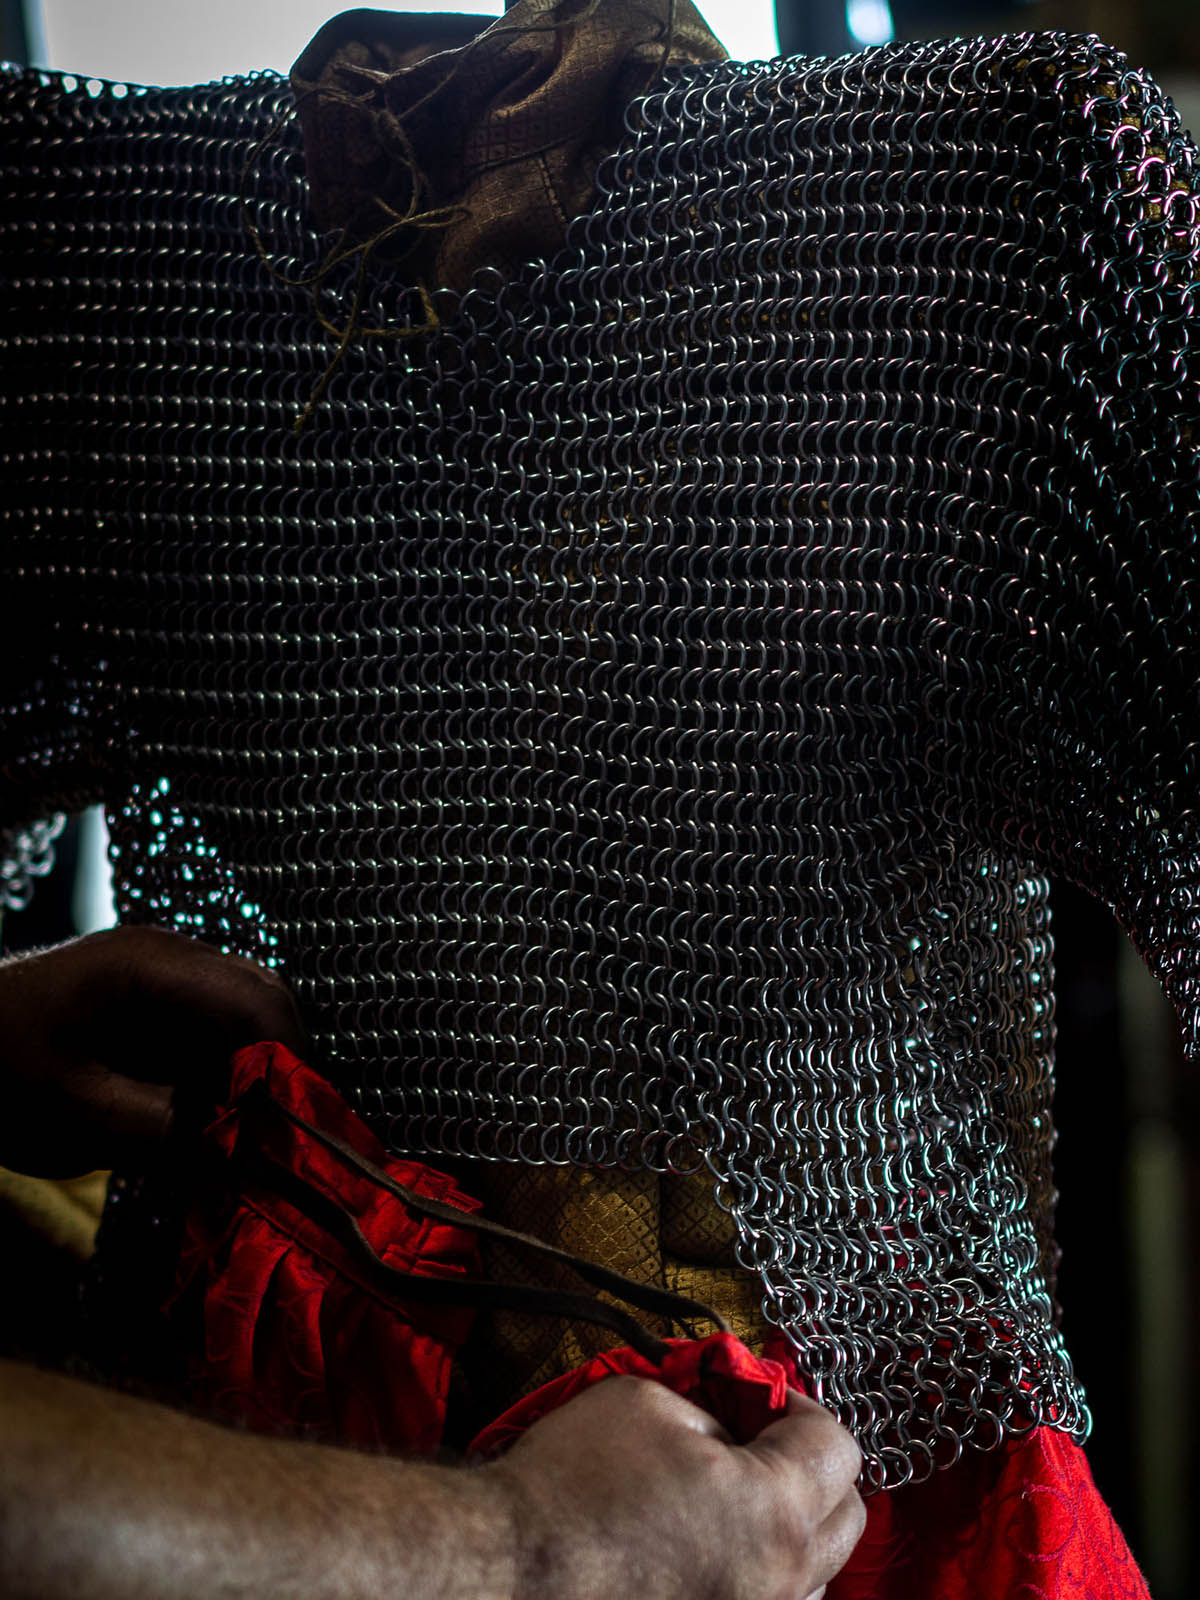
Photos 13 & 14. Front of the frame. There are loops on the waistband for pants attaching to the chainmail. We added leather laces for you. Also, there are four leather laces inserted in the rings for lacing up of the left and right parts of chainmail.
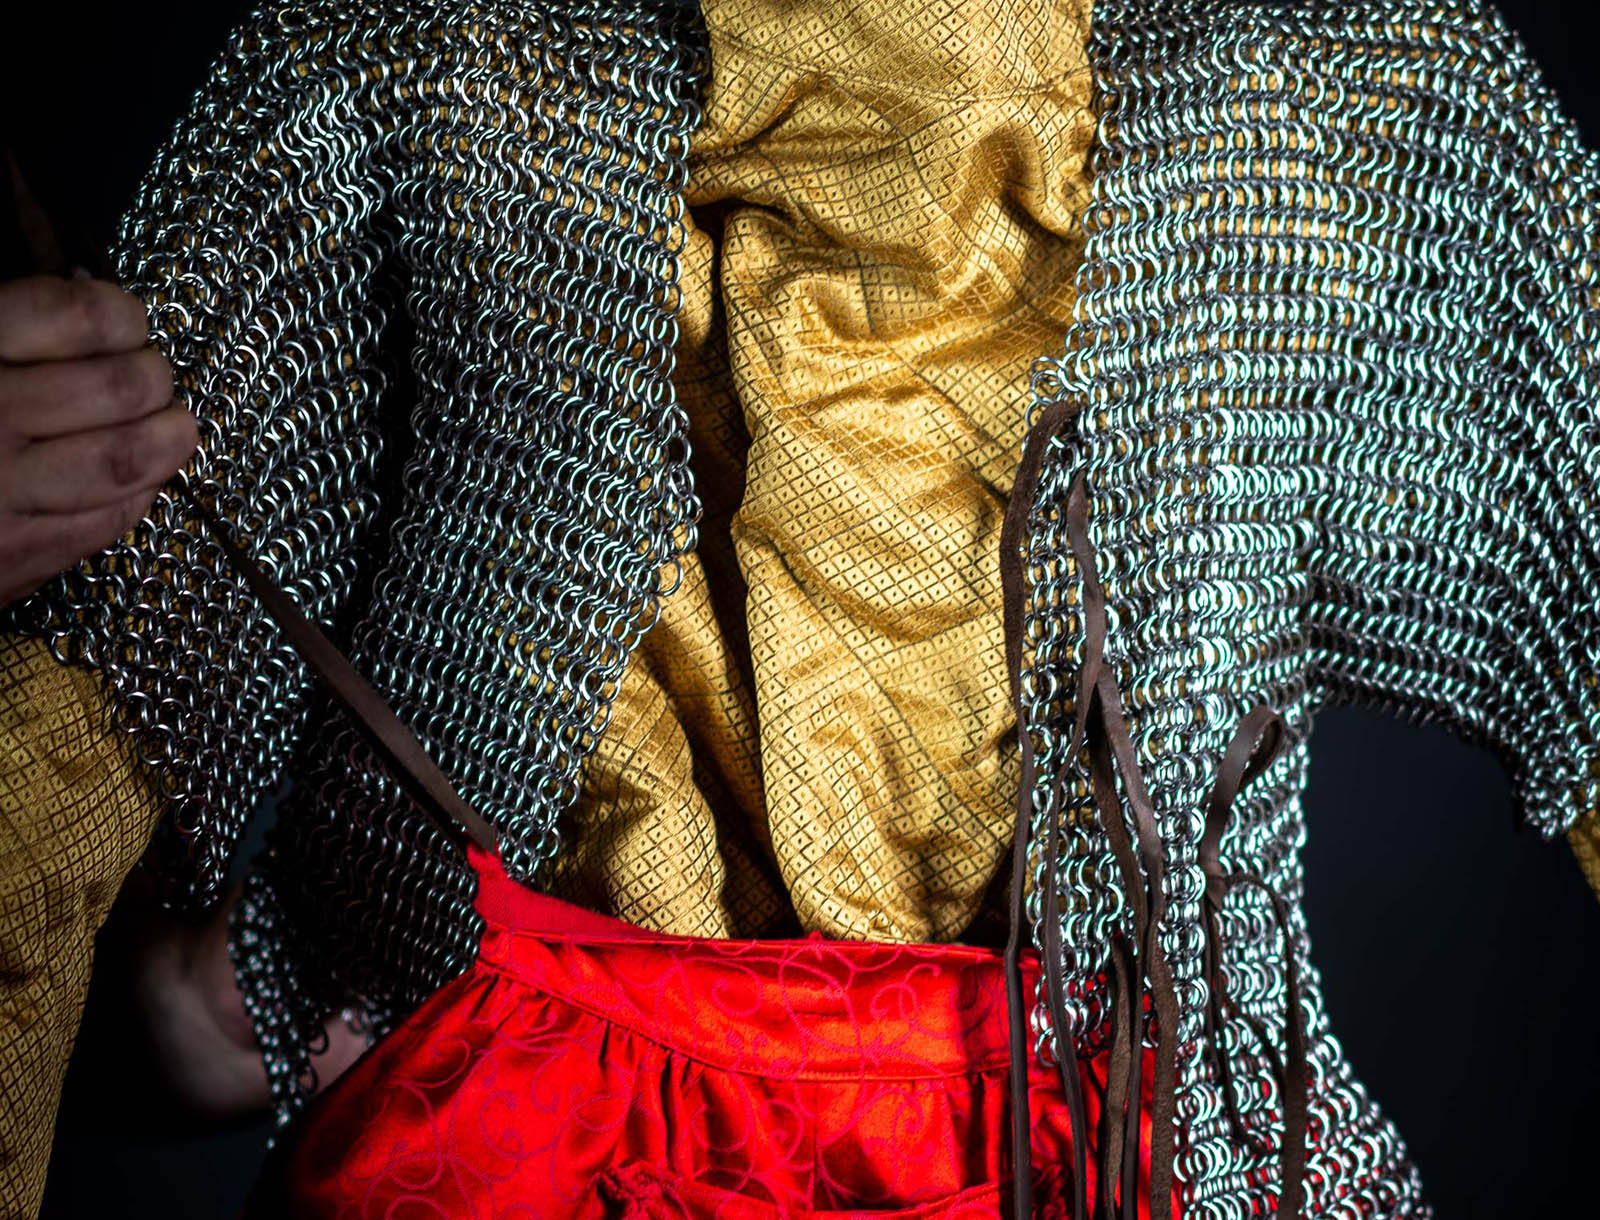
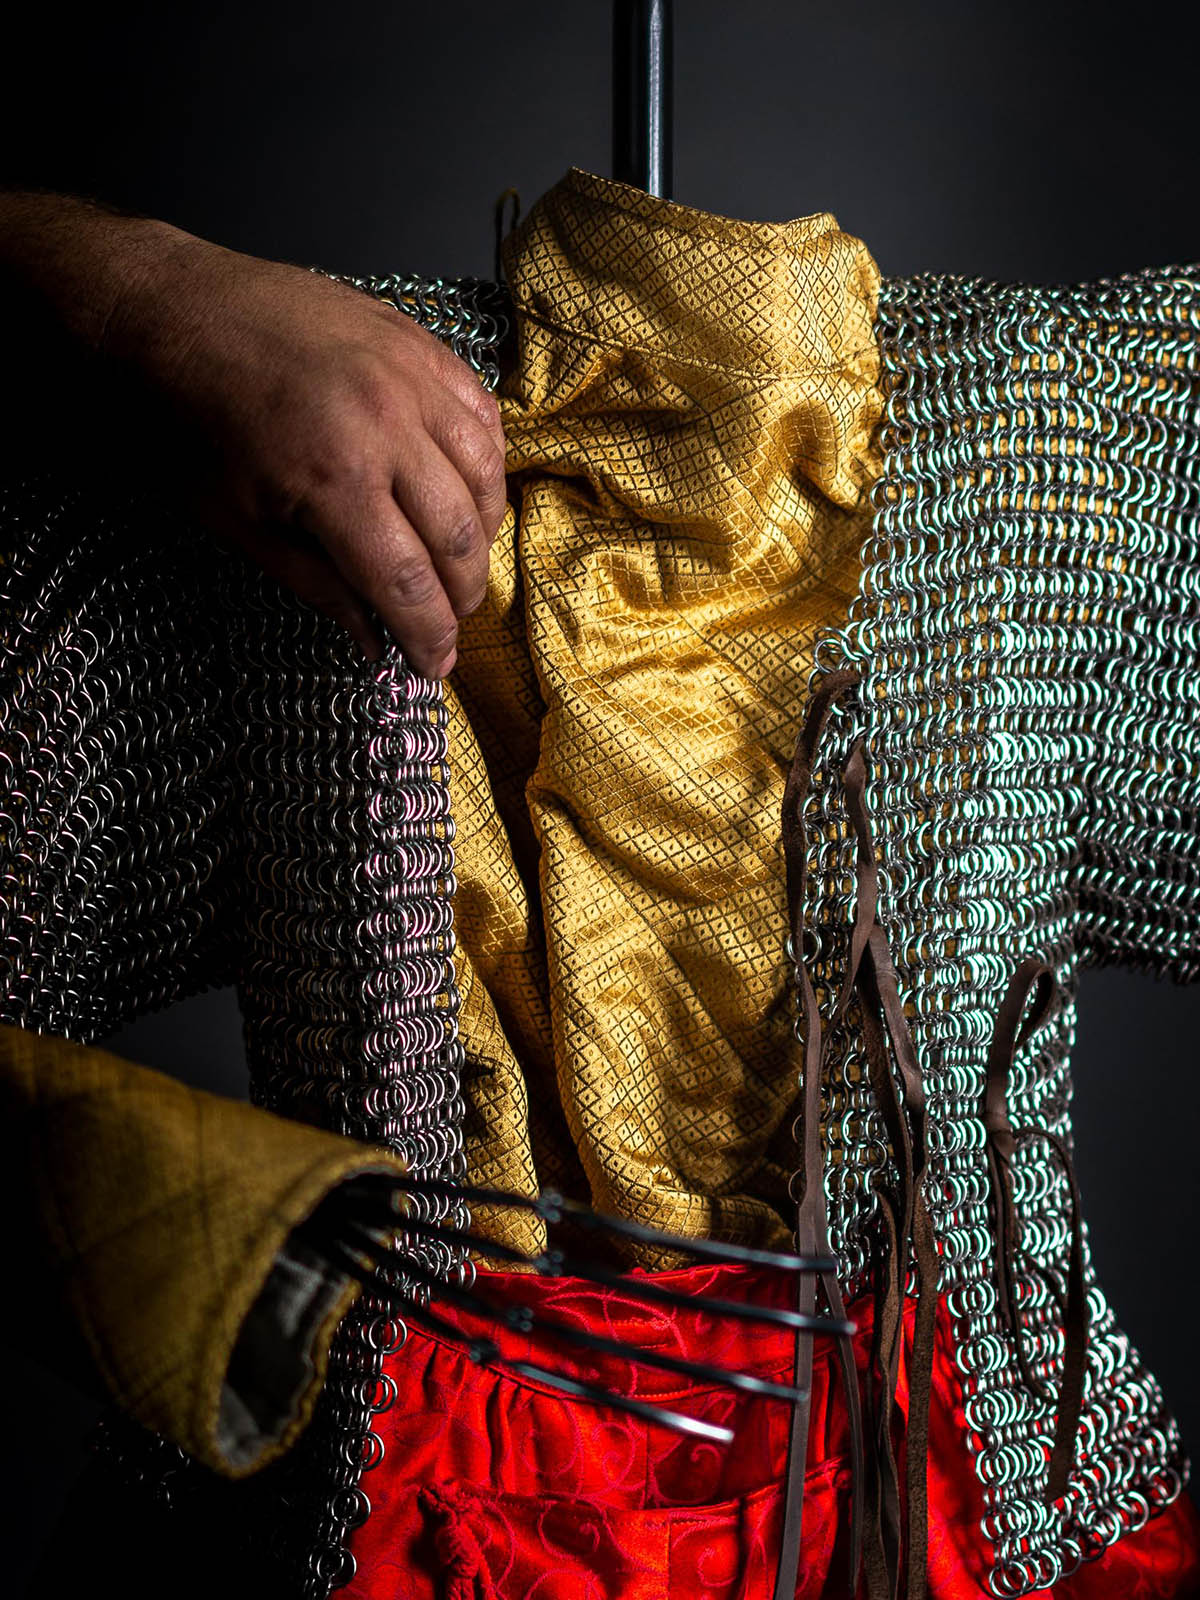
Photo 15. Frame is ready for dressing of armor. Lets’ begin with legs. There is one-piece construction, which will simplify wearing.
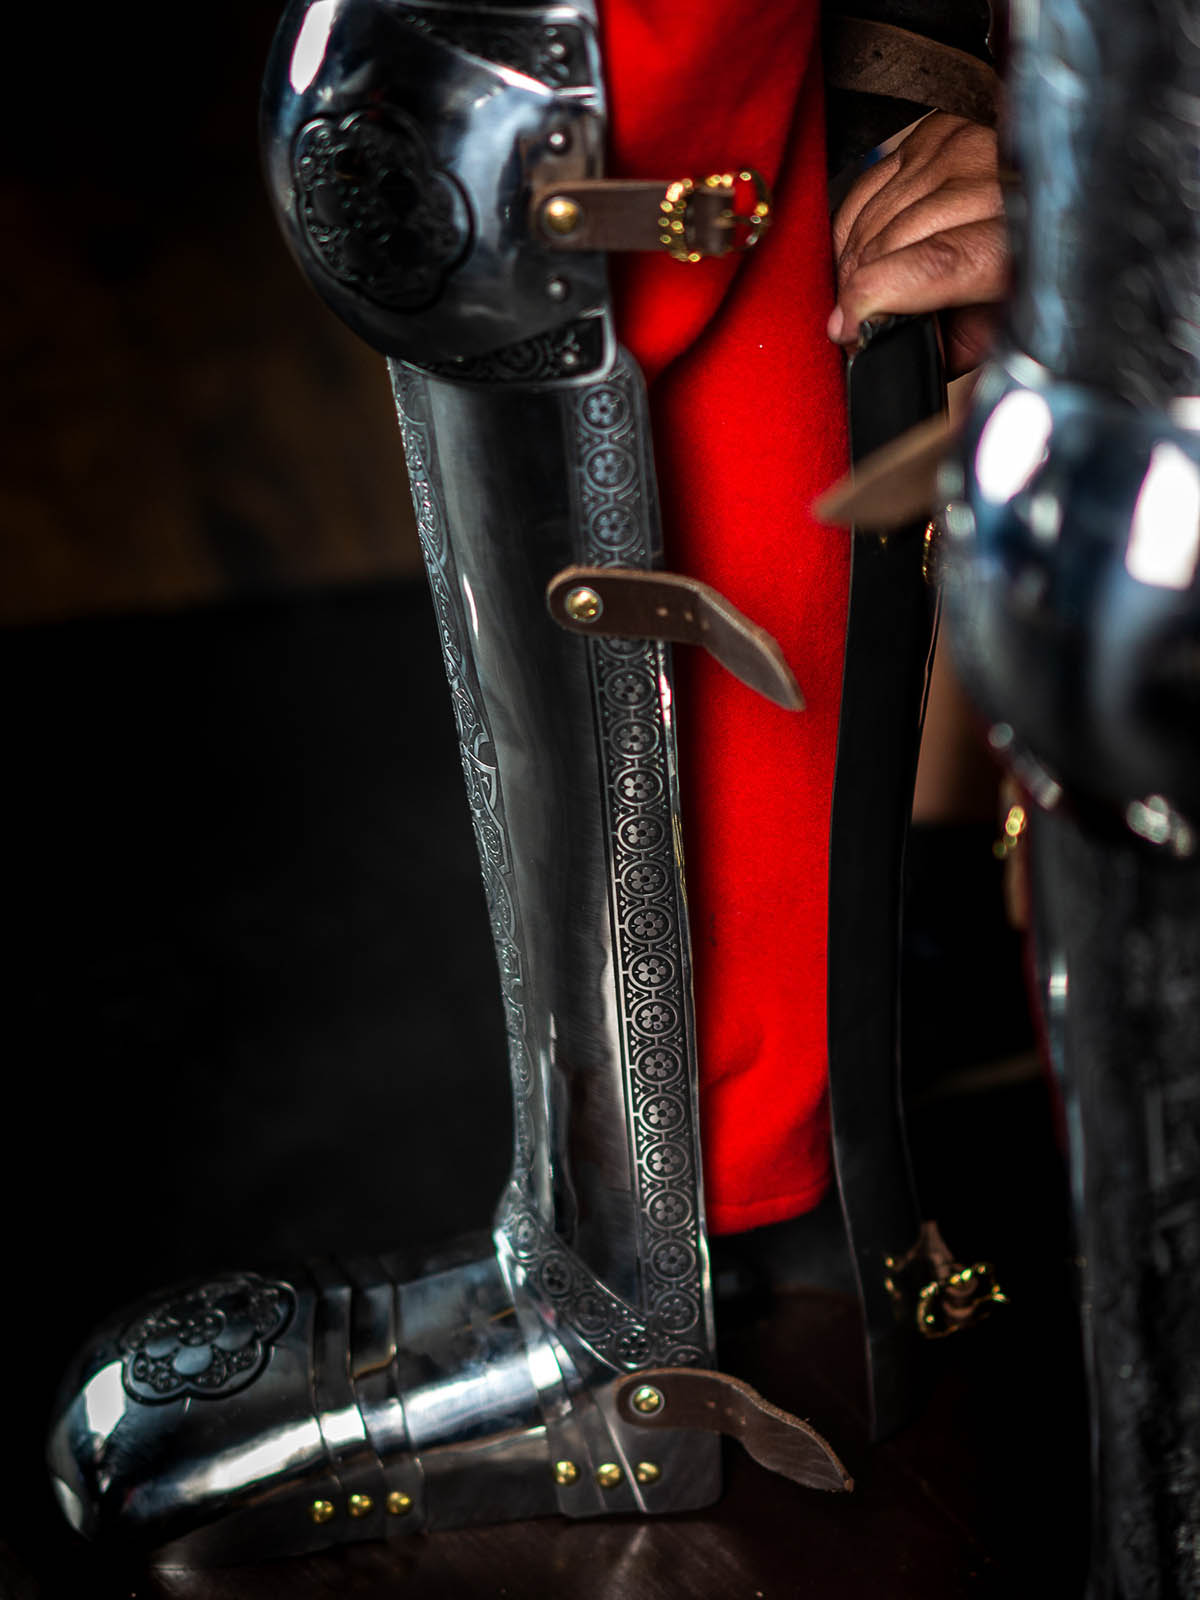
Photos 16-20. When you will fasten belts on the sabatons and greaves, keep an eye on pants not to get into linkage joints of armor. It may cause some difficulties in belts’ fastening.
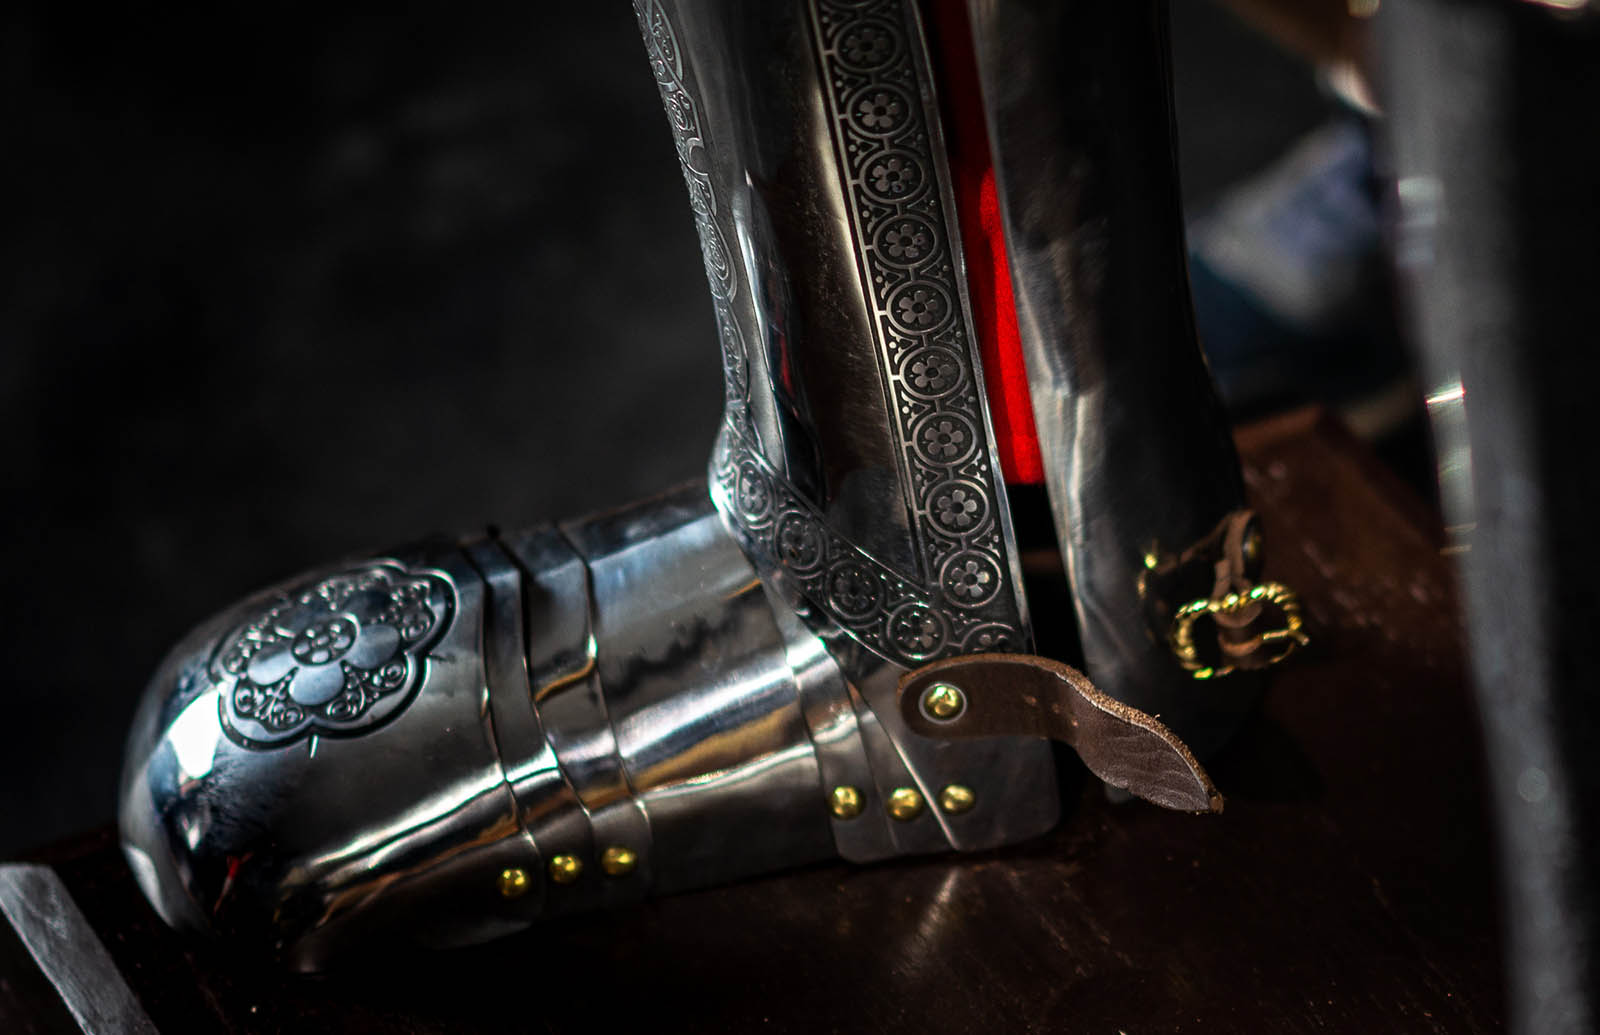
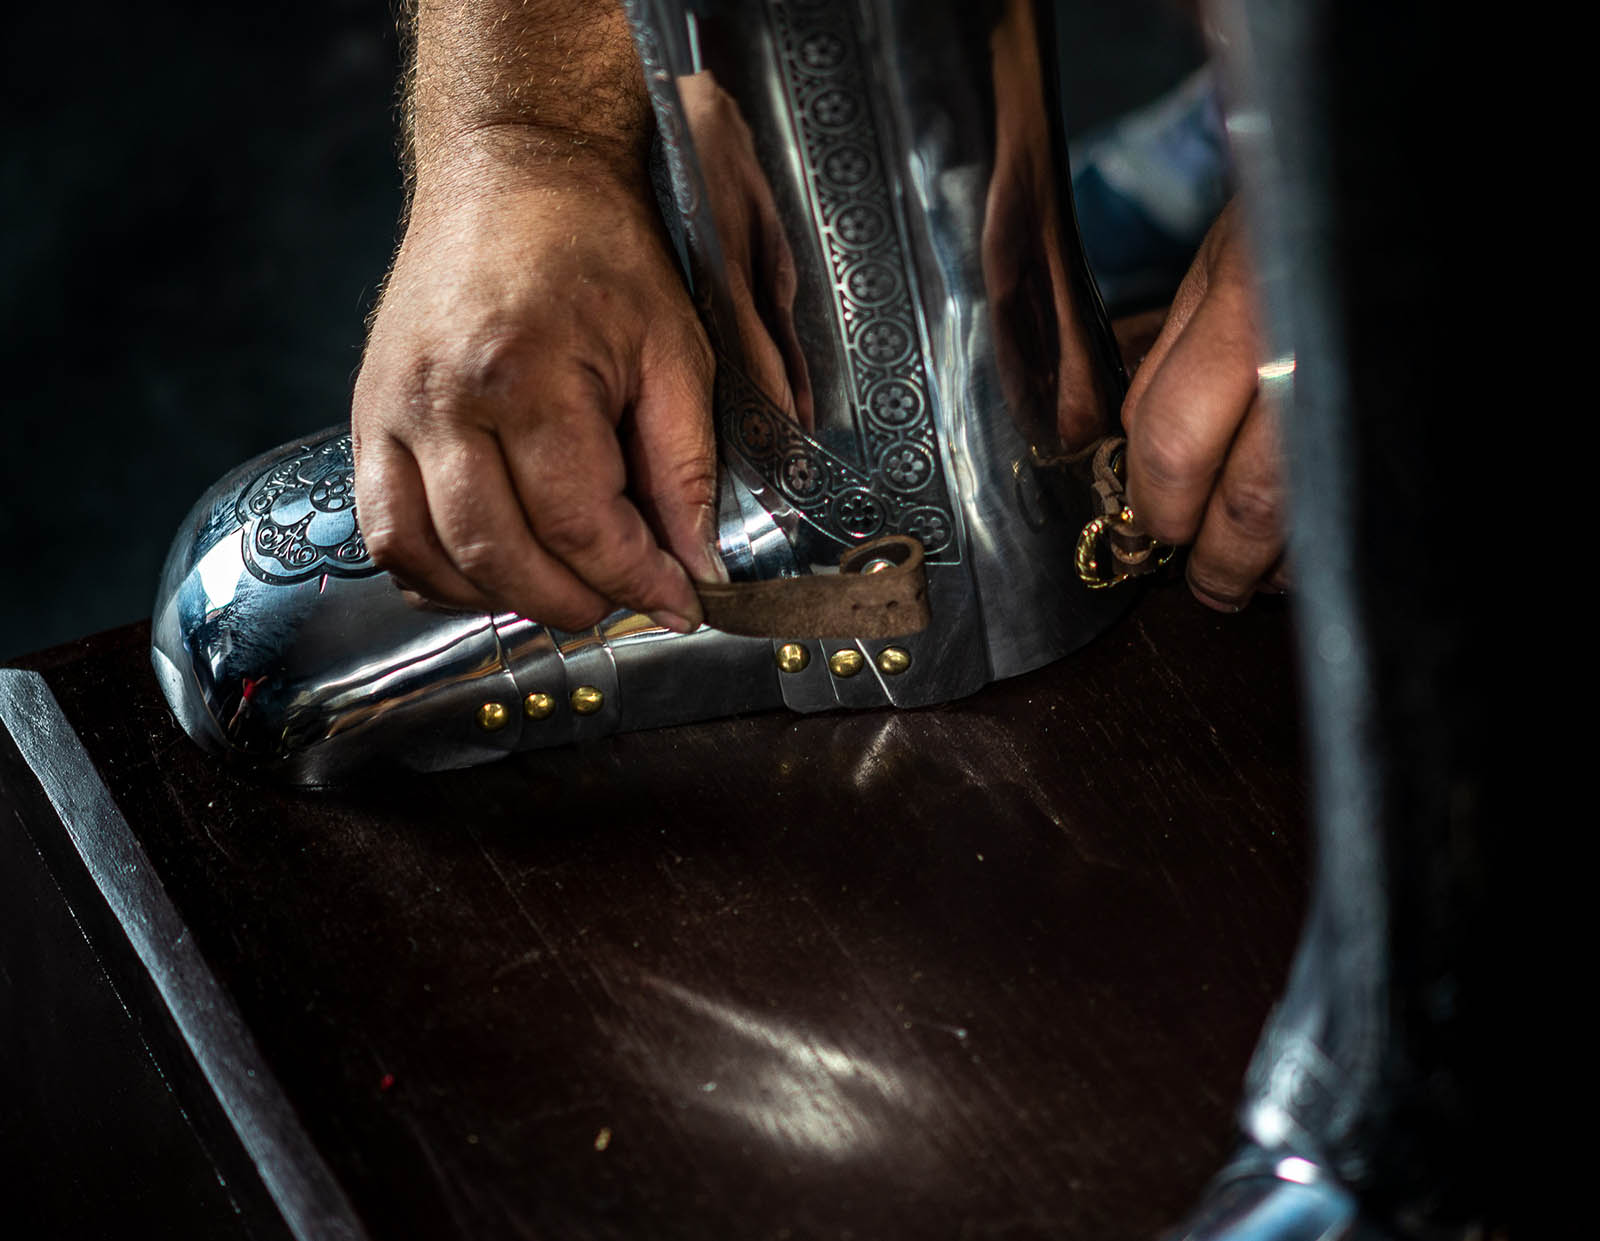
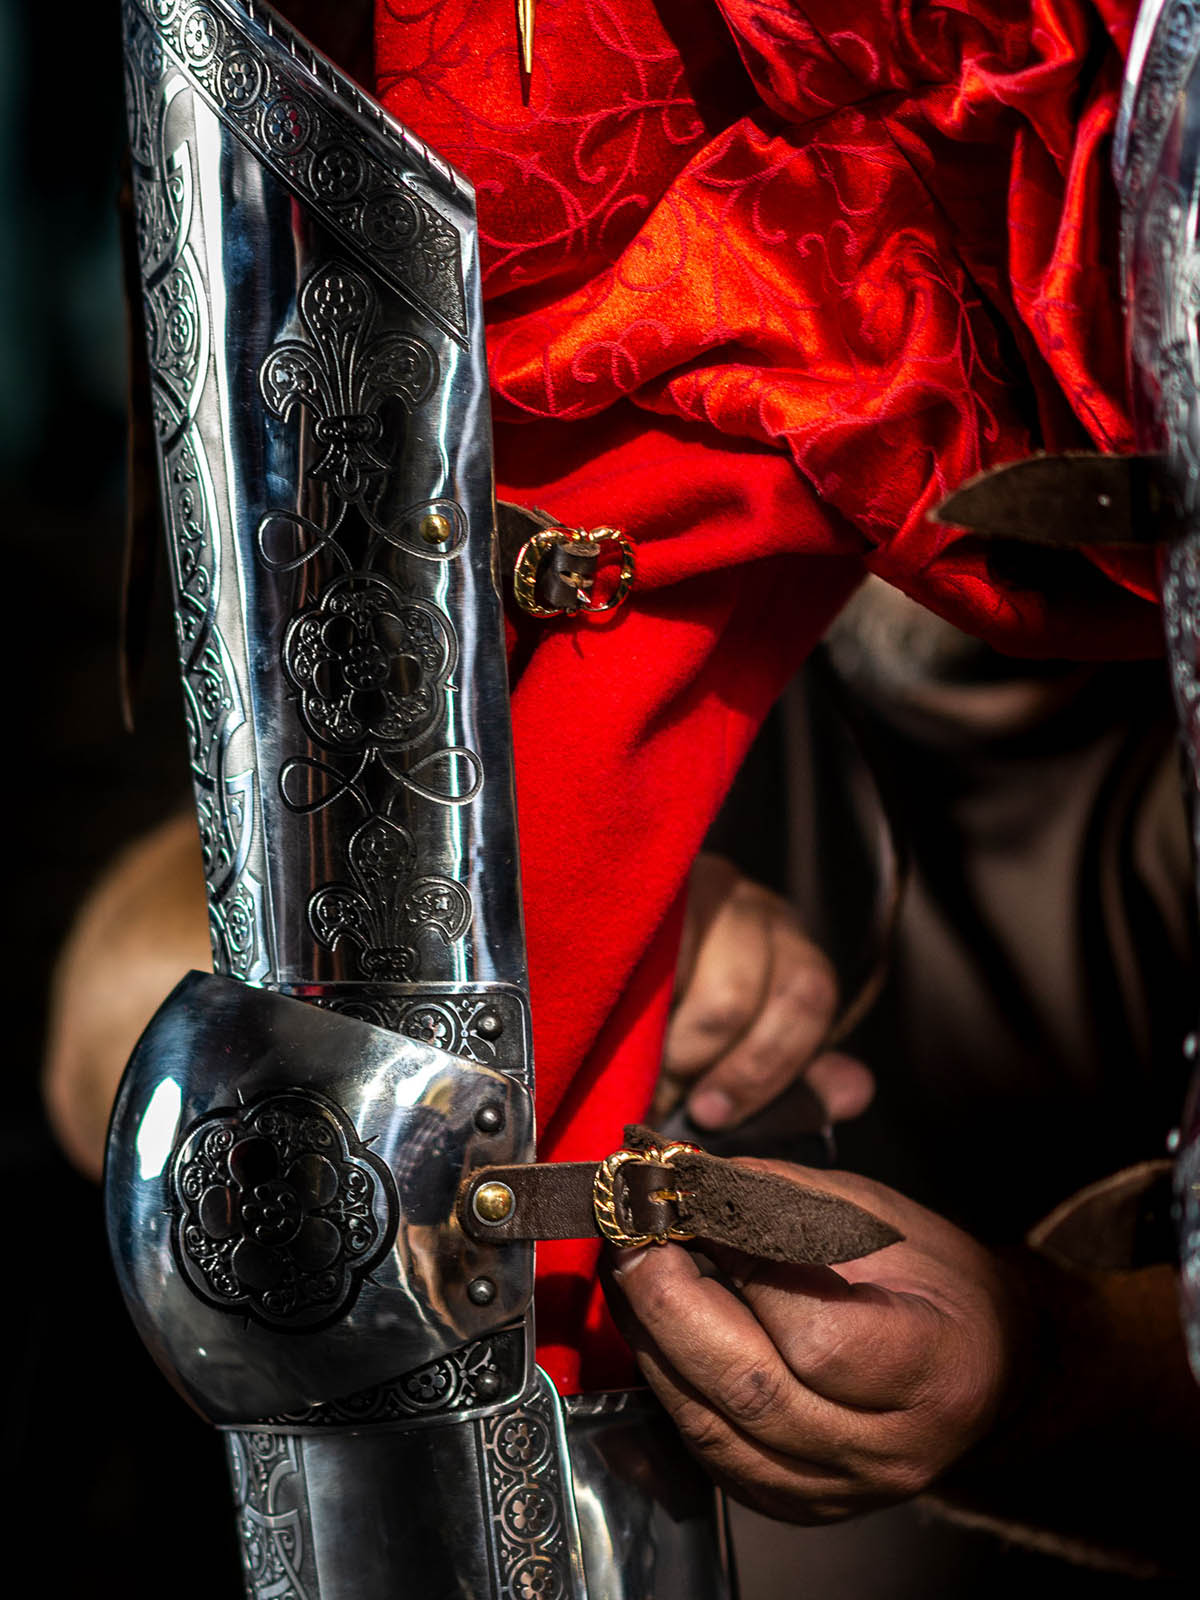
Photos 21 & 22. There is leather piece with eyelets in the upper part of plate leg. Pass leather lace through it and tie up to the chainmail.
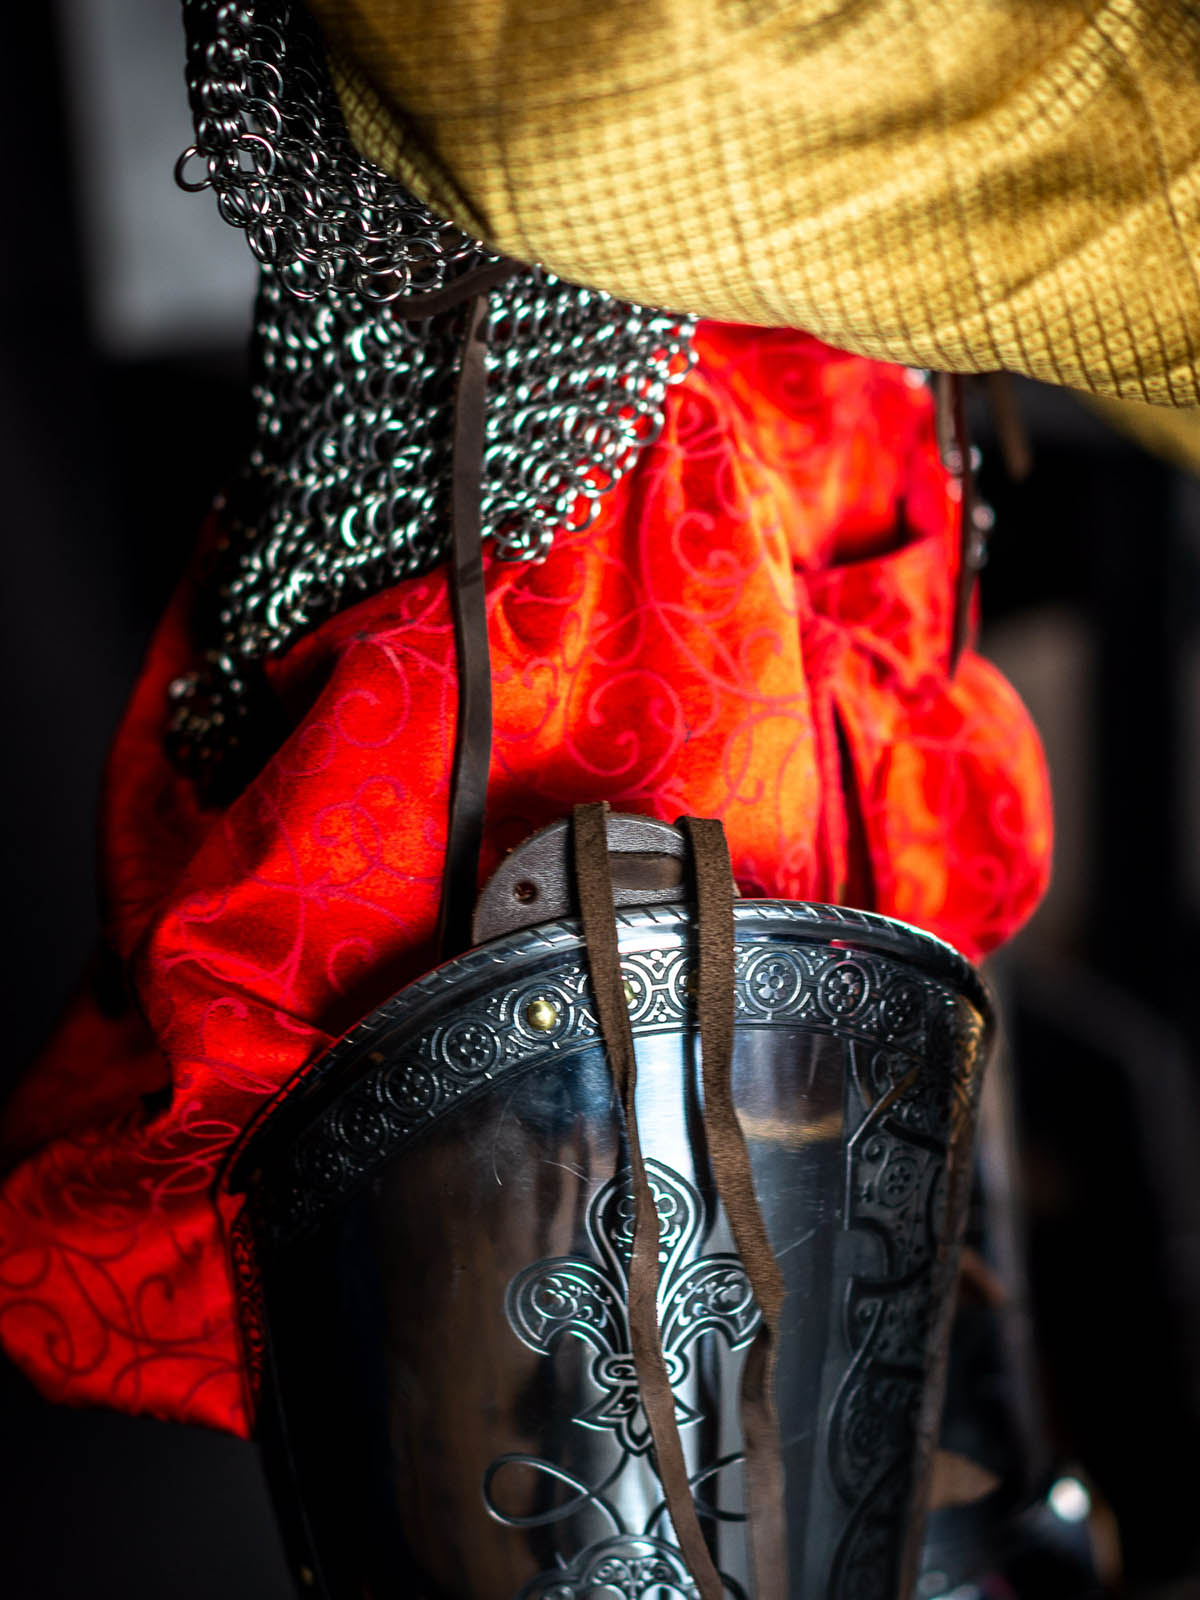
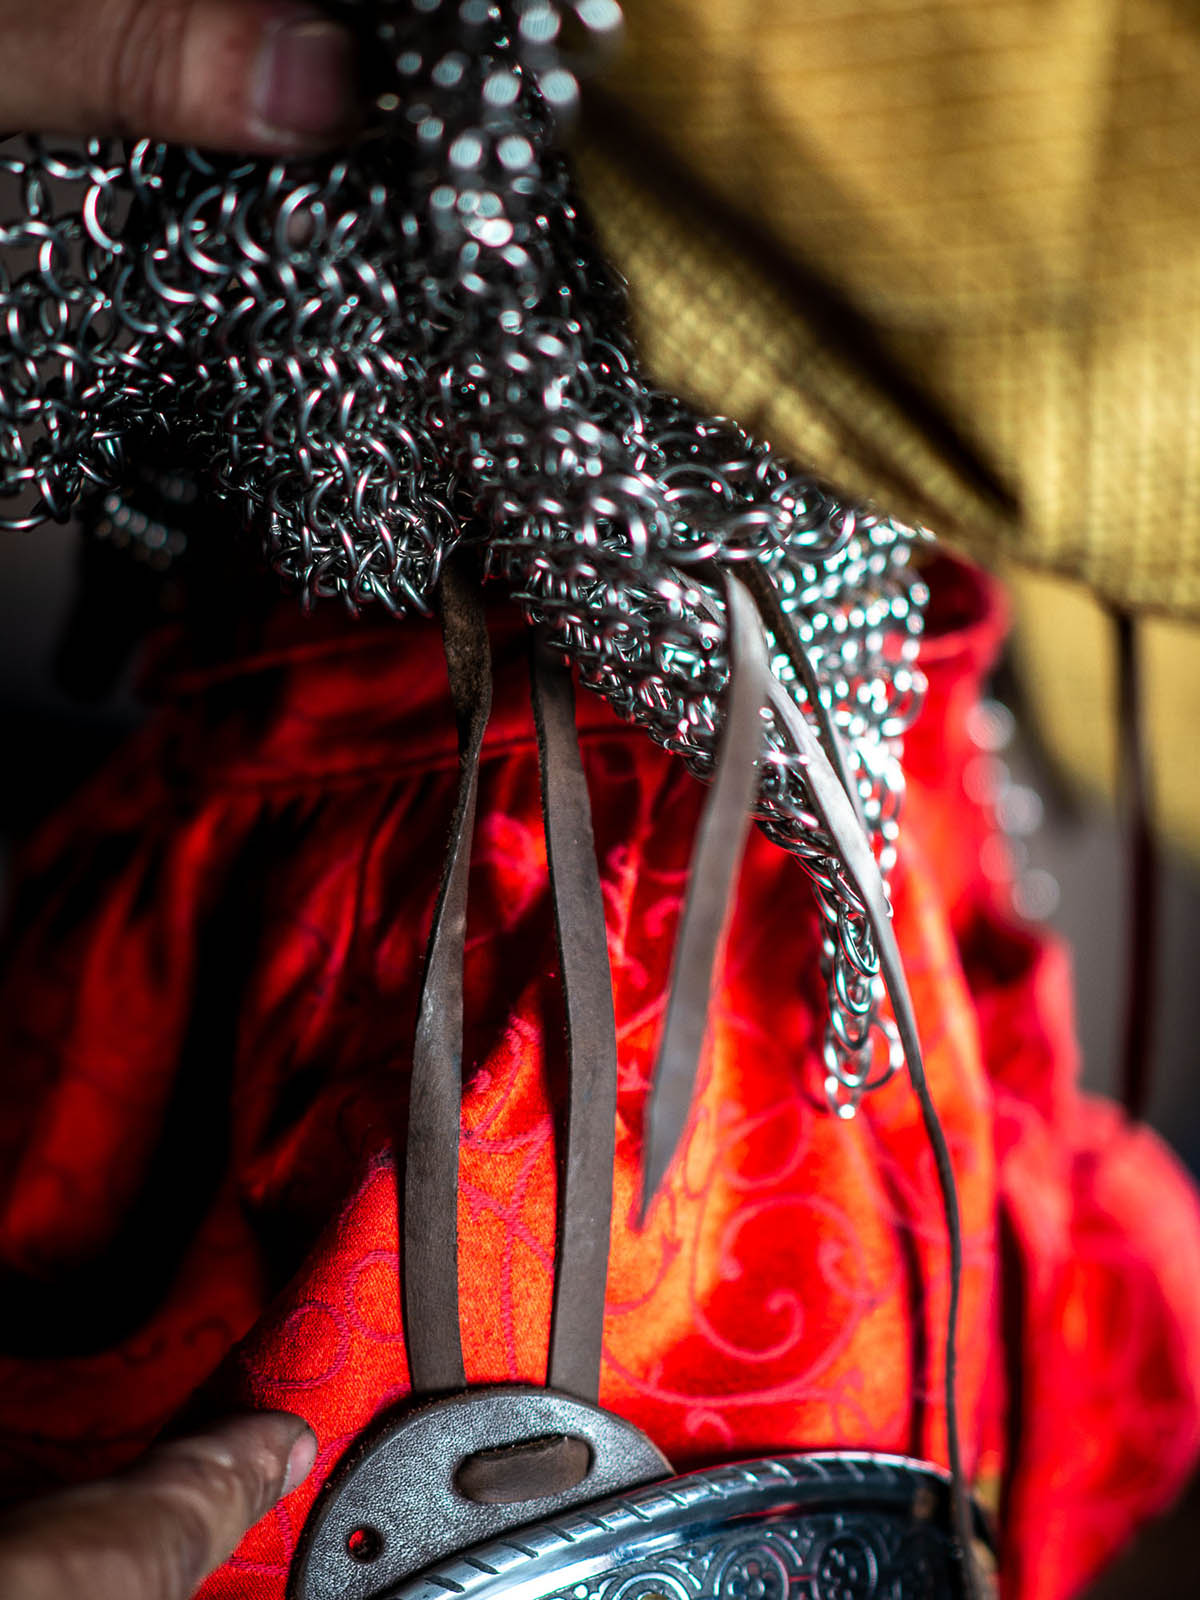
Photo 23. That is how tied plate legs on the frame look like.

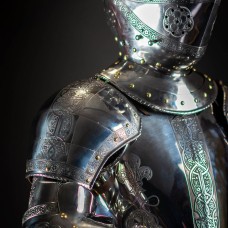
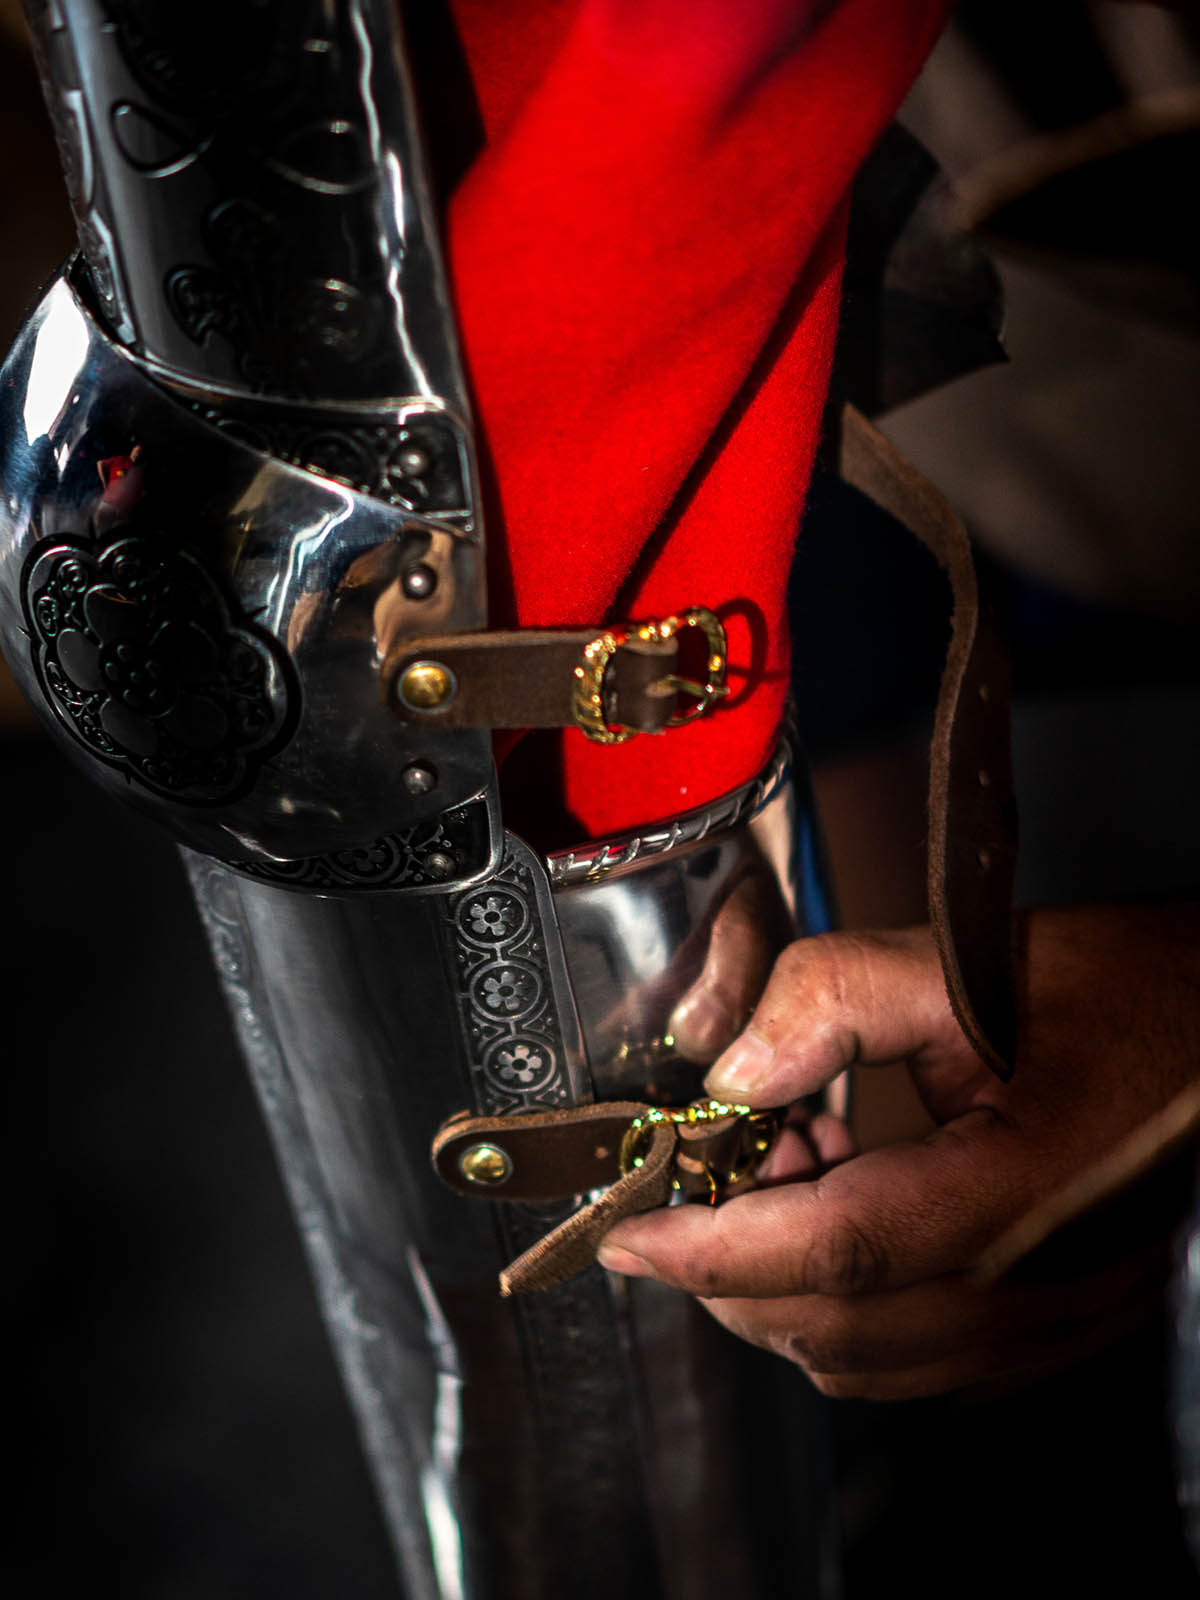
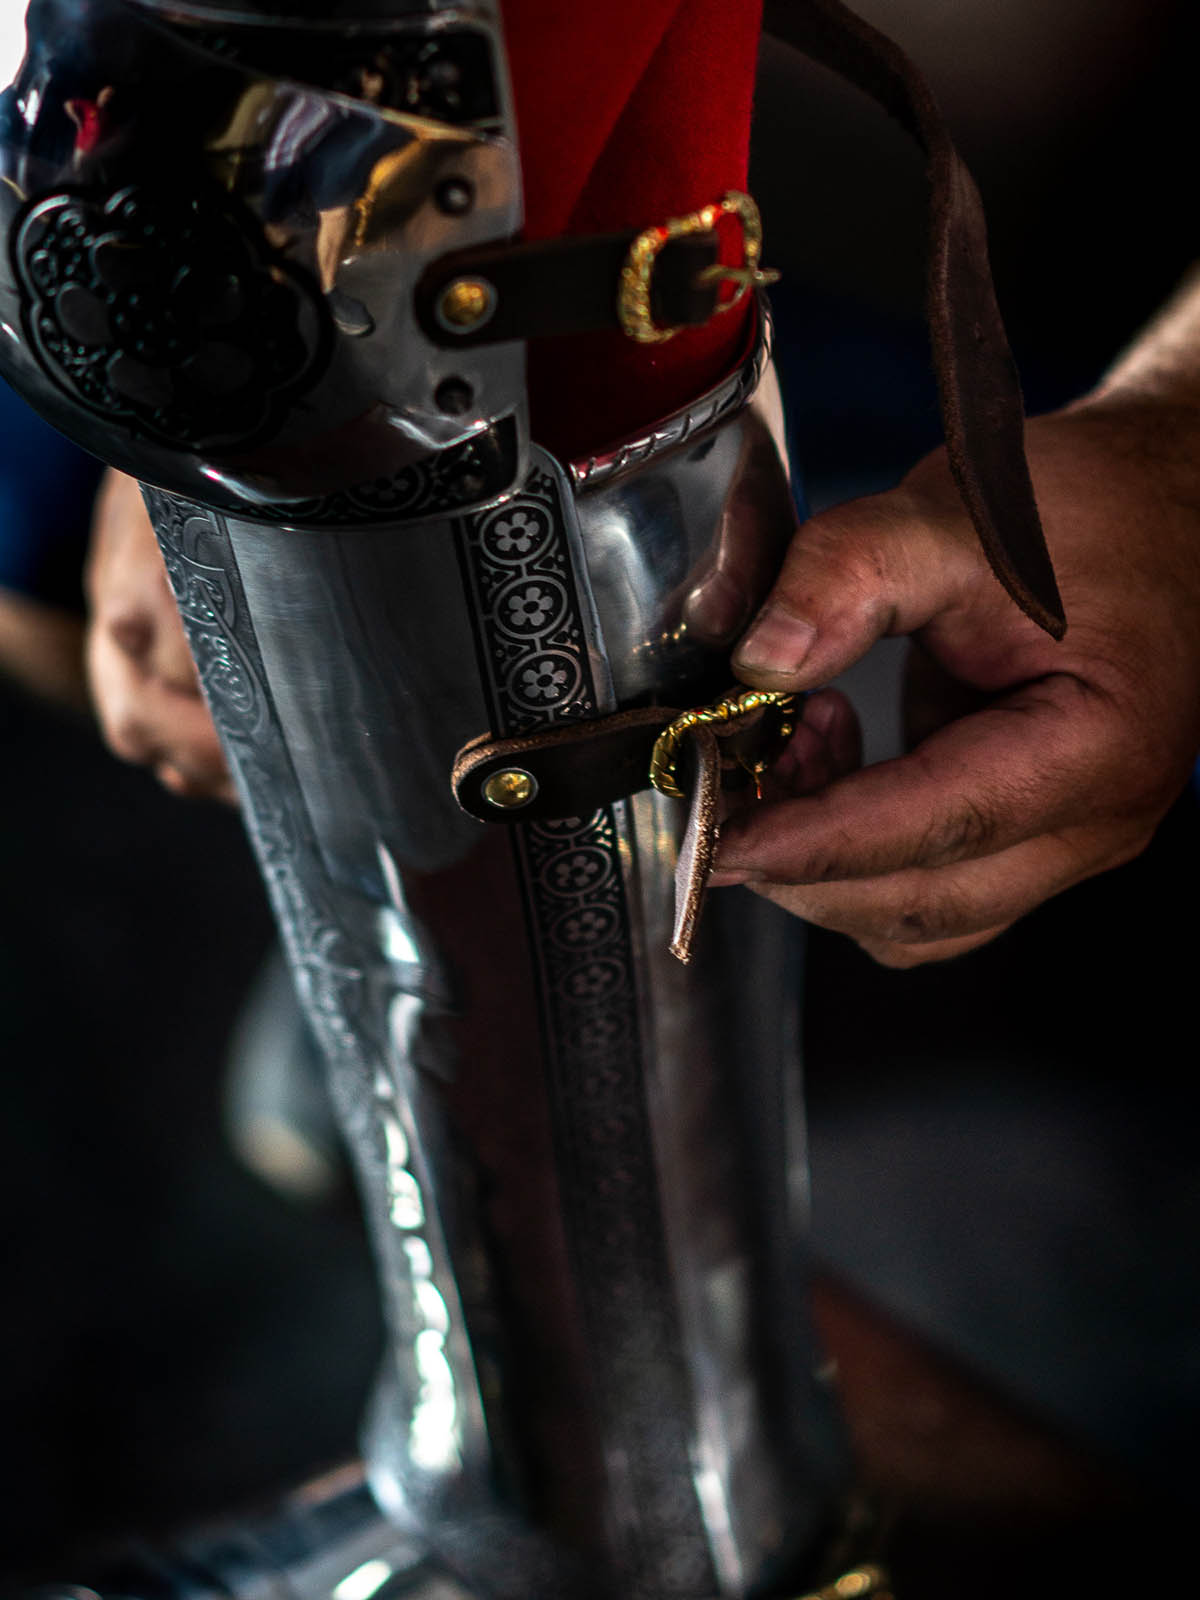
Photo 24. Let’s put on cuirass very carefully. There are shoulder belts on the front part and buckles on the back of cuirass. You clasp belt on the top with these belts.
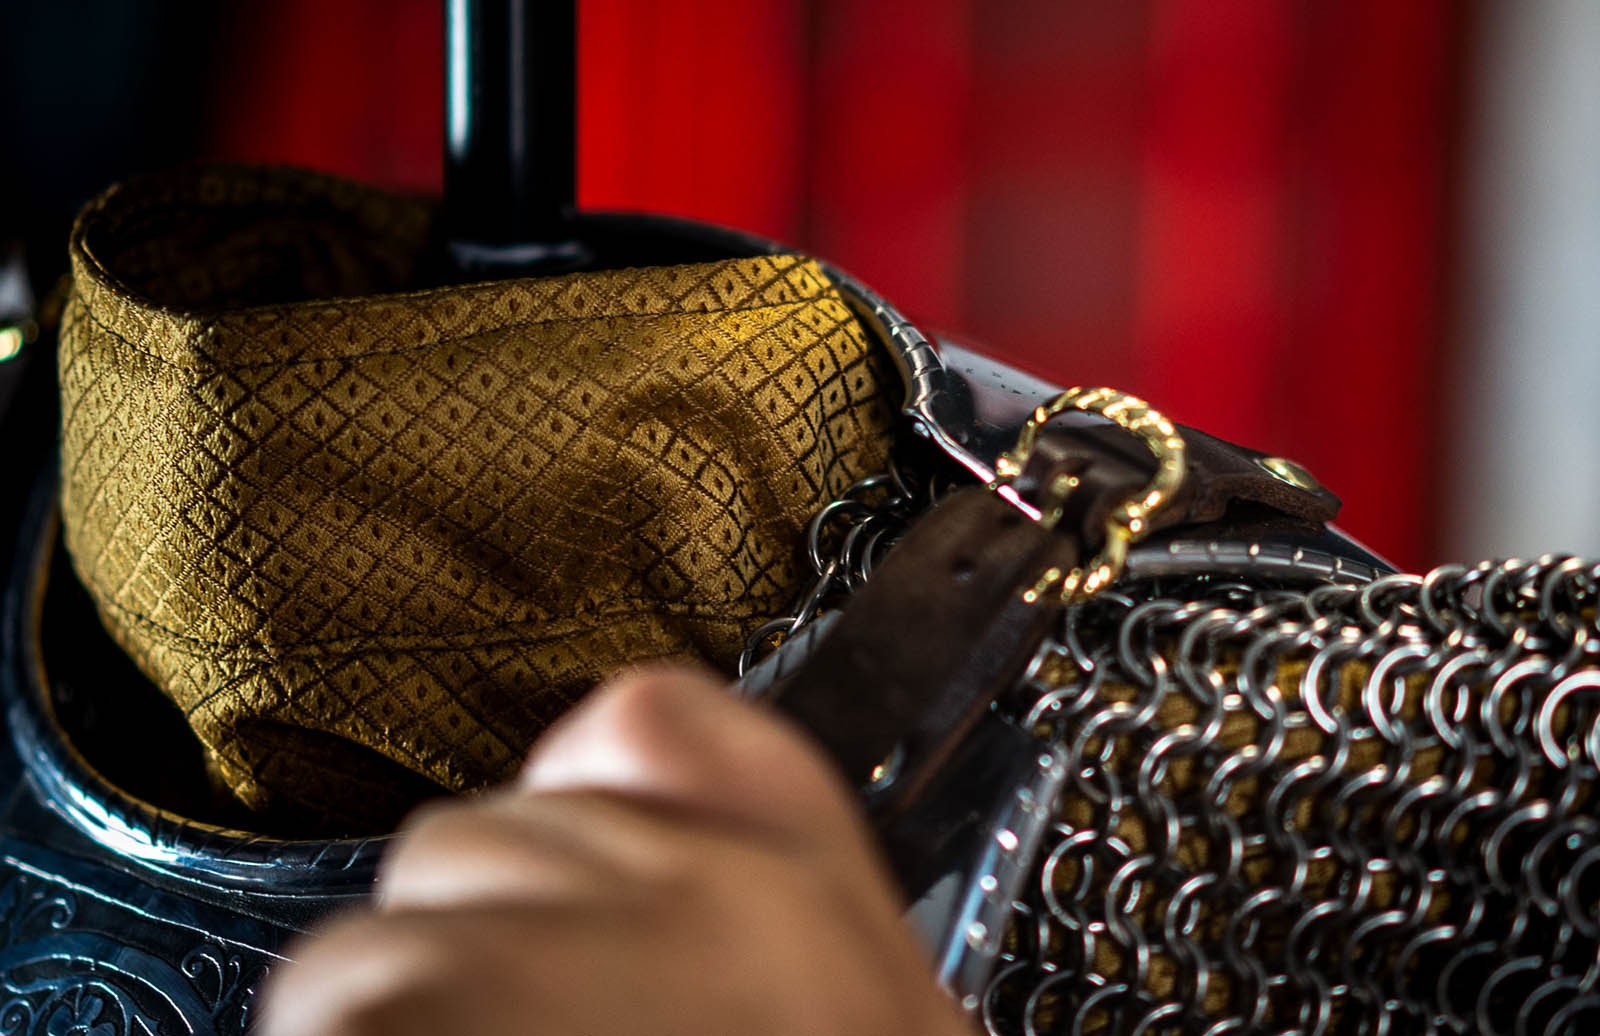
Photo 25. Cuirass, which is worn properly, should be closed (back part overlaps the front one). Fix cuirass with side belts.

Photo 26. That is how correctly worn cuirass on the frame looks like.
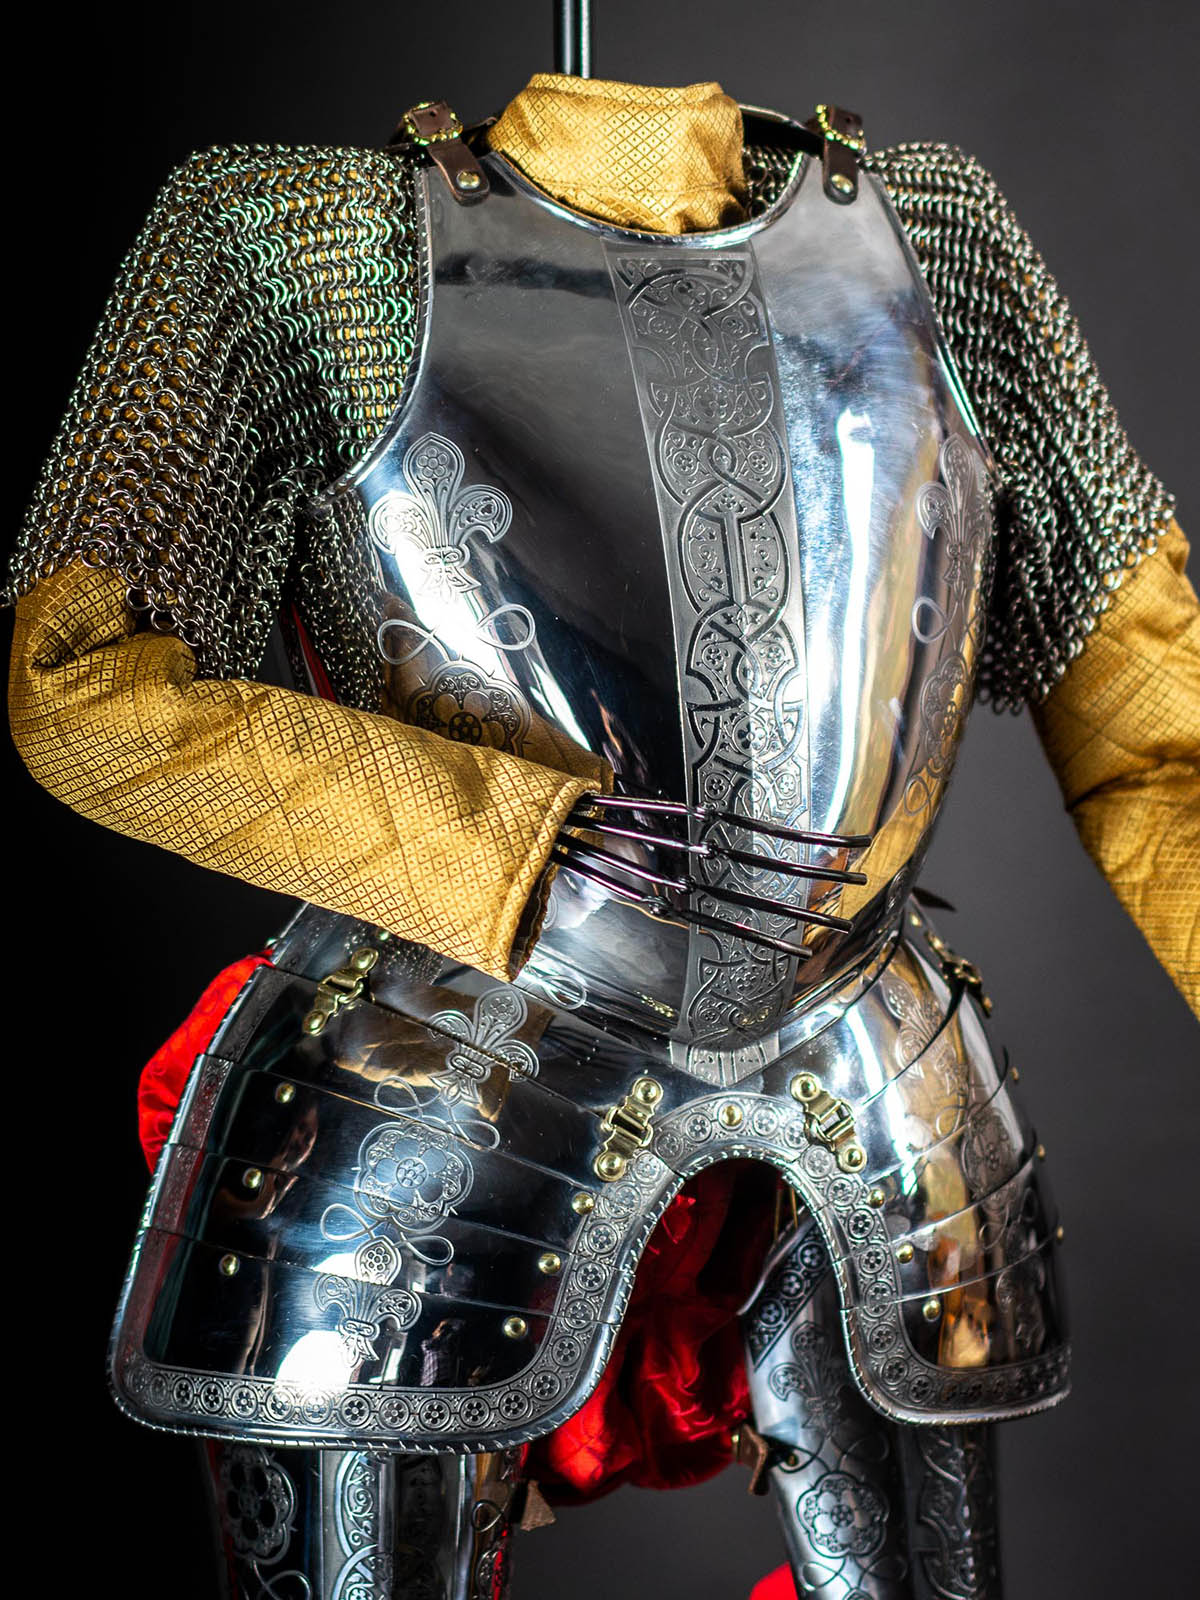
Photo 27. Let’s continue with spaulders’ adjustment. Pass leather lace through 2-3 rings on the shoulder part of chainmail – you will fix upper part of spaulders with it.
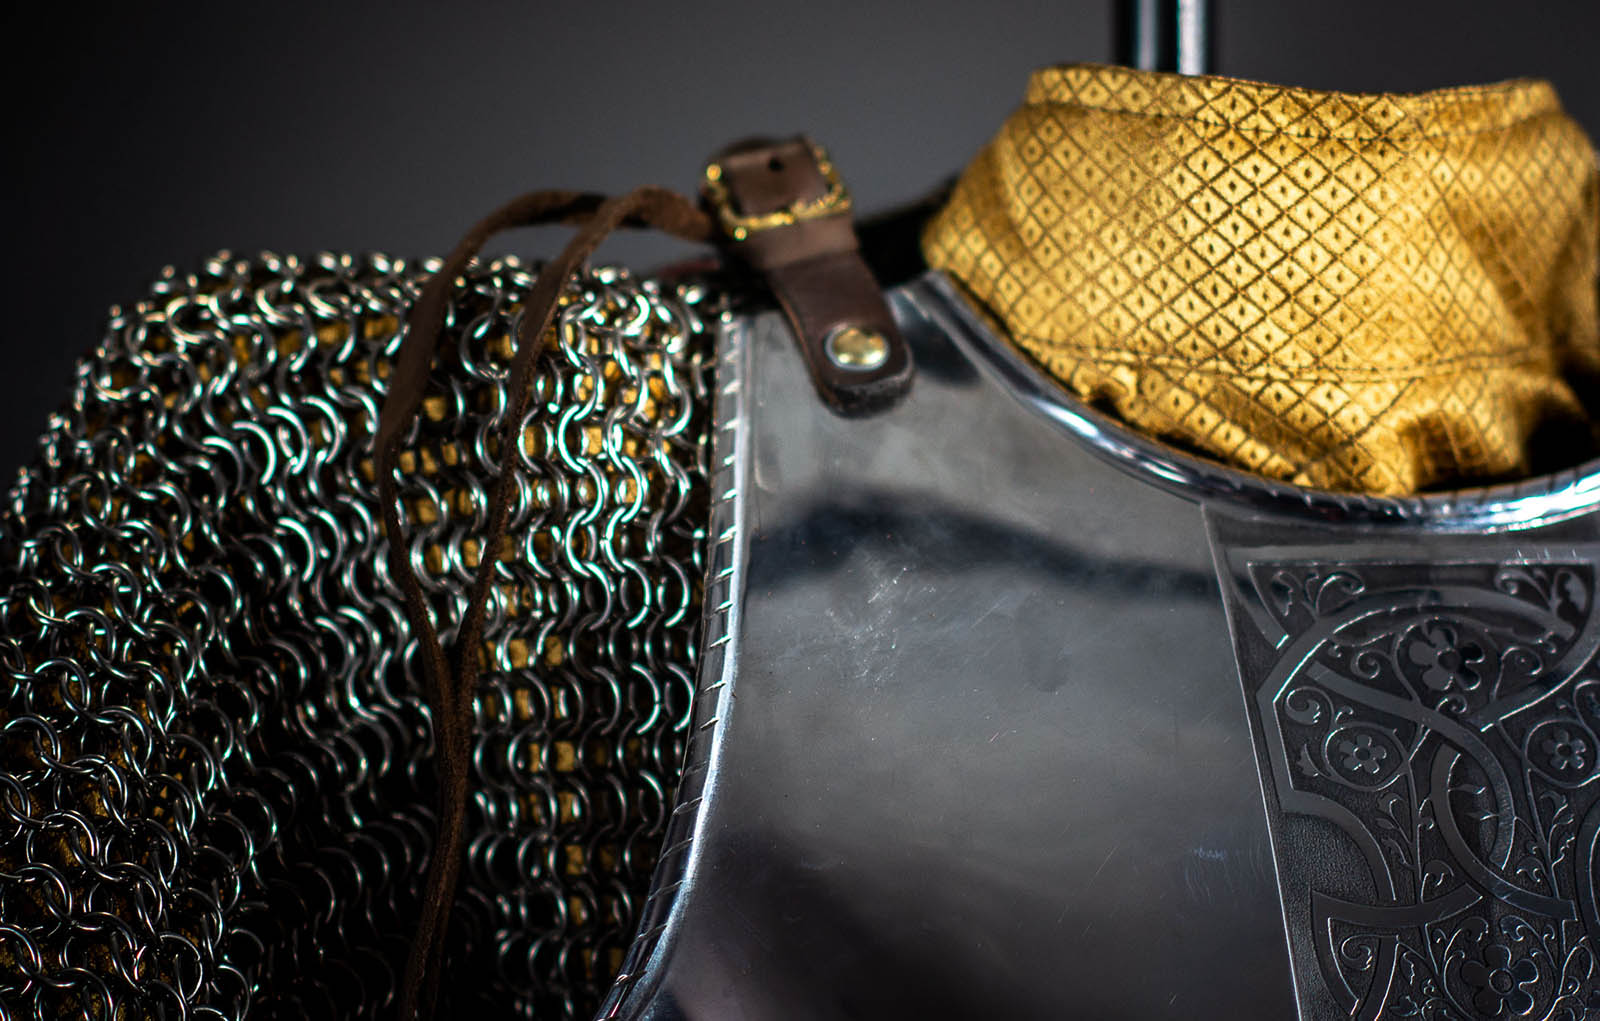
Photo 28. There is a process of spaulders fixation in its upper part. However, do not fasten belts in the lower part of spaulder.
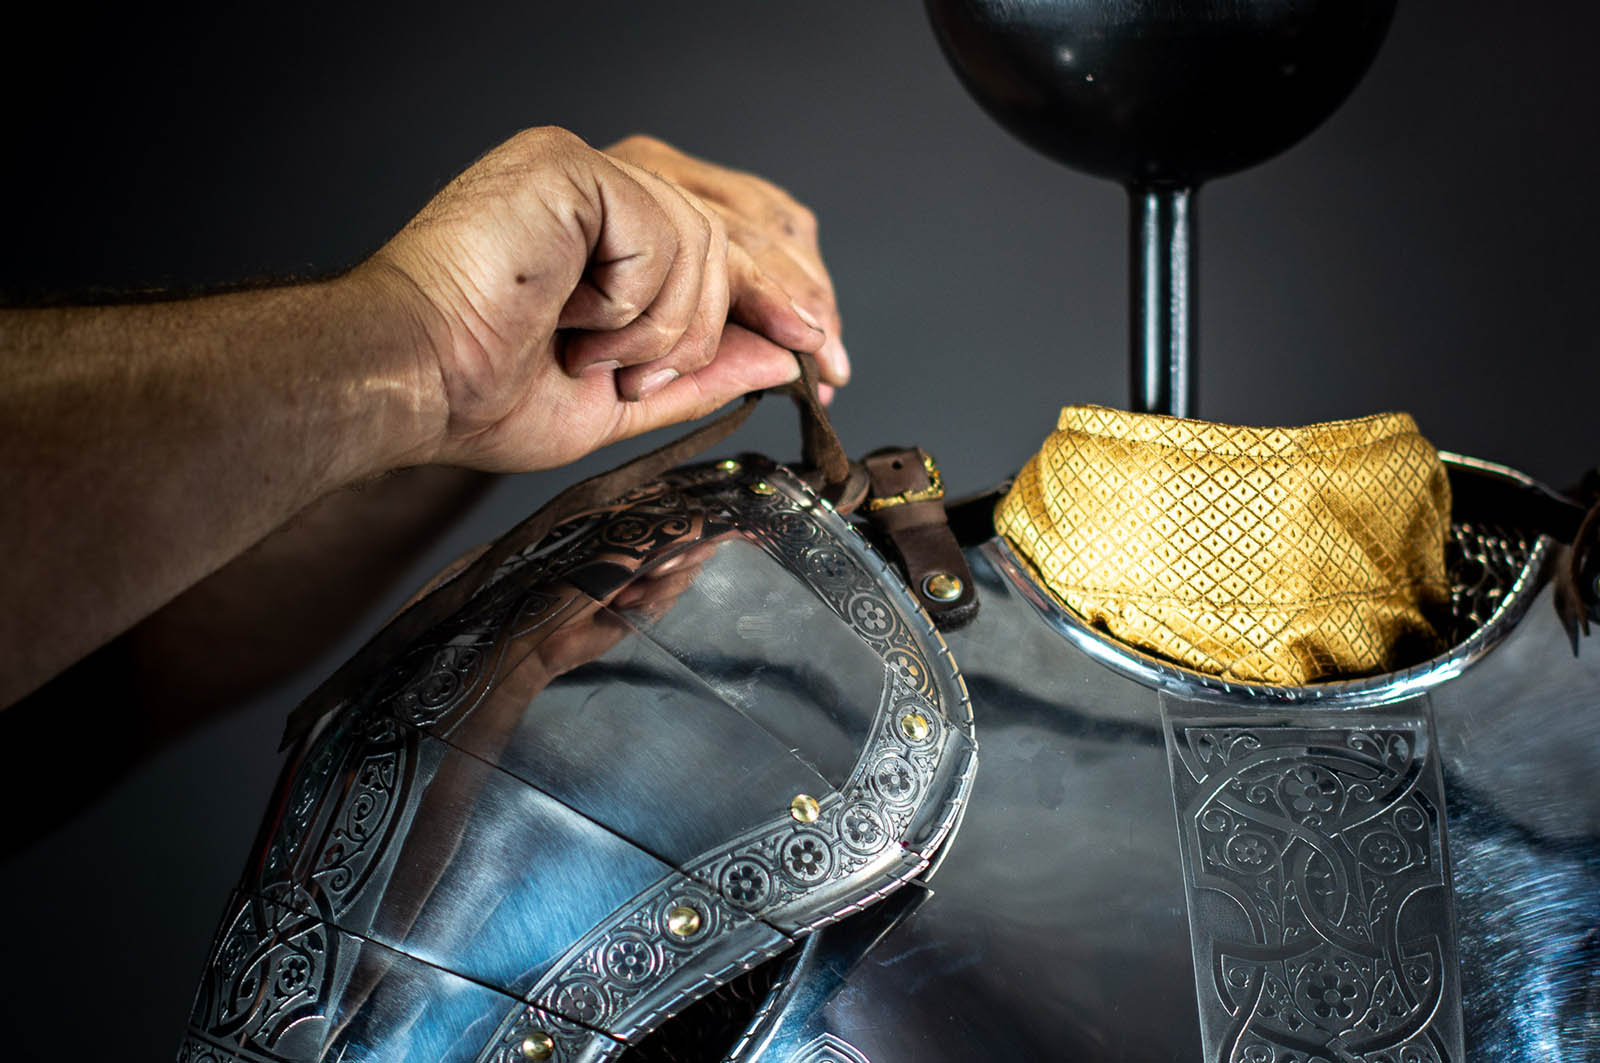
Photo 29. Now, put plate arms on. Open bracer to the fullest and draw plate arm on the arm of frame.
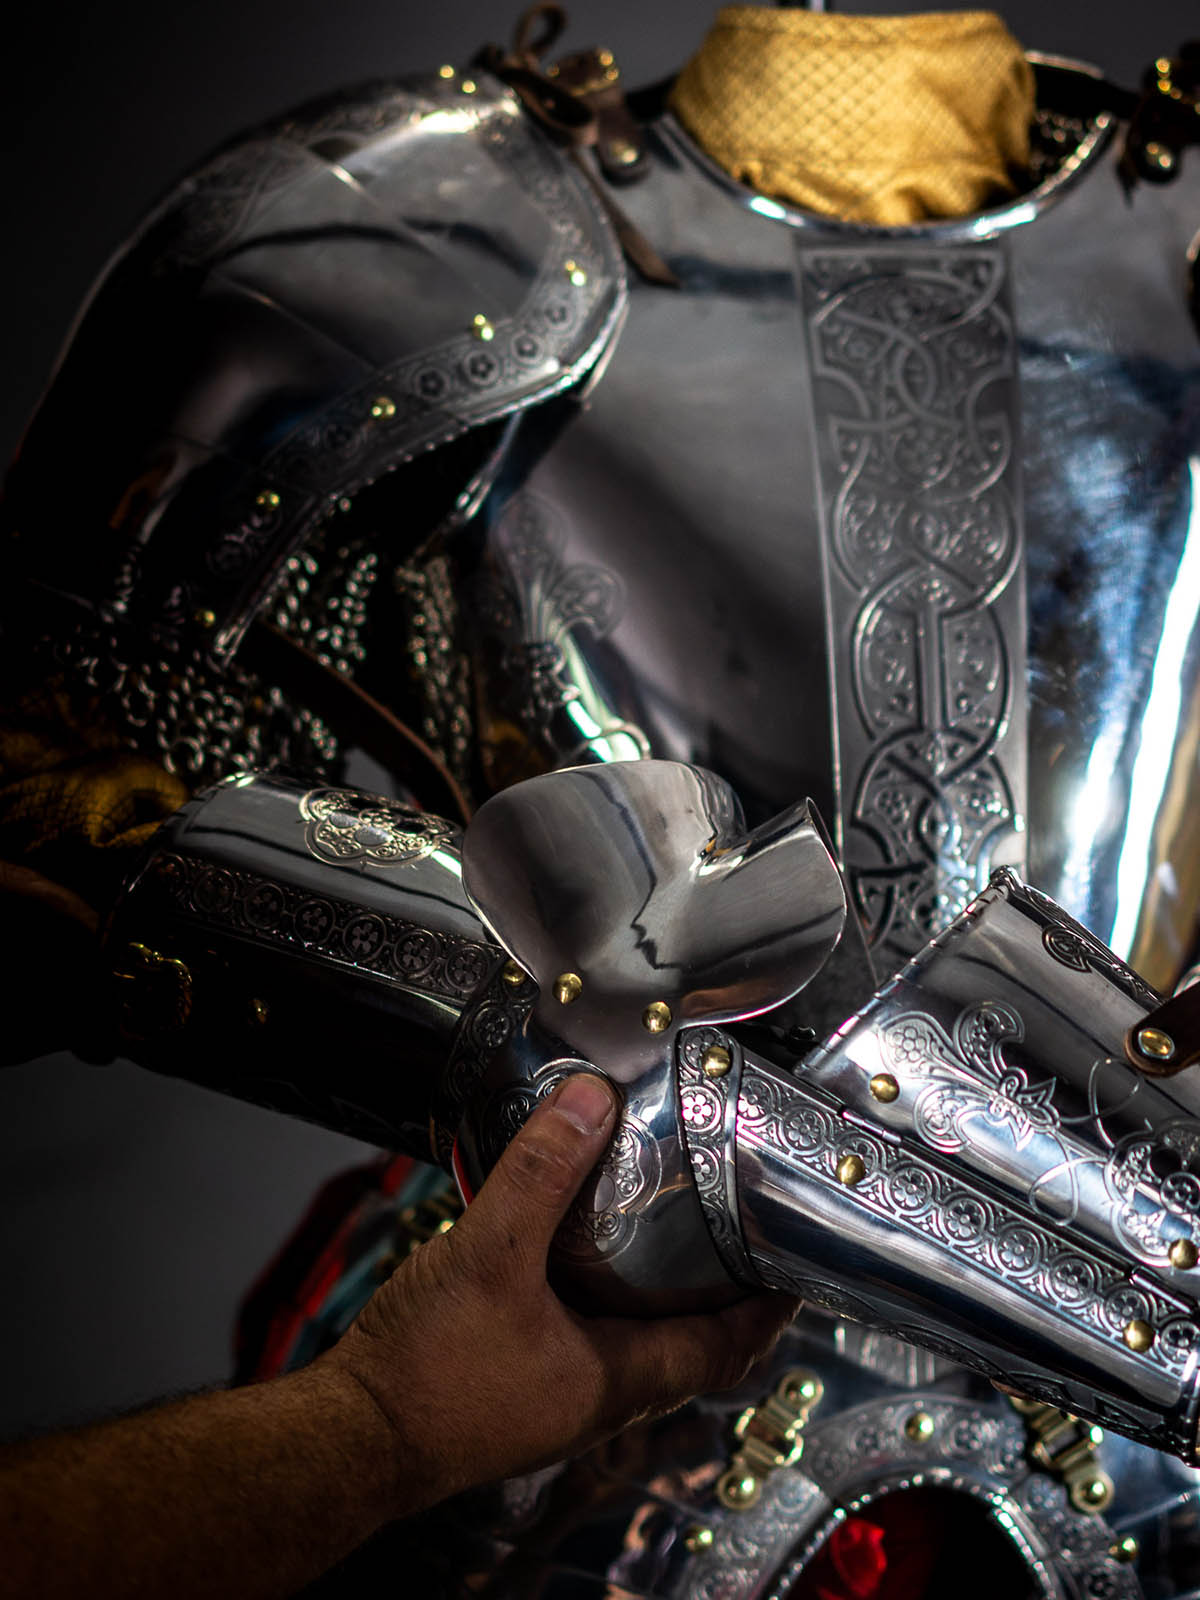
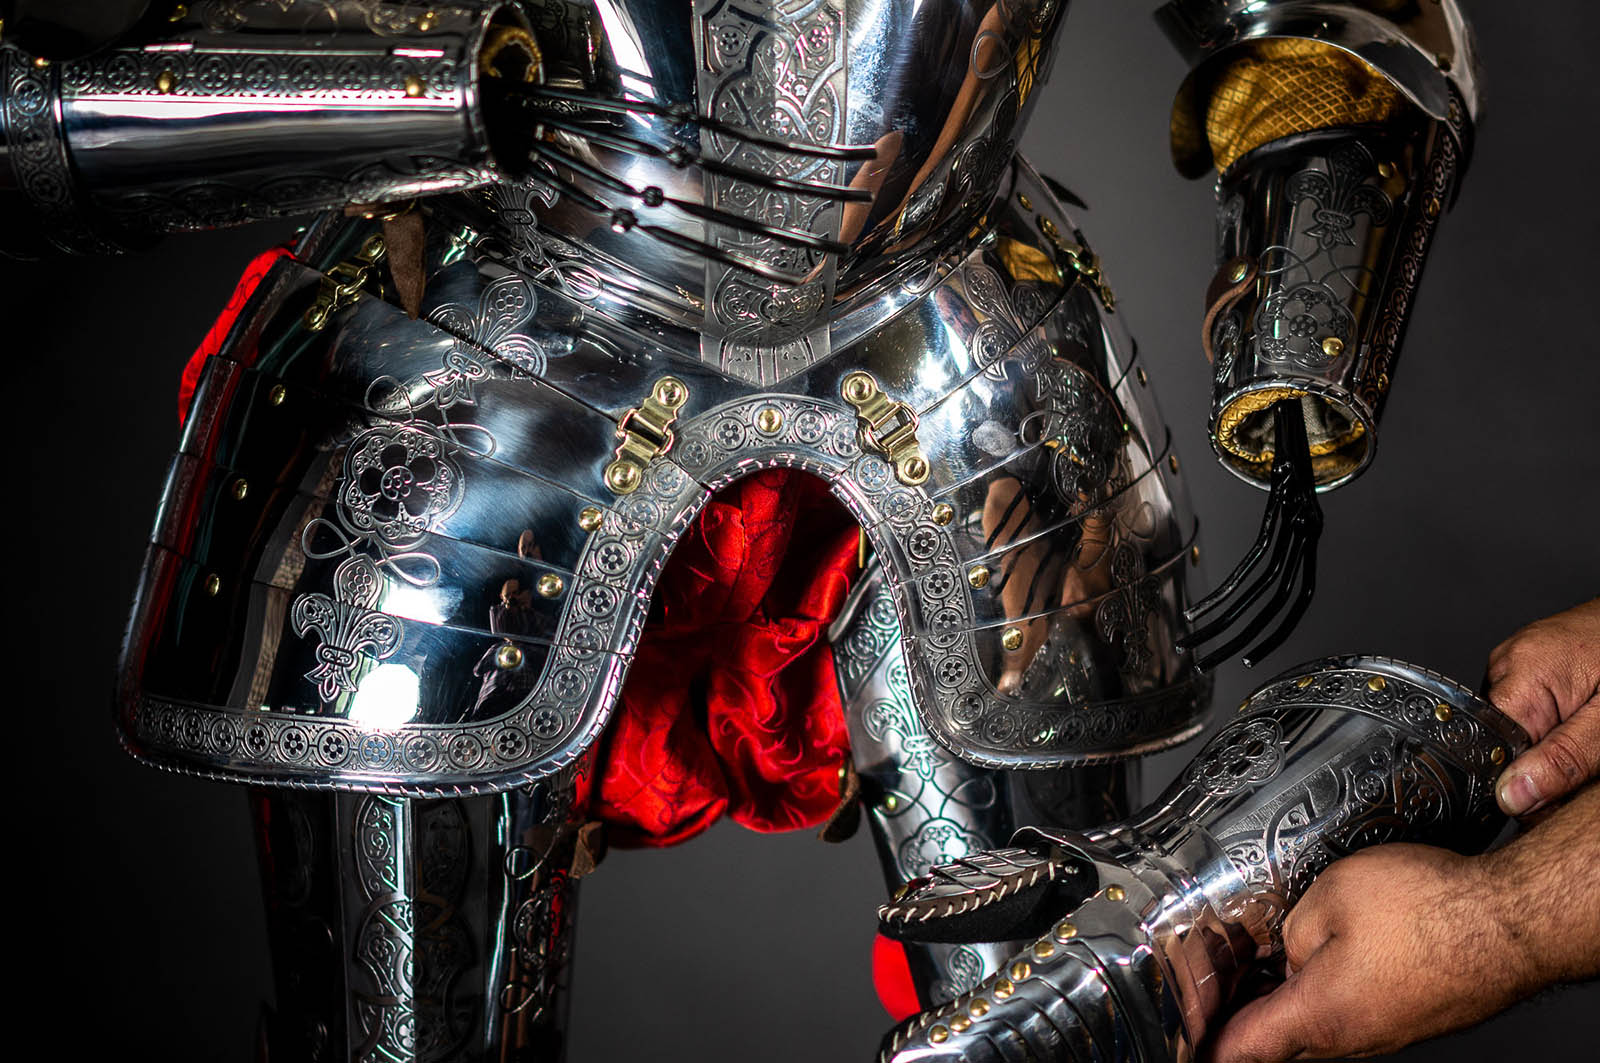
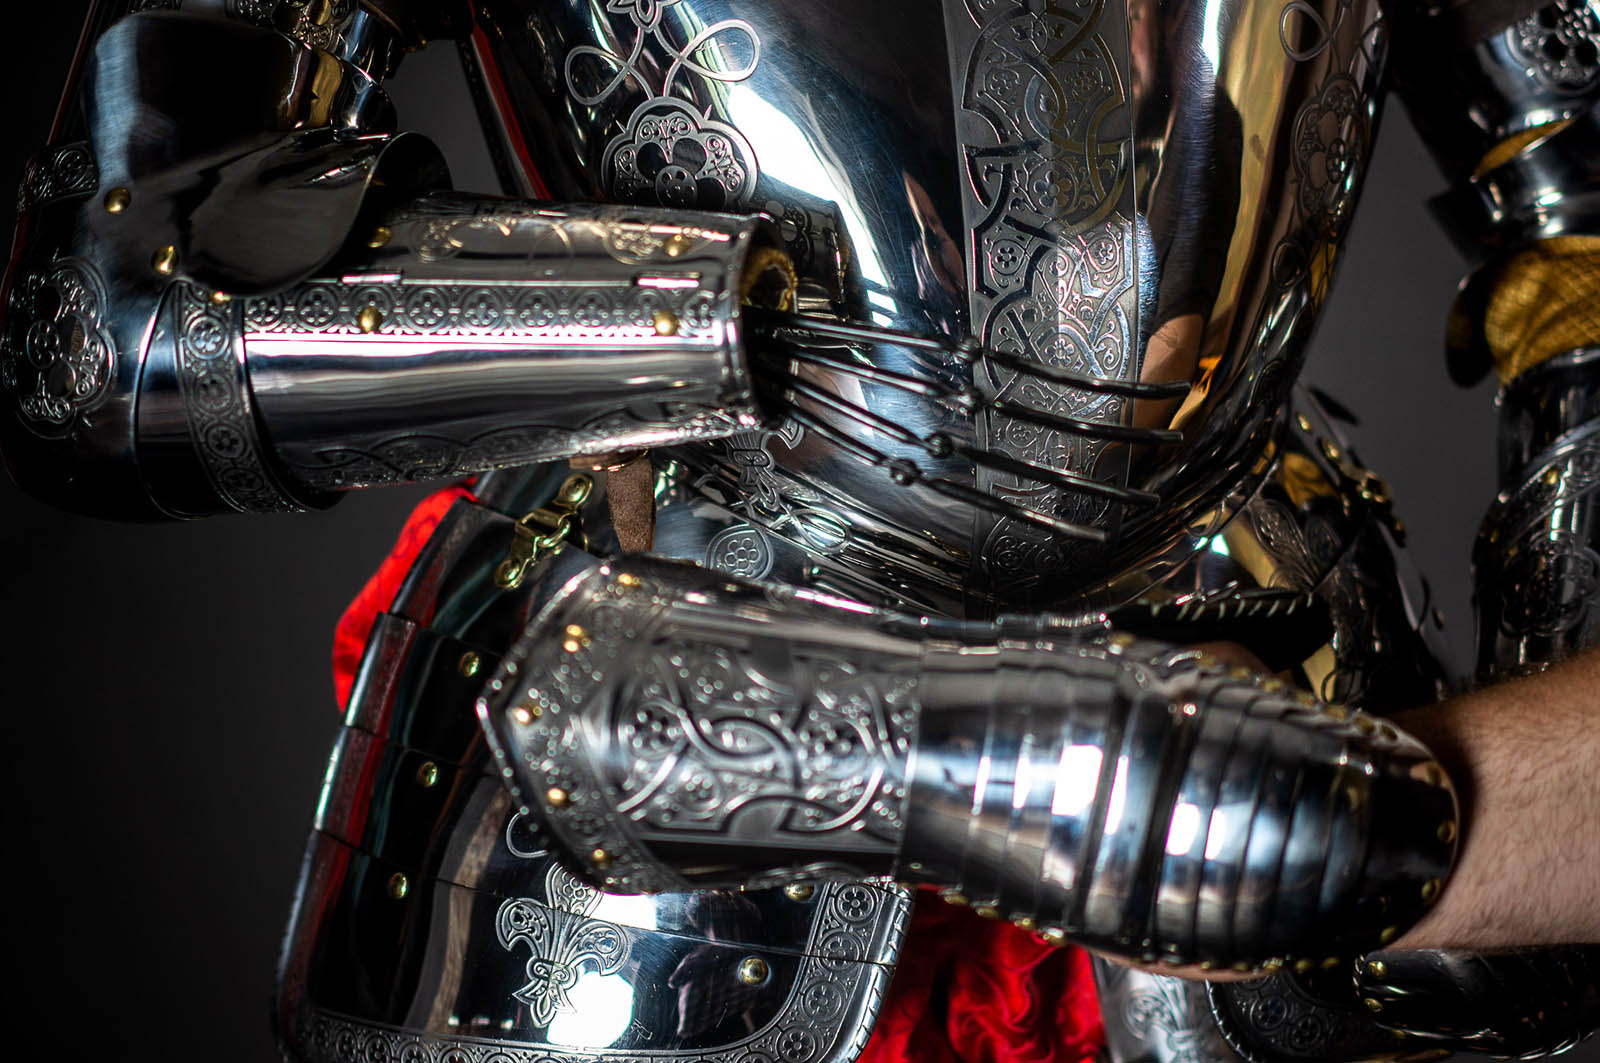
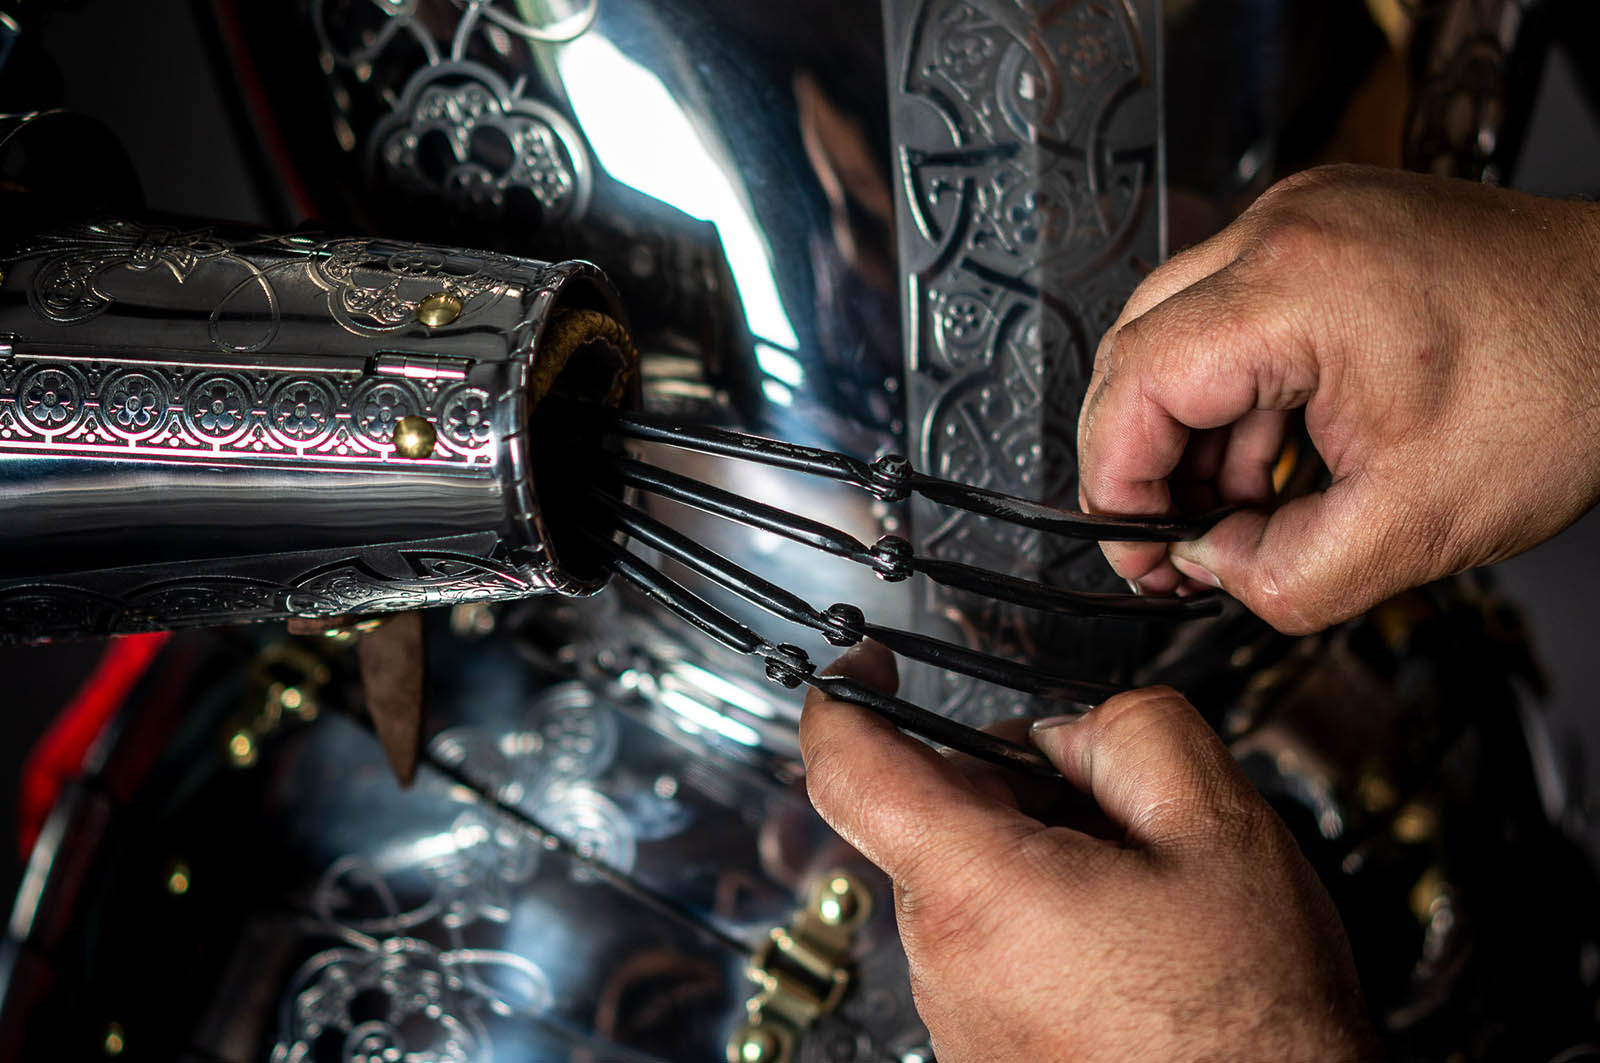
Photos 30 & 31. Attach plate arm to spaulder with inner belt, which is installed on the third segment inside the spaulders. There is a buckle in the plate arm. Pass spaulders belt through this buckle. Now, plate spaulders and arm are complete unit. You may also wrap spaulders belt round the upper part of plate arm and fix it.
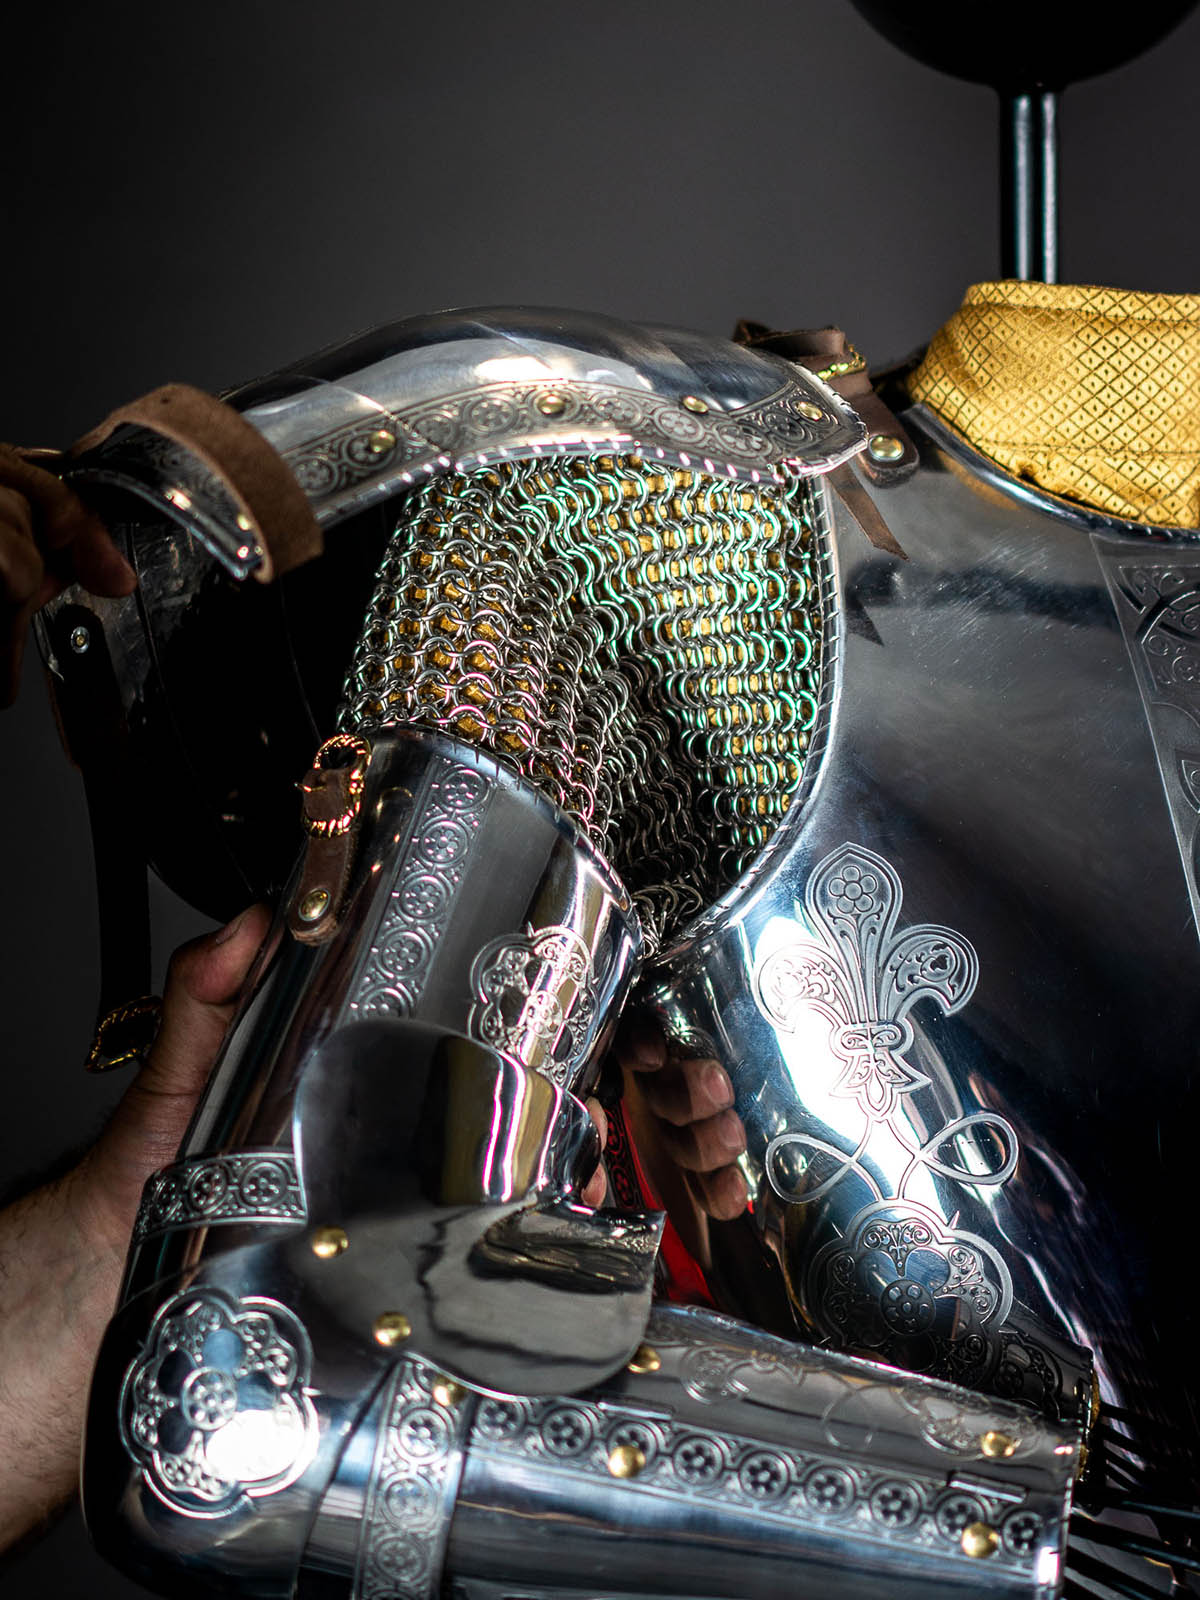
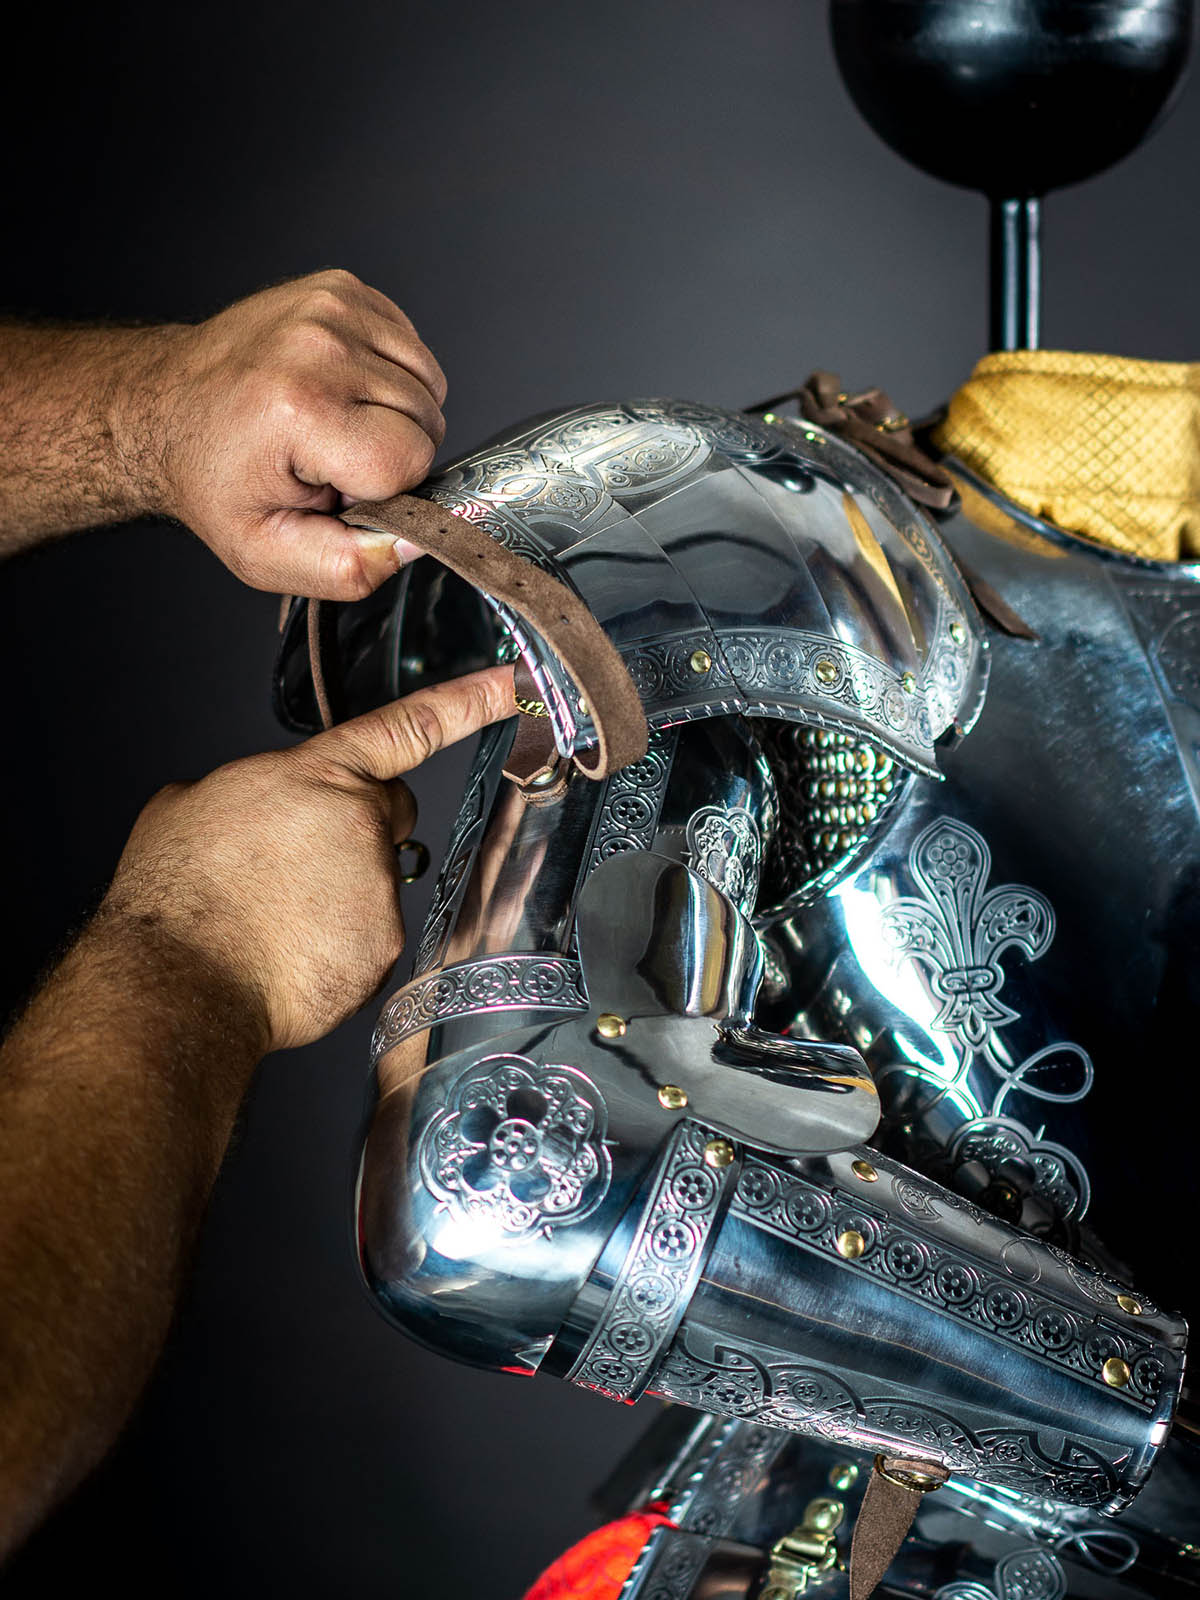
Photo 32. Fixation of bottom spaulders belt to the plate arm.
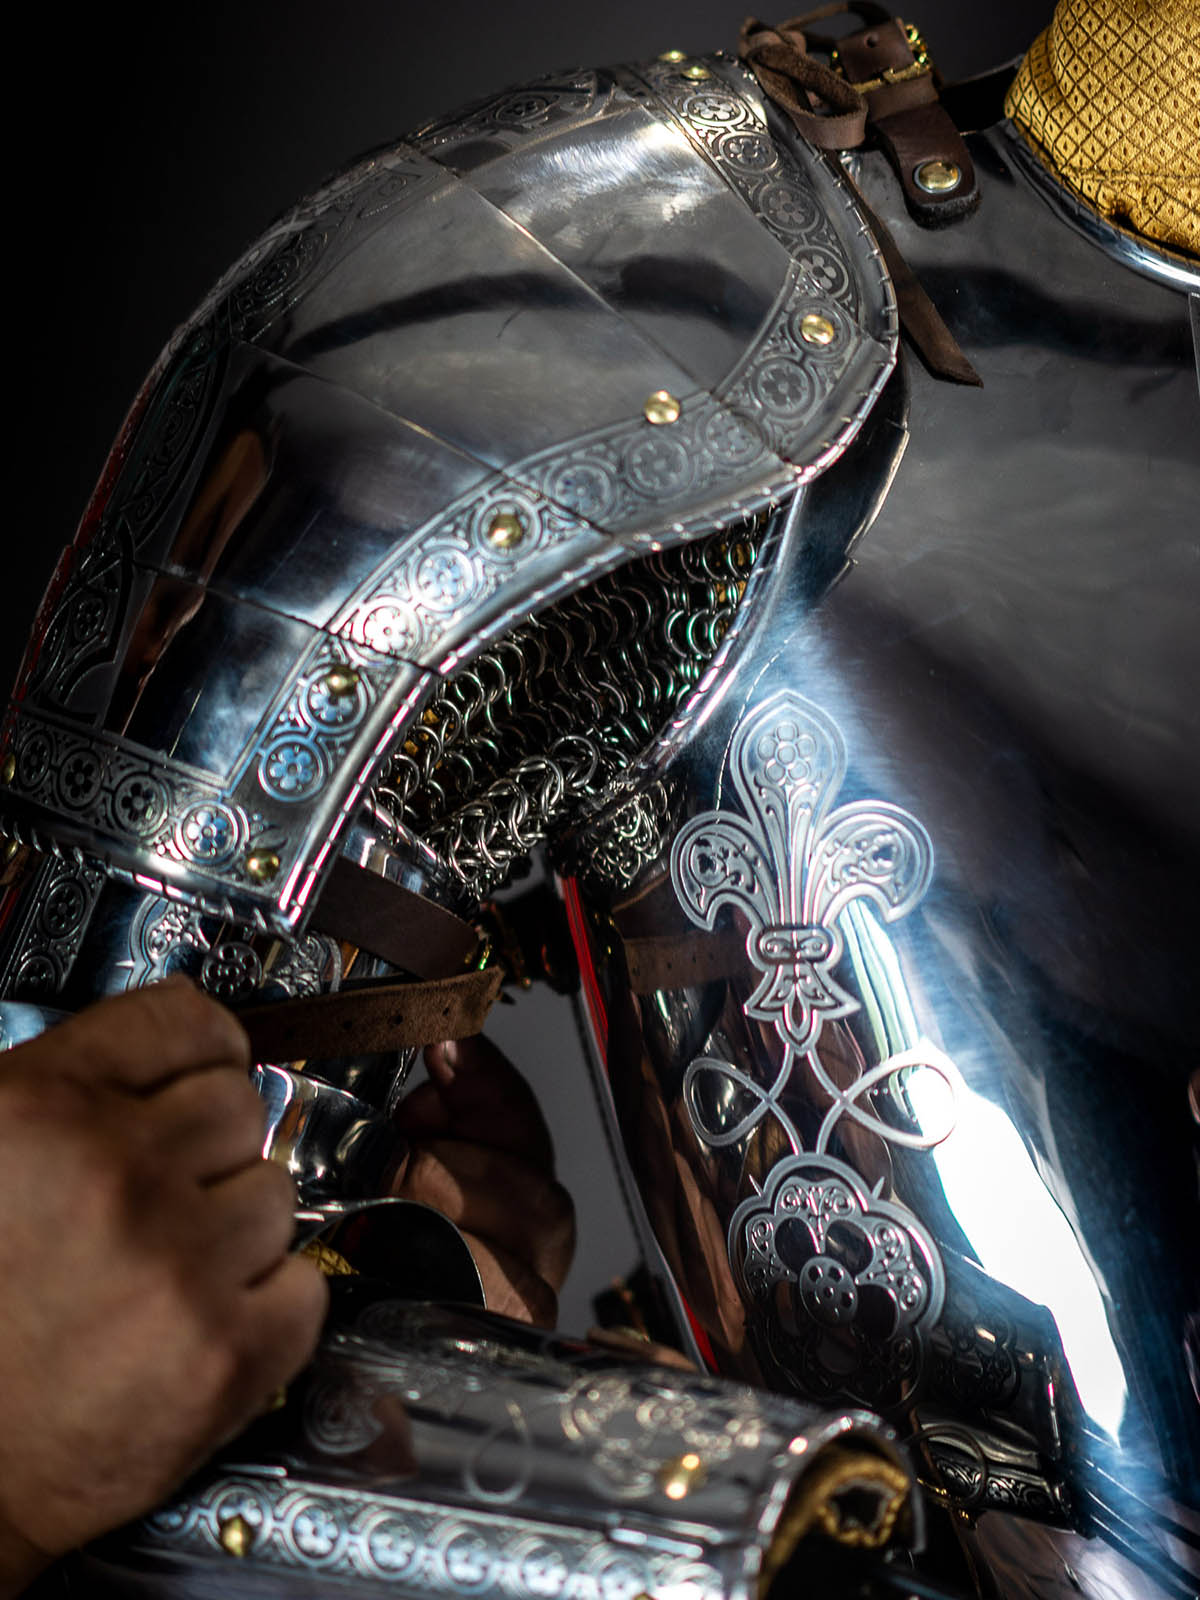
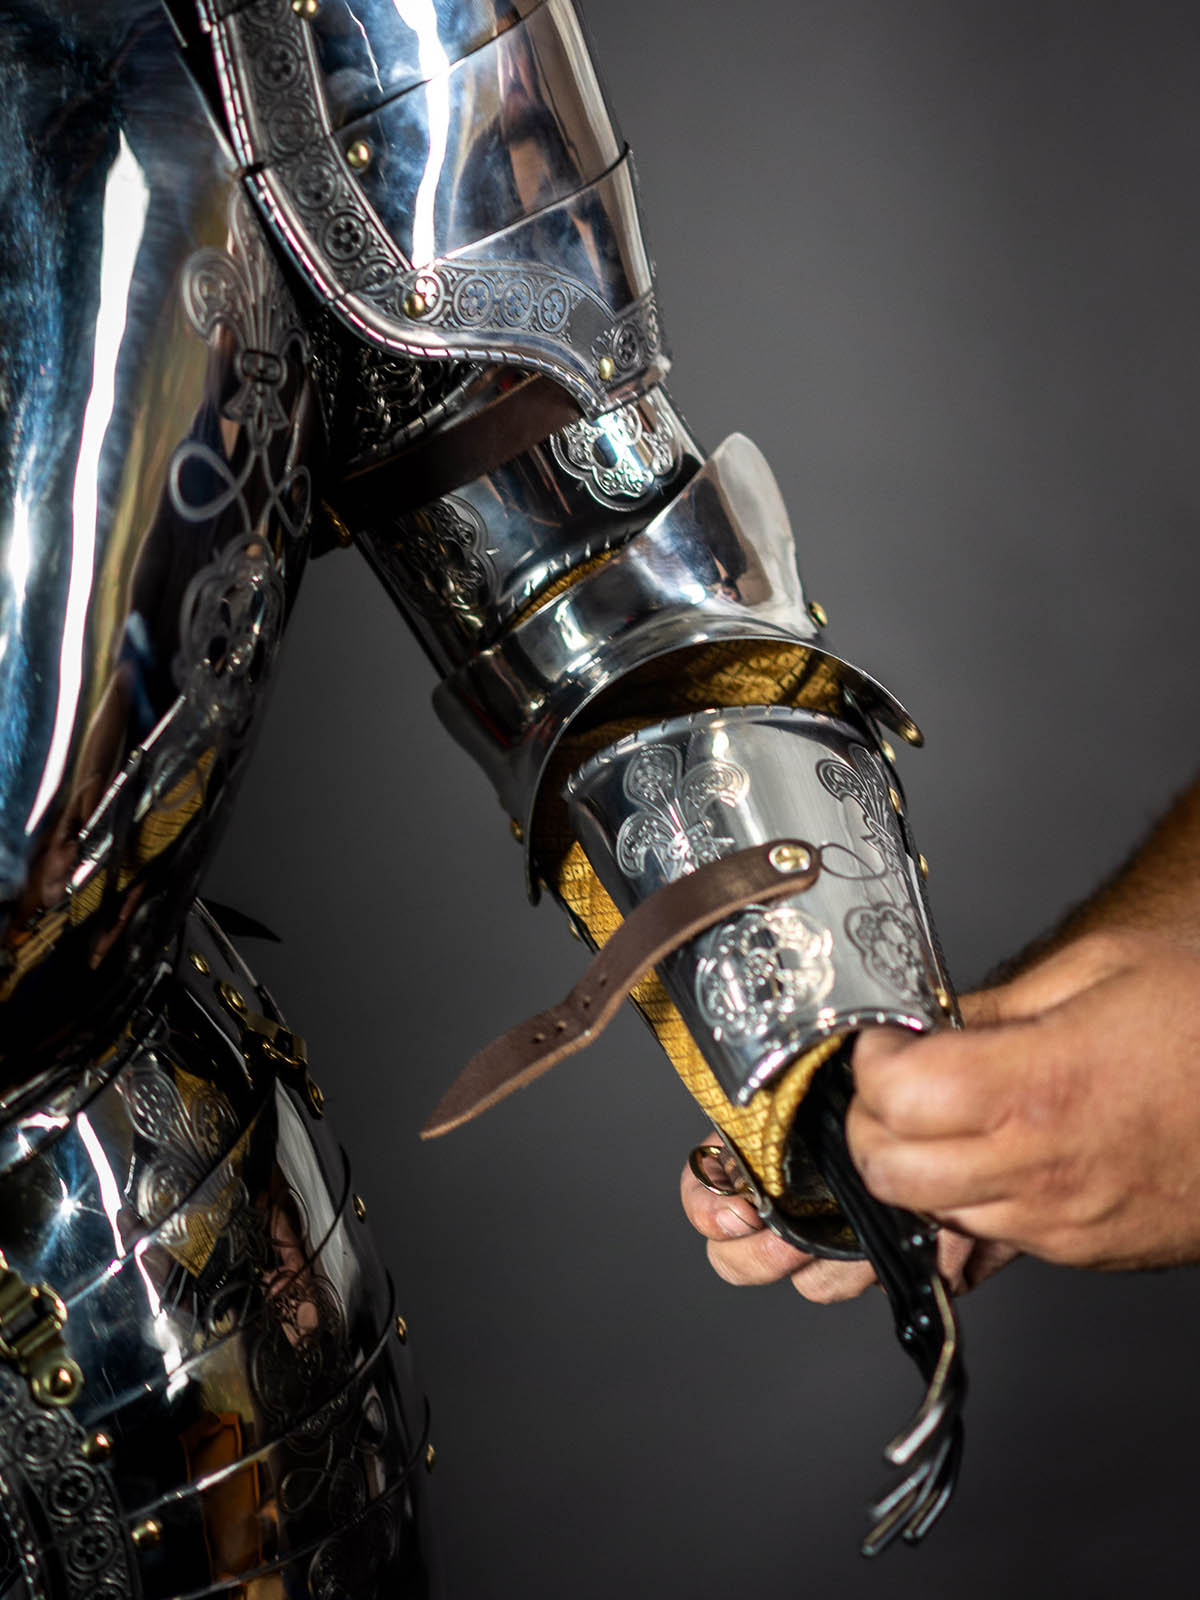
Photo 33. Fastening of belt on the bracer. Now, plate arms are worn as well.
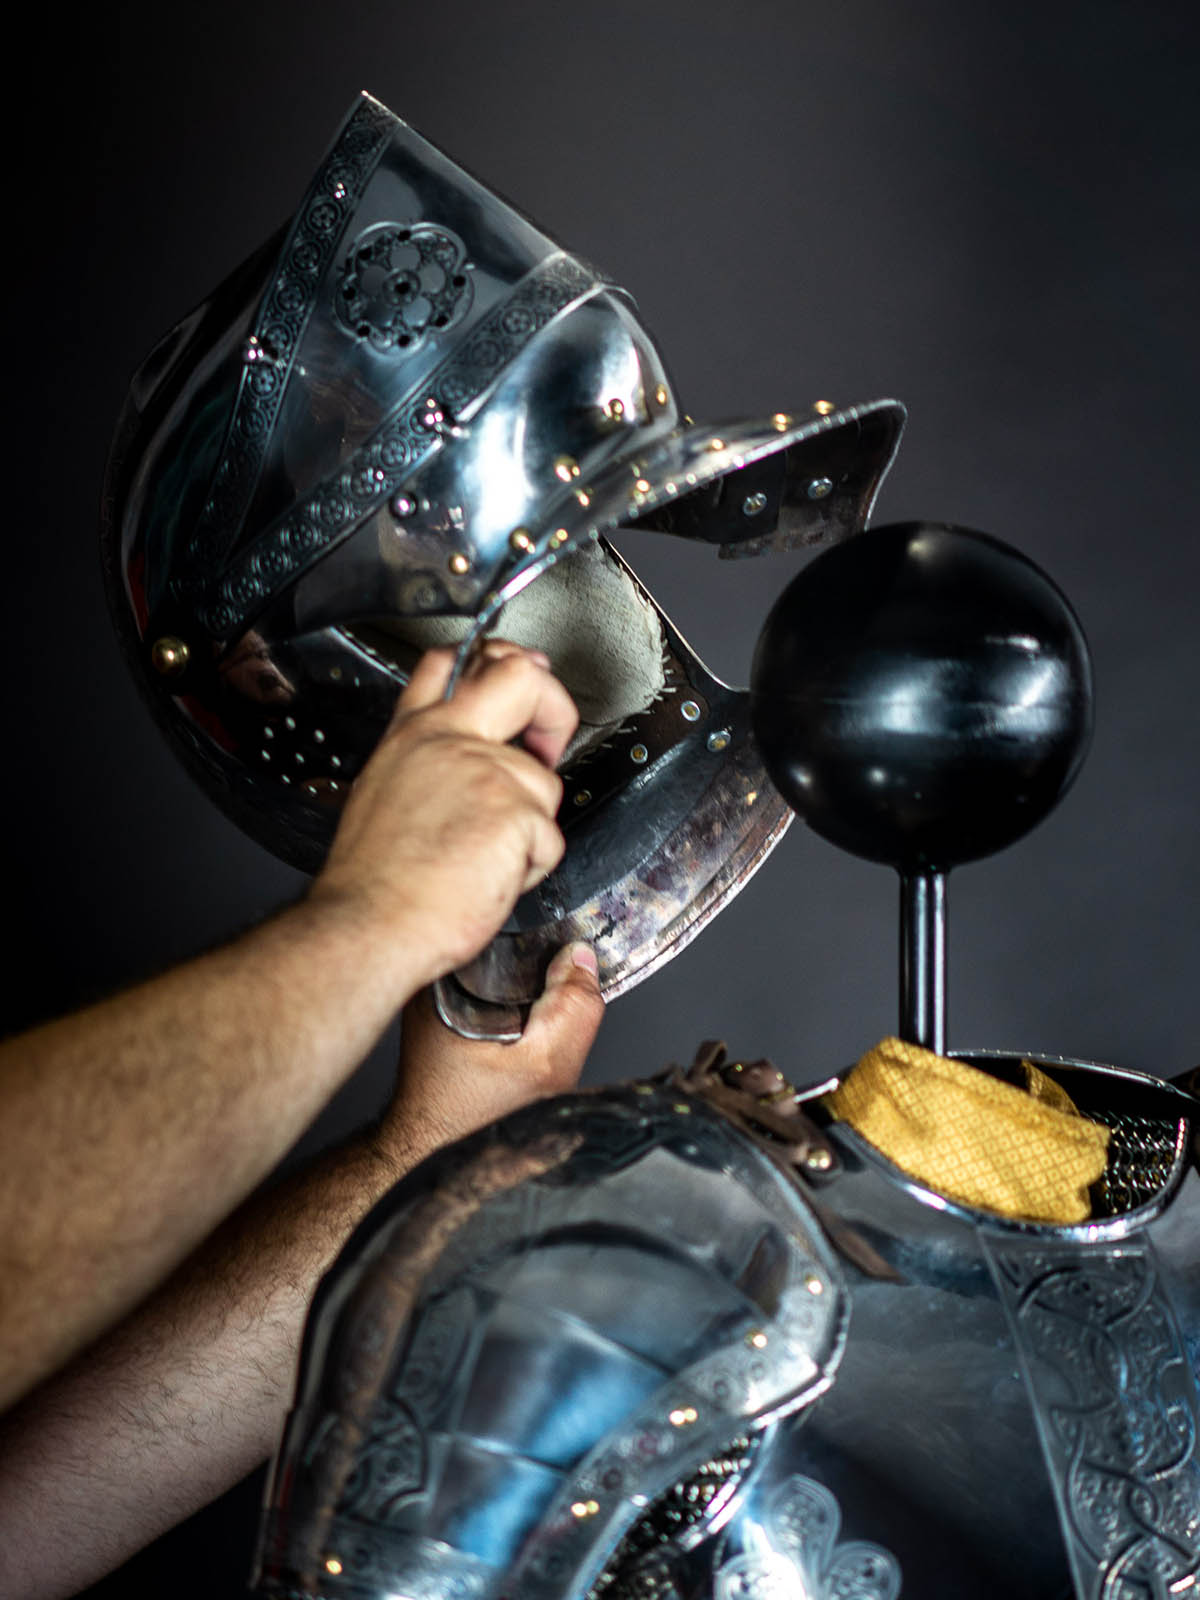
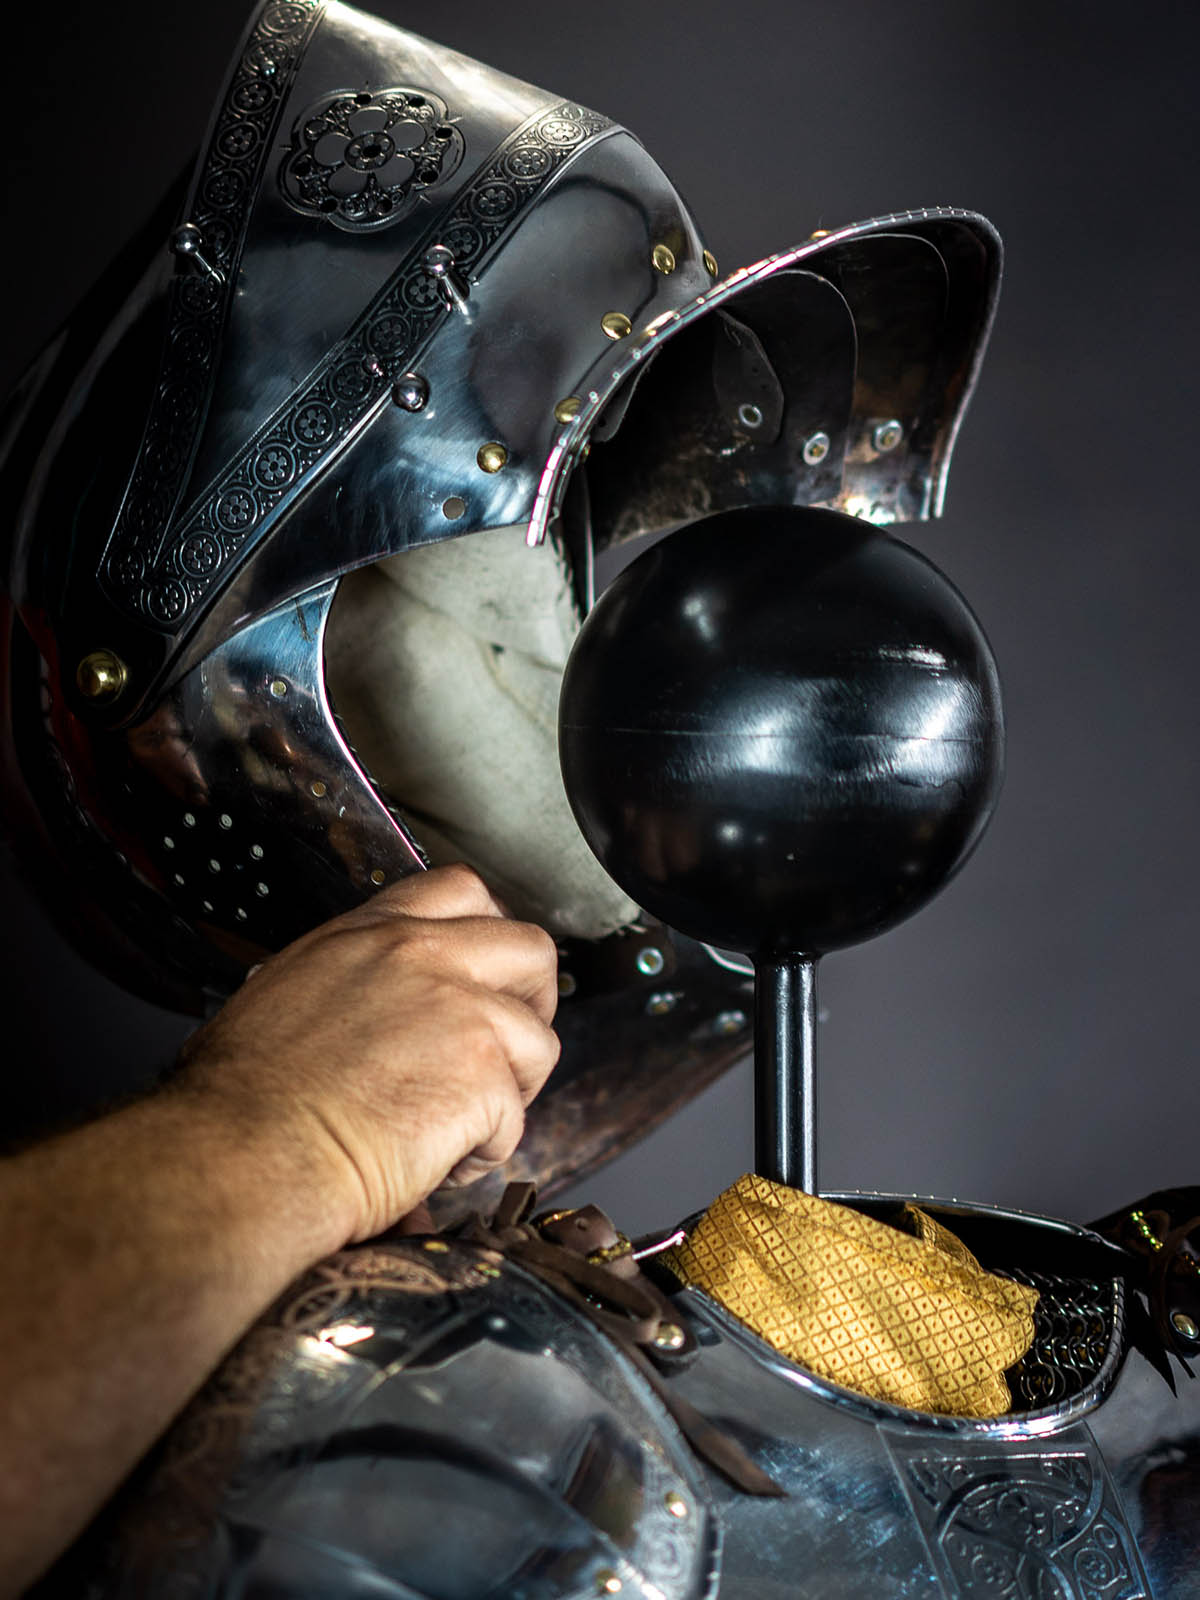
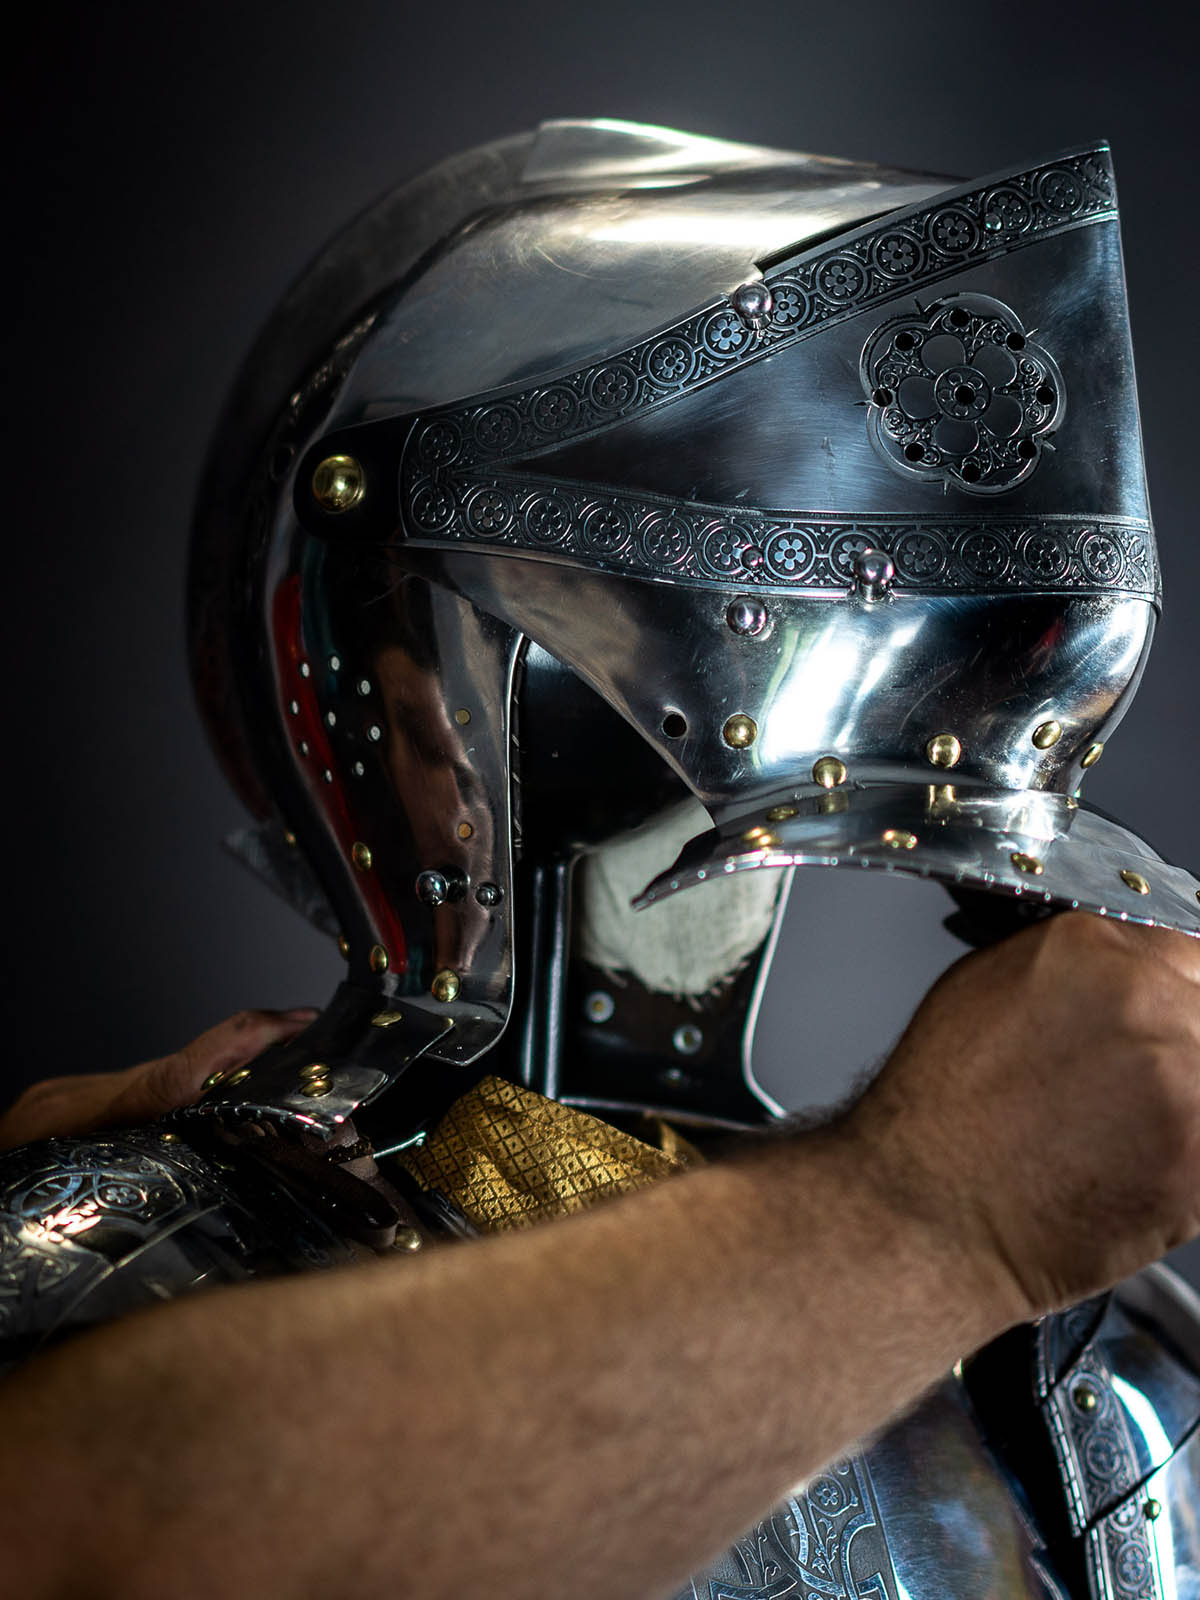
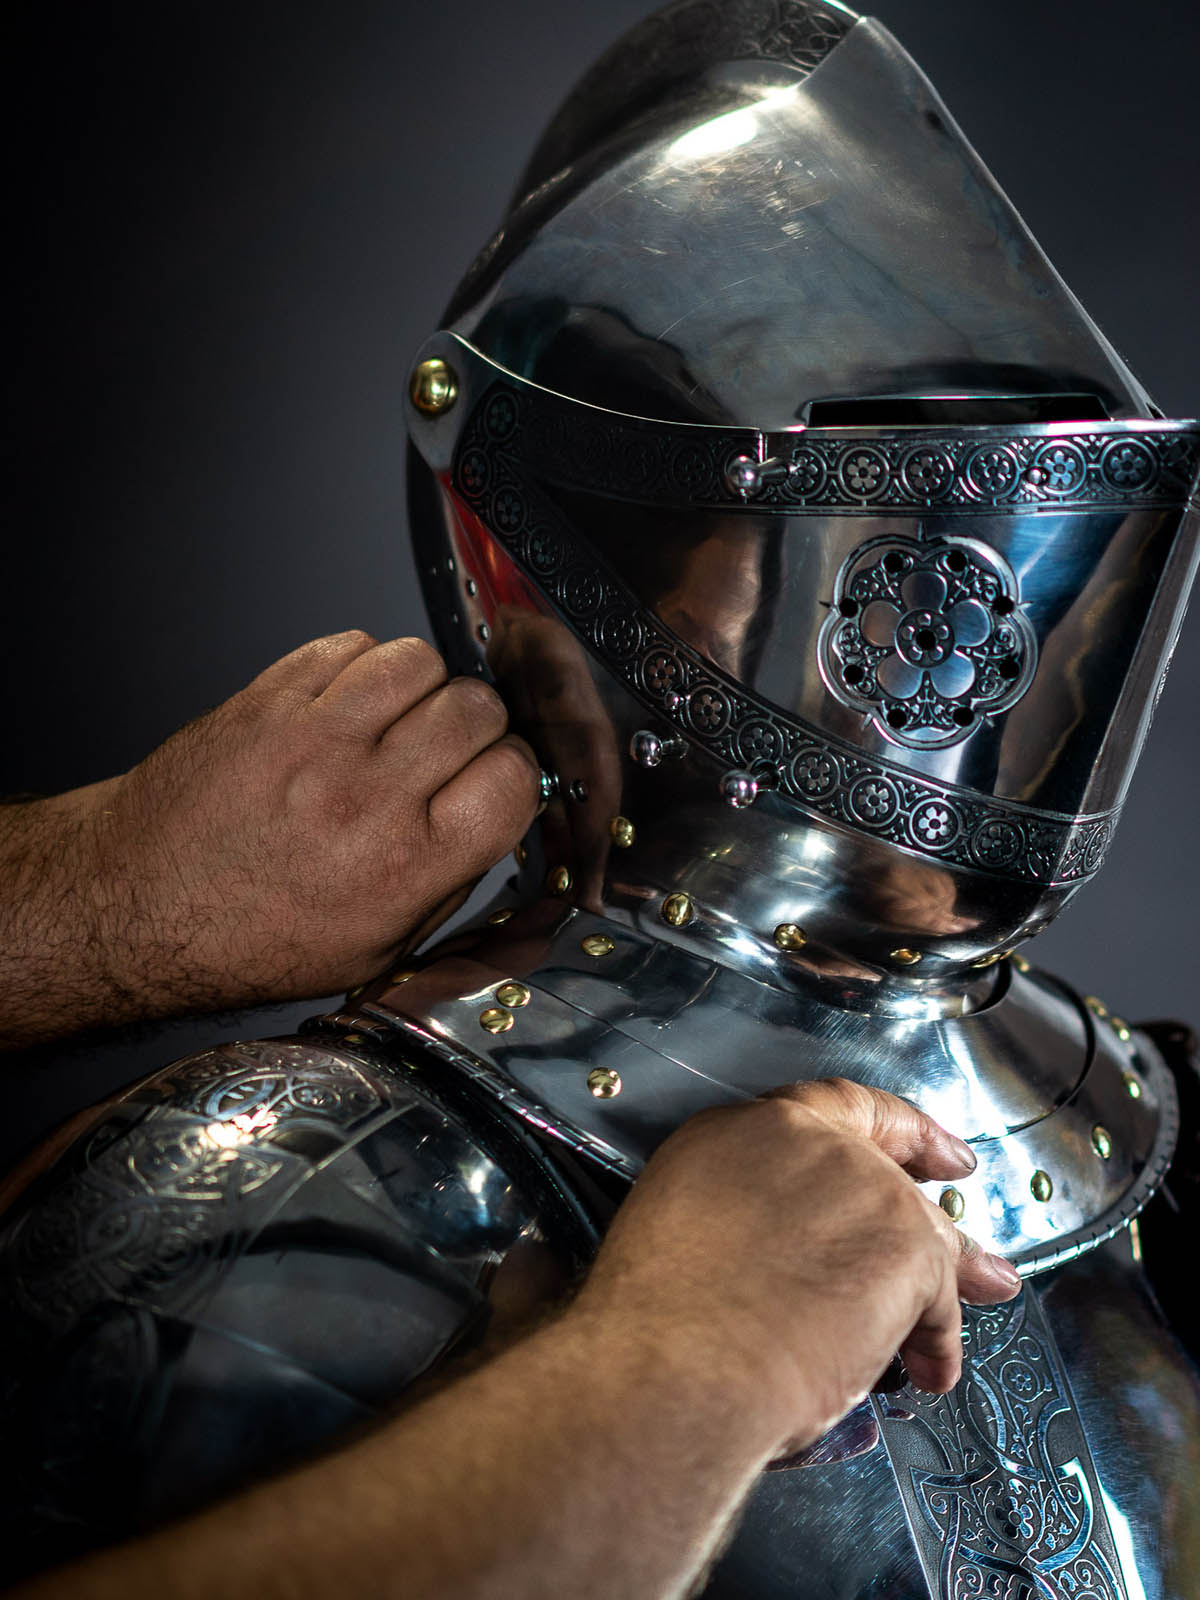
Photos 34-37. Let’s set helmet armet on the head of frame. Open helmet at maximum with fix button and carefully wear it on the head. Then, close helmet. It is ready now.
Photos 38-40. Let’s put gloves on. Pay attention that fingers are flexible. We have to set them in straight position. Then, carefully draw gloves on. It should be tightly worn over the plate arm. When you will finish with it, make a lock of fingers and put a halberd into it.
That’s it! Plate armor, being set in right position, stands steady and delights your eyes.
Few life hacks:
1. Tuck gambeson in pants.
2. We use the word “pants” not to disorient you with terms.
3. Short chainmail is the most important part, to which we attach pants, plate legs and spaulders with leather laces. It improves on look of armor.

0 Commenti
Steel-mastery.com