


Dear friends,
We decided to share our experience - to instruct you and clearly demonstrate the process of helmet production! Hopefully this article will be useful to you.
We are going to post it partially, so by the time of next part’s posting you will have time to get all the necessary materials and to learn the first steps of making your first, beloved, not always successful, but the best helmet.
So let’s start! :)
1) The first step is cutting
First of all for helmet making you have to do a pattern. Pattern is a shape of future two halves of the helmet, made of paper or any other needless material. Pattern fits to the head and general physique.
Please note that people have different sizes and shapes of the head, for example Europeans have more long heads, while Asians have more round.
Now you should put the pattern to the head and cut off the unnecessary parts. You should trim it in such a way that there remains space for the helmet liner. If you make a helmet just for beauty, it is enough to make a margin of 4-6 cm of the head circumference. If you make a helmet for the battle, the margin must be at least 10 cm. You may wonder why? Because you need a thicker liner for the battle, and you need to leave space for the helmet crashing.
Don’t worry, you can always find “kind friends” to help you crush the helmet with rattan stick or steel halberd! :)
Nota bene! Leave the margin, you will always have time to cut unnecessary parts!
The pattern also depends on the height, body-build, head carriage (you keep your head up or you walk slightly inclining the head forward). Please note that the halves for all the helmets must be forged not equally, but in inversed manner.
2) Forging
Forging techniques:
You can use cold or hot (heating billets) forging technique. Keep remembering that it is not difficult and you will succeed, there is no miracle in it :)
- Hot forging - is a technique in which the metal is heated before working with it. Because of heating metal becomes soft and malleable. You can find a lot of articles how to control the process of metal heating: using a thermometer or controlling the color. Ideal temperature is when the heated metal has yellowish red colour.
Nota bene! Not all types of metals endure repeated heating, hot forging can be used for normal mild steel or stainless steel. There is no sense to heat titanium, because it cools down too quickly and becomes brittle. Some kinds of spring steel that can be hardened, can not be heated several times, and putting them into shape should be done in one approach, not letting the metal cool down, maintaining ideal temperature.
- Cold forging - we recommend starting exactly with this technology, it is safe, easy to learn, requires less equipment.
Its main point is simple: the metal is forged without heating, with quite often slack blows, slowly putting it into the desired shape.
There are 2 methods of forging: inside or outside.
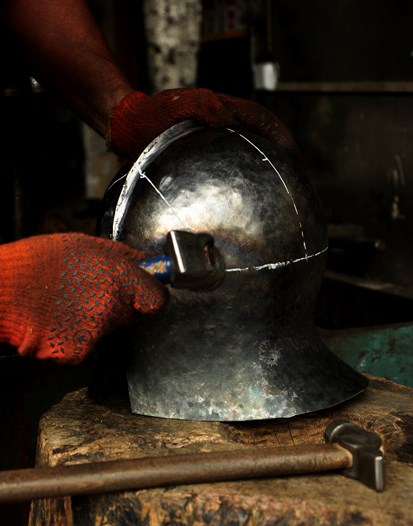
"Outside" - this method is used to obtain seamless drawn helmets (e.g. sallet or bascinet, which are made of one piece without welding).
You should insert beakiron with the mandrel into the anvil, then you place the billet on the mandrel, and holding it in the air you put the billet into the shape hammering on the top edge of the mandrel.
This method is quite time-consuming and requires at least basic forging skills. That’s why we will discuss a simpler method in this article.
"Inside" - for such forging we need a wooden stub with a small hole, a hammer with a round pain. The hammer can be either of solid wood or of metal. The heavier the stub is (or better fixed), the easier is to work on it.
Now let’s get down to the work:
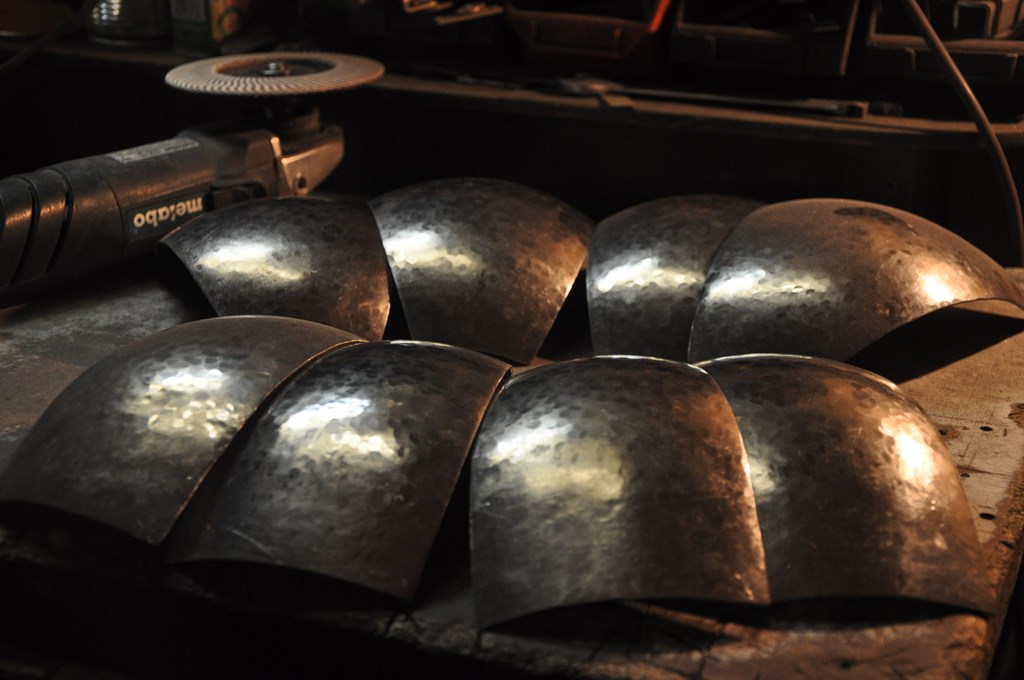
We put the billet on a flat stub and start to hammer on it. The hammer should hit the place where the hole on the stub is. As you can see it is very easy :)
Now I am going to let you in on a few little secrets :)
1. No need to beat the center point of the billet, it is necessary to beat spirally, moving from the edge inside. Normally from the first blow from the edge to the center point of your billet your spiral will have 7-8 circles.
2. You must clearly distinguish primary forging (metal drawing) from straightening (metal alignment).
3. No need to beat hard! If you use hot forging then it’s fine if the metal is drawn of 3-5 mm in depth after every stroke. No one doubts that you can beat so hard, that the hammer will drive through the metal, but if we make a helmet for a battle, it is important that the metal retains its thickness and doesn’t lost strength.
4. Do not rush!!! It will be fine if you spend 8-20 hours on unhurried, careful hammering, depending on your qualifications and skills.
No need to hurry, hurry ends up with torn billet or with too thin metal, which will crush at once.
And you can find all our helmets here :)


5 Commenti
Steel-mastery.com